
Jenkins
Nctl works with the Jenkins CI pipeline and can be used in the Jenkins workflow to scan the configuration files present in a repository against the centrally defined policies. The Jenkins job will trigger the scanning of the files and if unsuccessful, the entire job will fail, which will prompt the user with feedback for their changes. Upon successful completion of the job, the scan results will be published to the NCH for viewing. NCH provides insights to platform administrators on overall governance of different code repositories in their organization.
Understanding the Jenkins Workflow
To see pipeline scanning with Jenkins CI in action:
-
Create a Bitbucket or Git repository with some Docker, Kubernetes, and Terraform files. Refer to the official GitHub docs for creating a repository.
-
Next, log into Jenkins with your credentials which will take you to the dashboard page.
-
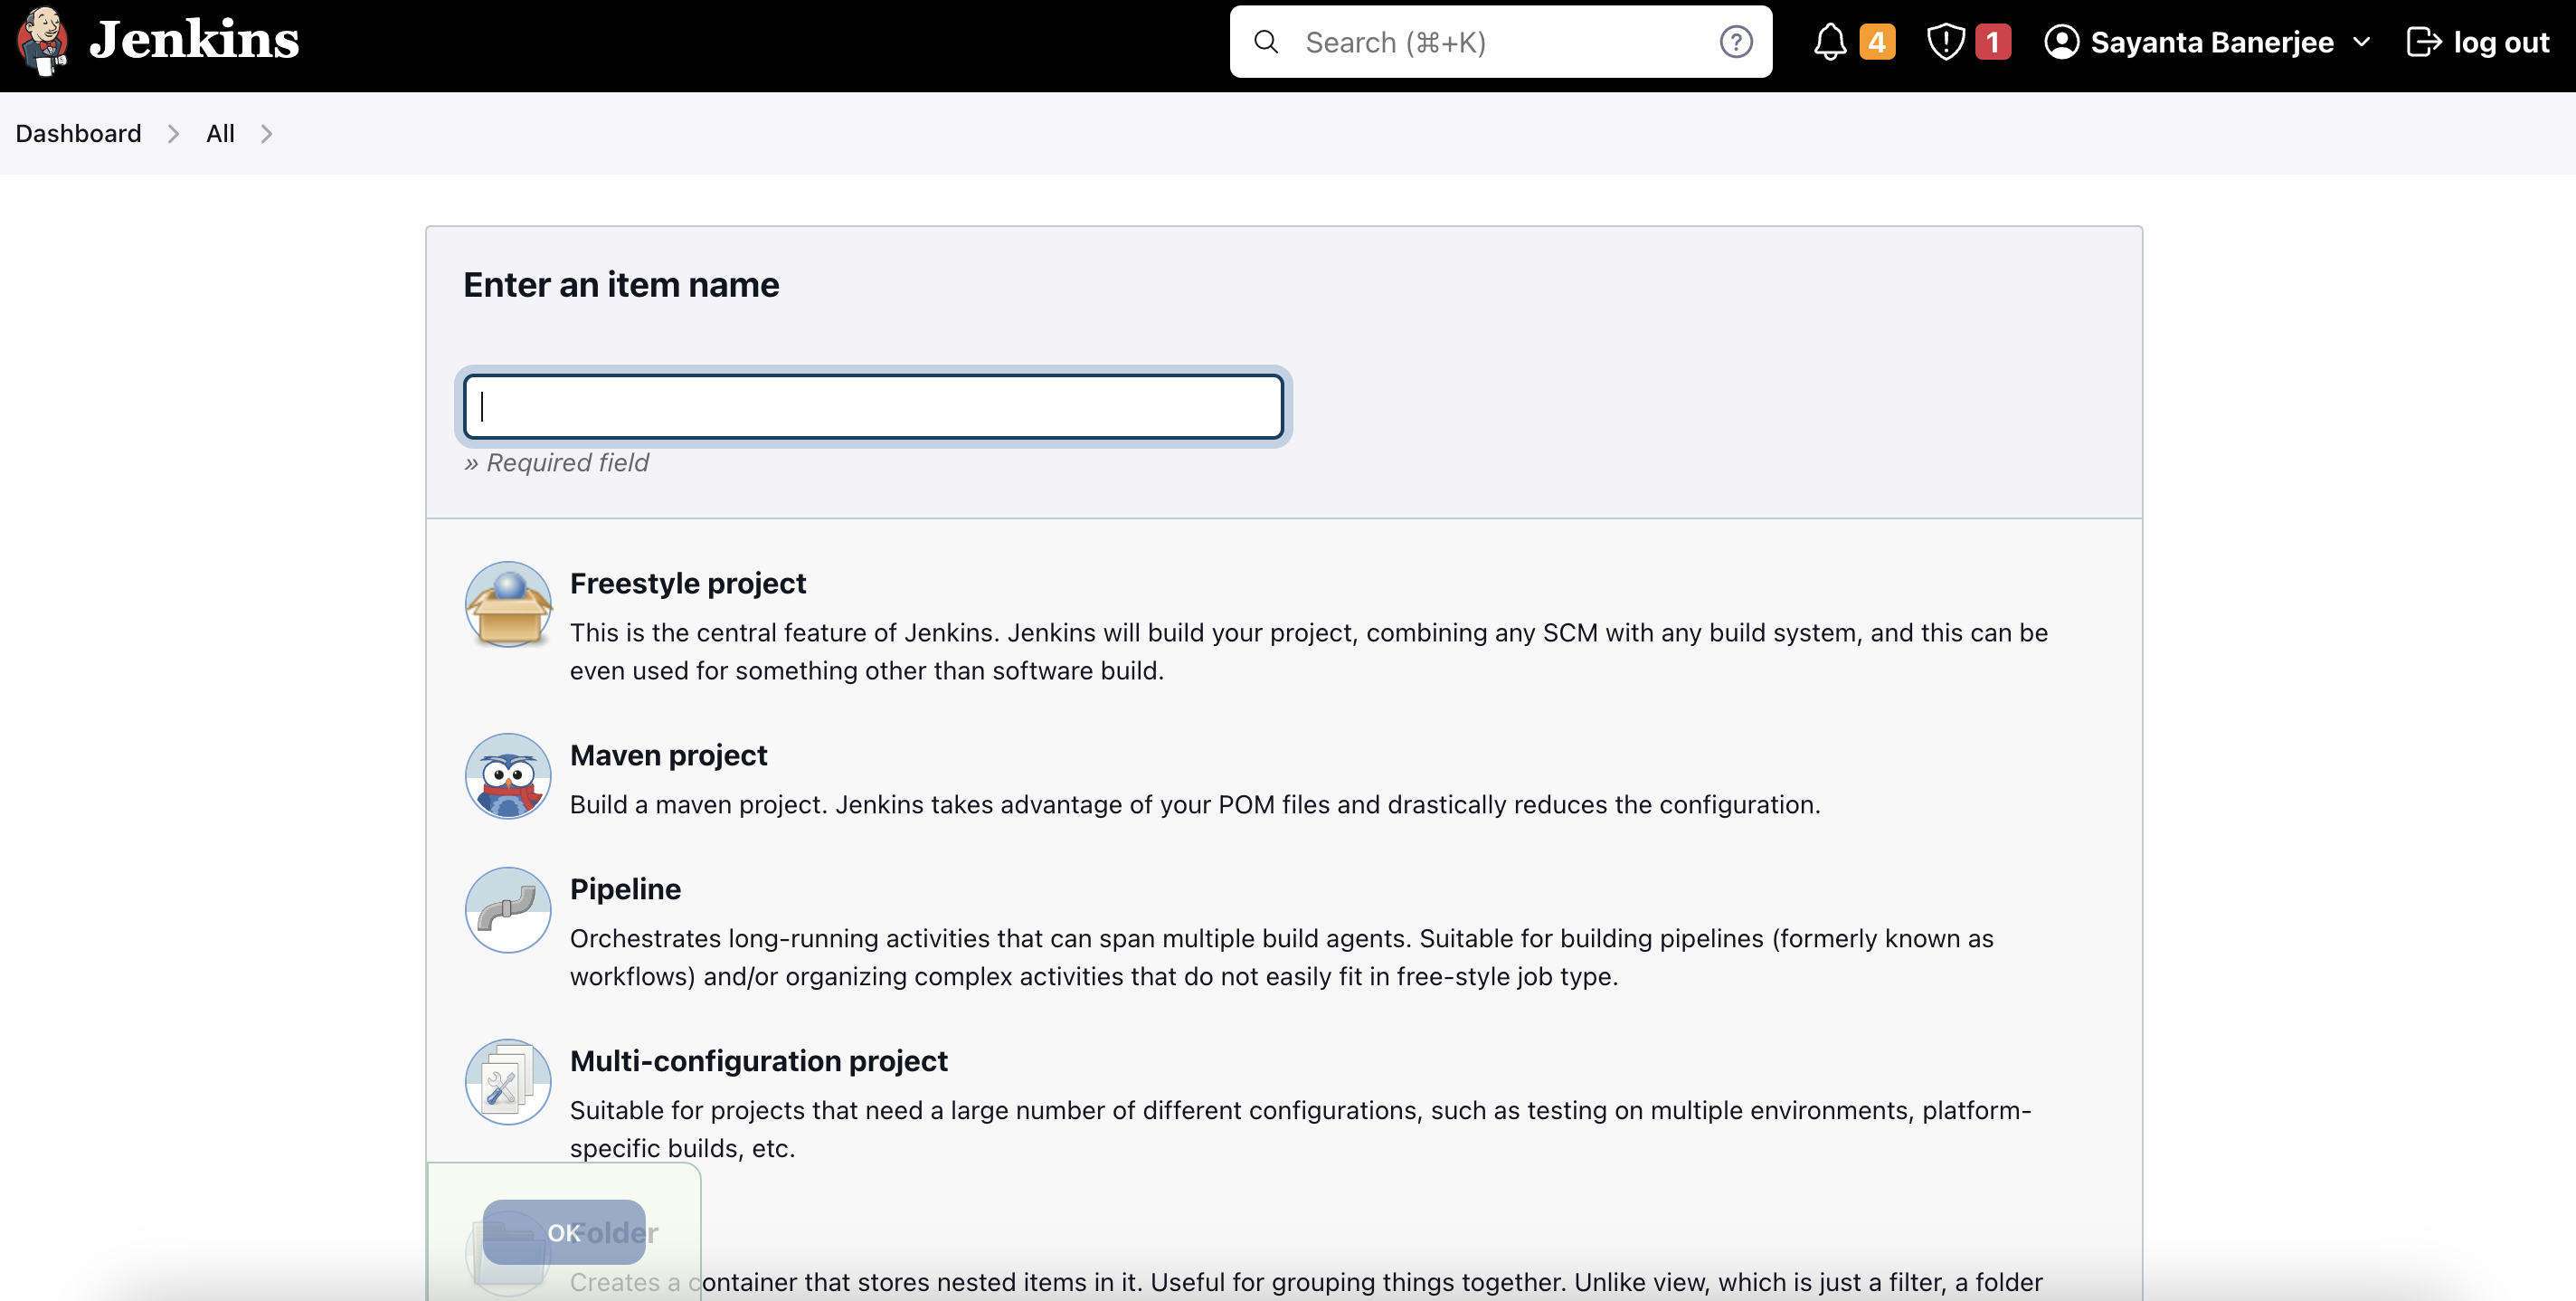
After that, click on
New Itemlocated in the top left corner of the screen. This will initiate the creation of a Jenkins job. -
Enter the name of the job. Select
Freestyle projectfrom the list of options to choose from and clickOK.
- Now that the job is created, it needs to be configured accordingly for the pipeline scanning to take place. To do so:
a. Click on General and fill outJira sitewith your organization’s Atlassian URL.
b. After that, selectGitas the Source Code Management and provide the repository details.
c. Enter theURLof your repository and provide the credentials if it’s a private one. Leave credentials as none if it is a public repository.
d. Next, specify the branch name where the scanning will take place. Type./mainif there are no other branches in the repository.
e. Next, under Additional Behaviours, clickAddand selectCheck out to specific local branchfrom the dropdown and typemainunder Branch Name.
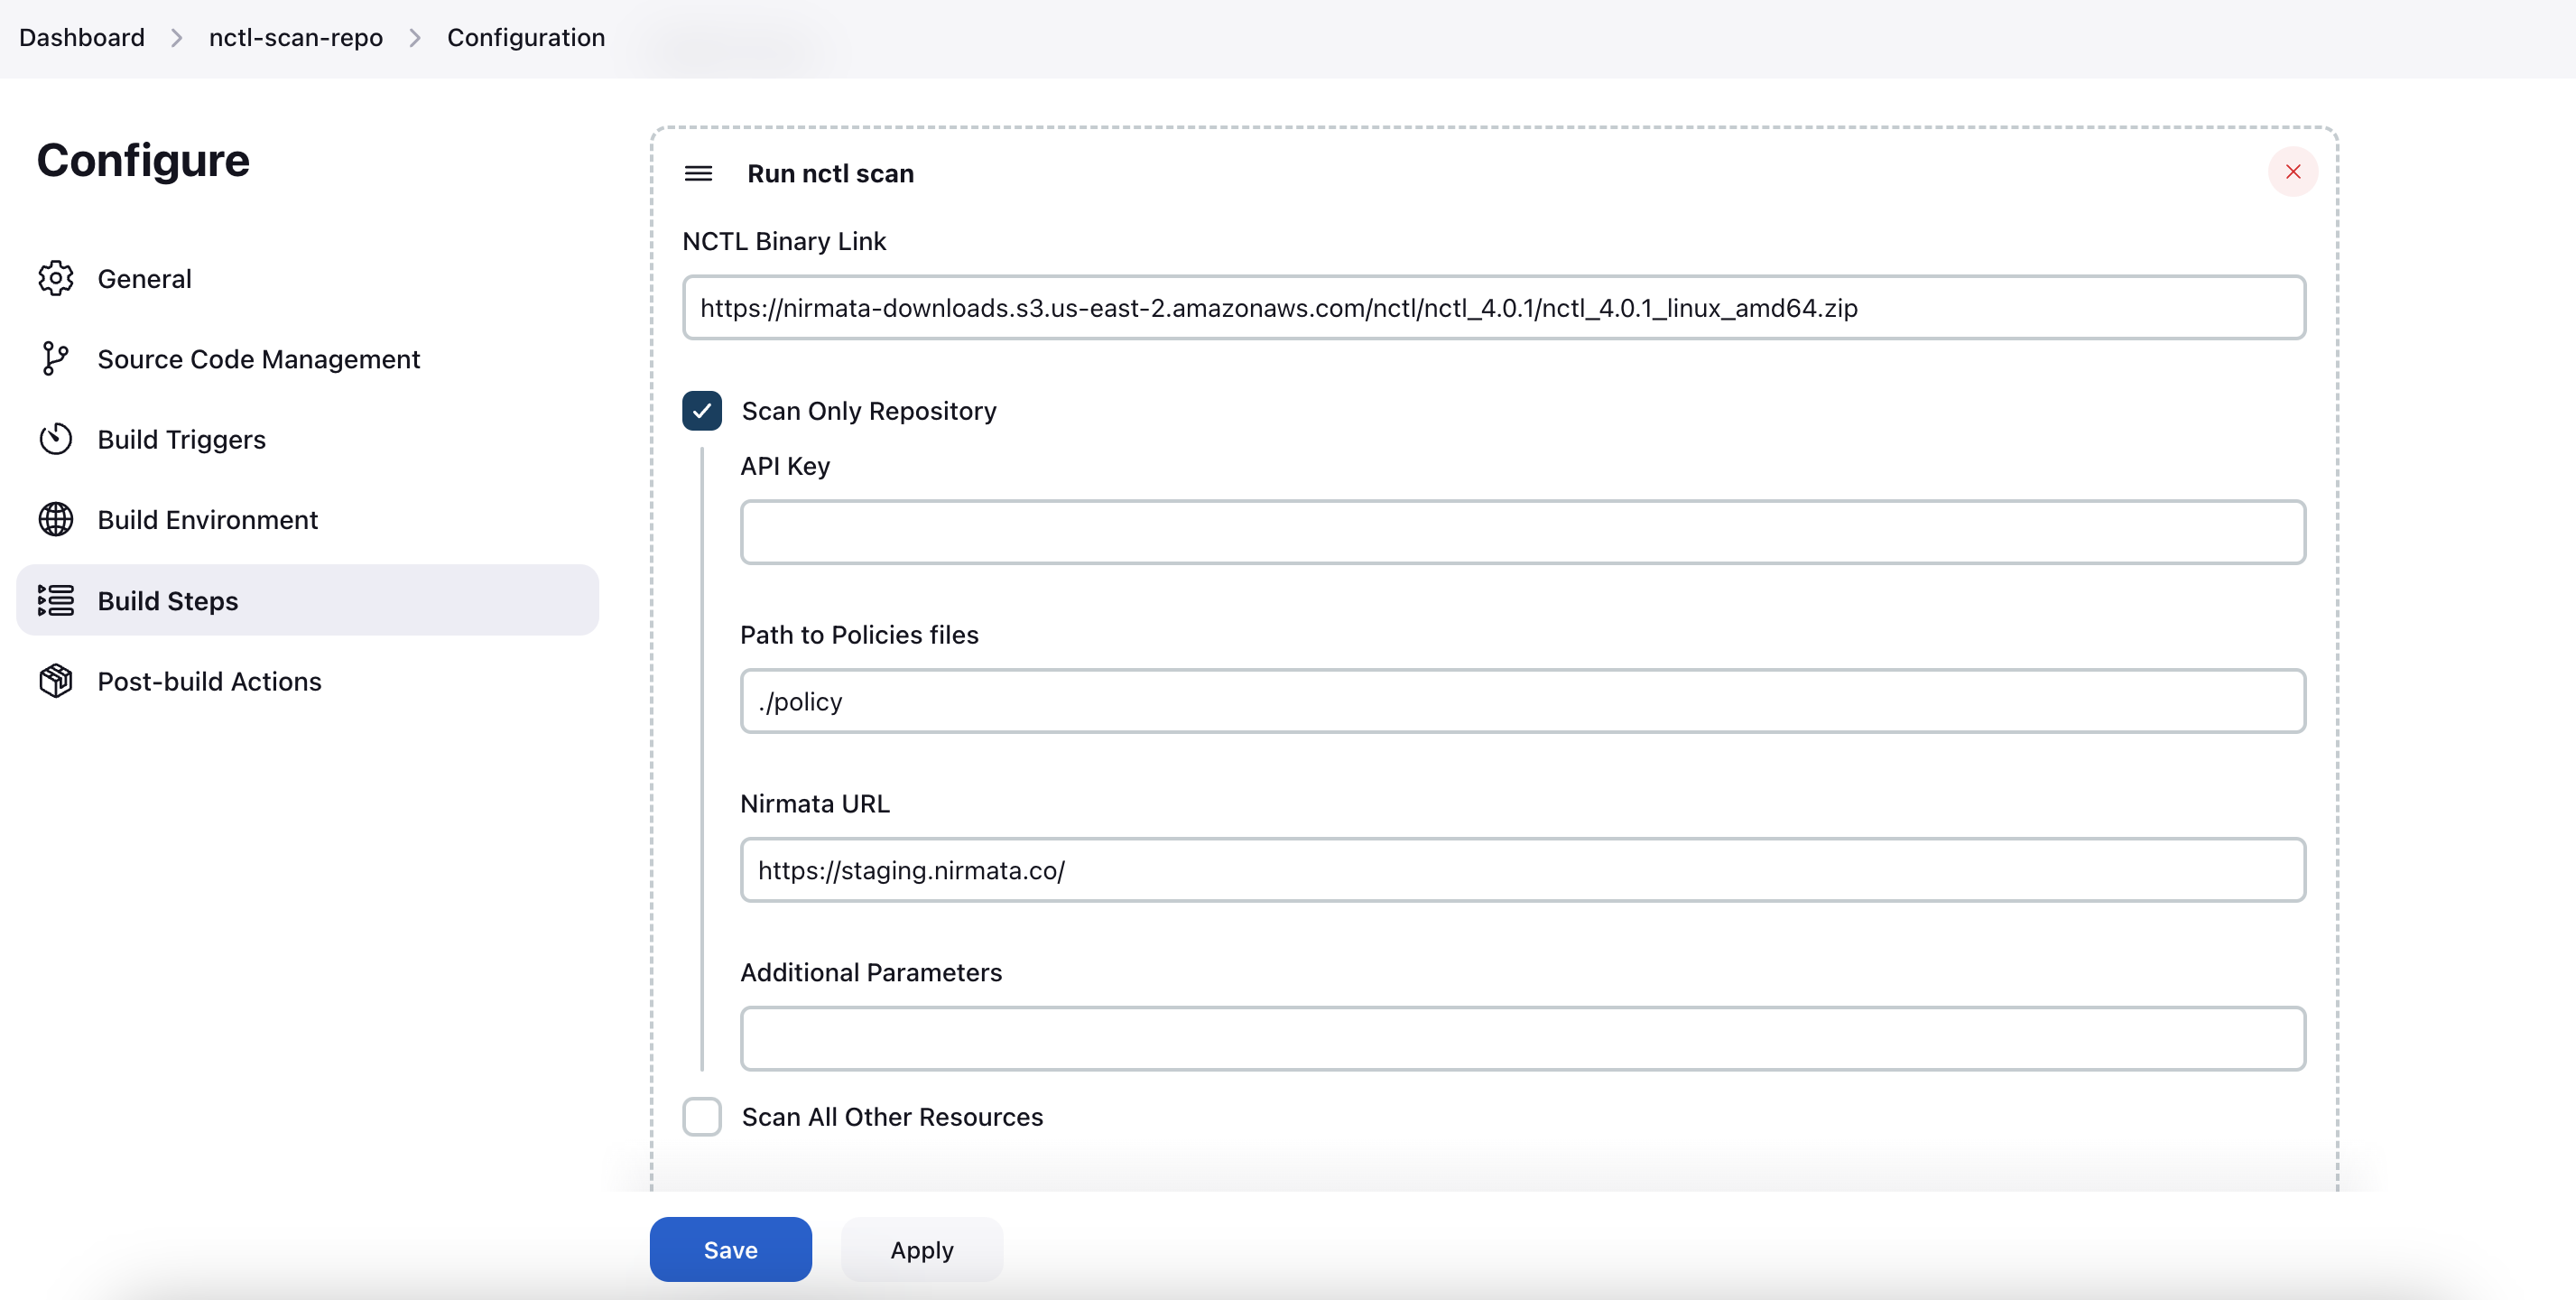
f. After this, scroll down to Build Steps and click on Add build step.
g. SelectRun Nctl Scanfrom the dropdown.
h. Fill out theNCTL Binary Linkfield with the URL of the latest Nctl binary version to download. The required URL is available here.
i. Now, check the box for Scan Only Repository which will help integrate NCH.
j. UnderAPI Key, add the API key that can be found in the profile section of the NCH tenant.
k. Fill outPath to Policies fileswith the path to your policy files andNirmata URLwith the NCH URL (https://www.nirmata.io)
l. Finally, click Save to complete the job configuration.
- Next, click on Build Now on the left hand side navigation bar to run the job. This will trigger the pipeline scan and the process can be seen under
Build Historylocated on the left hand lower corner of the screen.
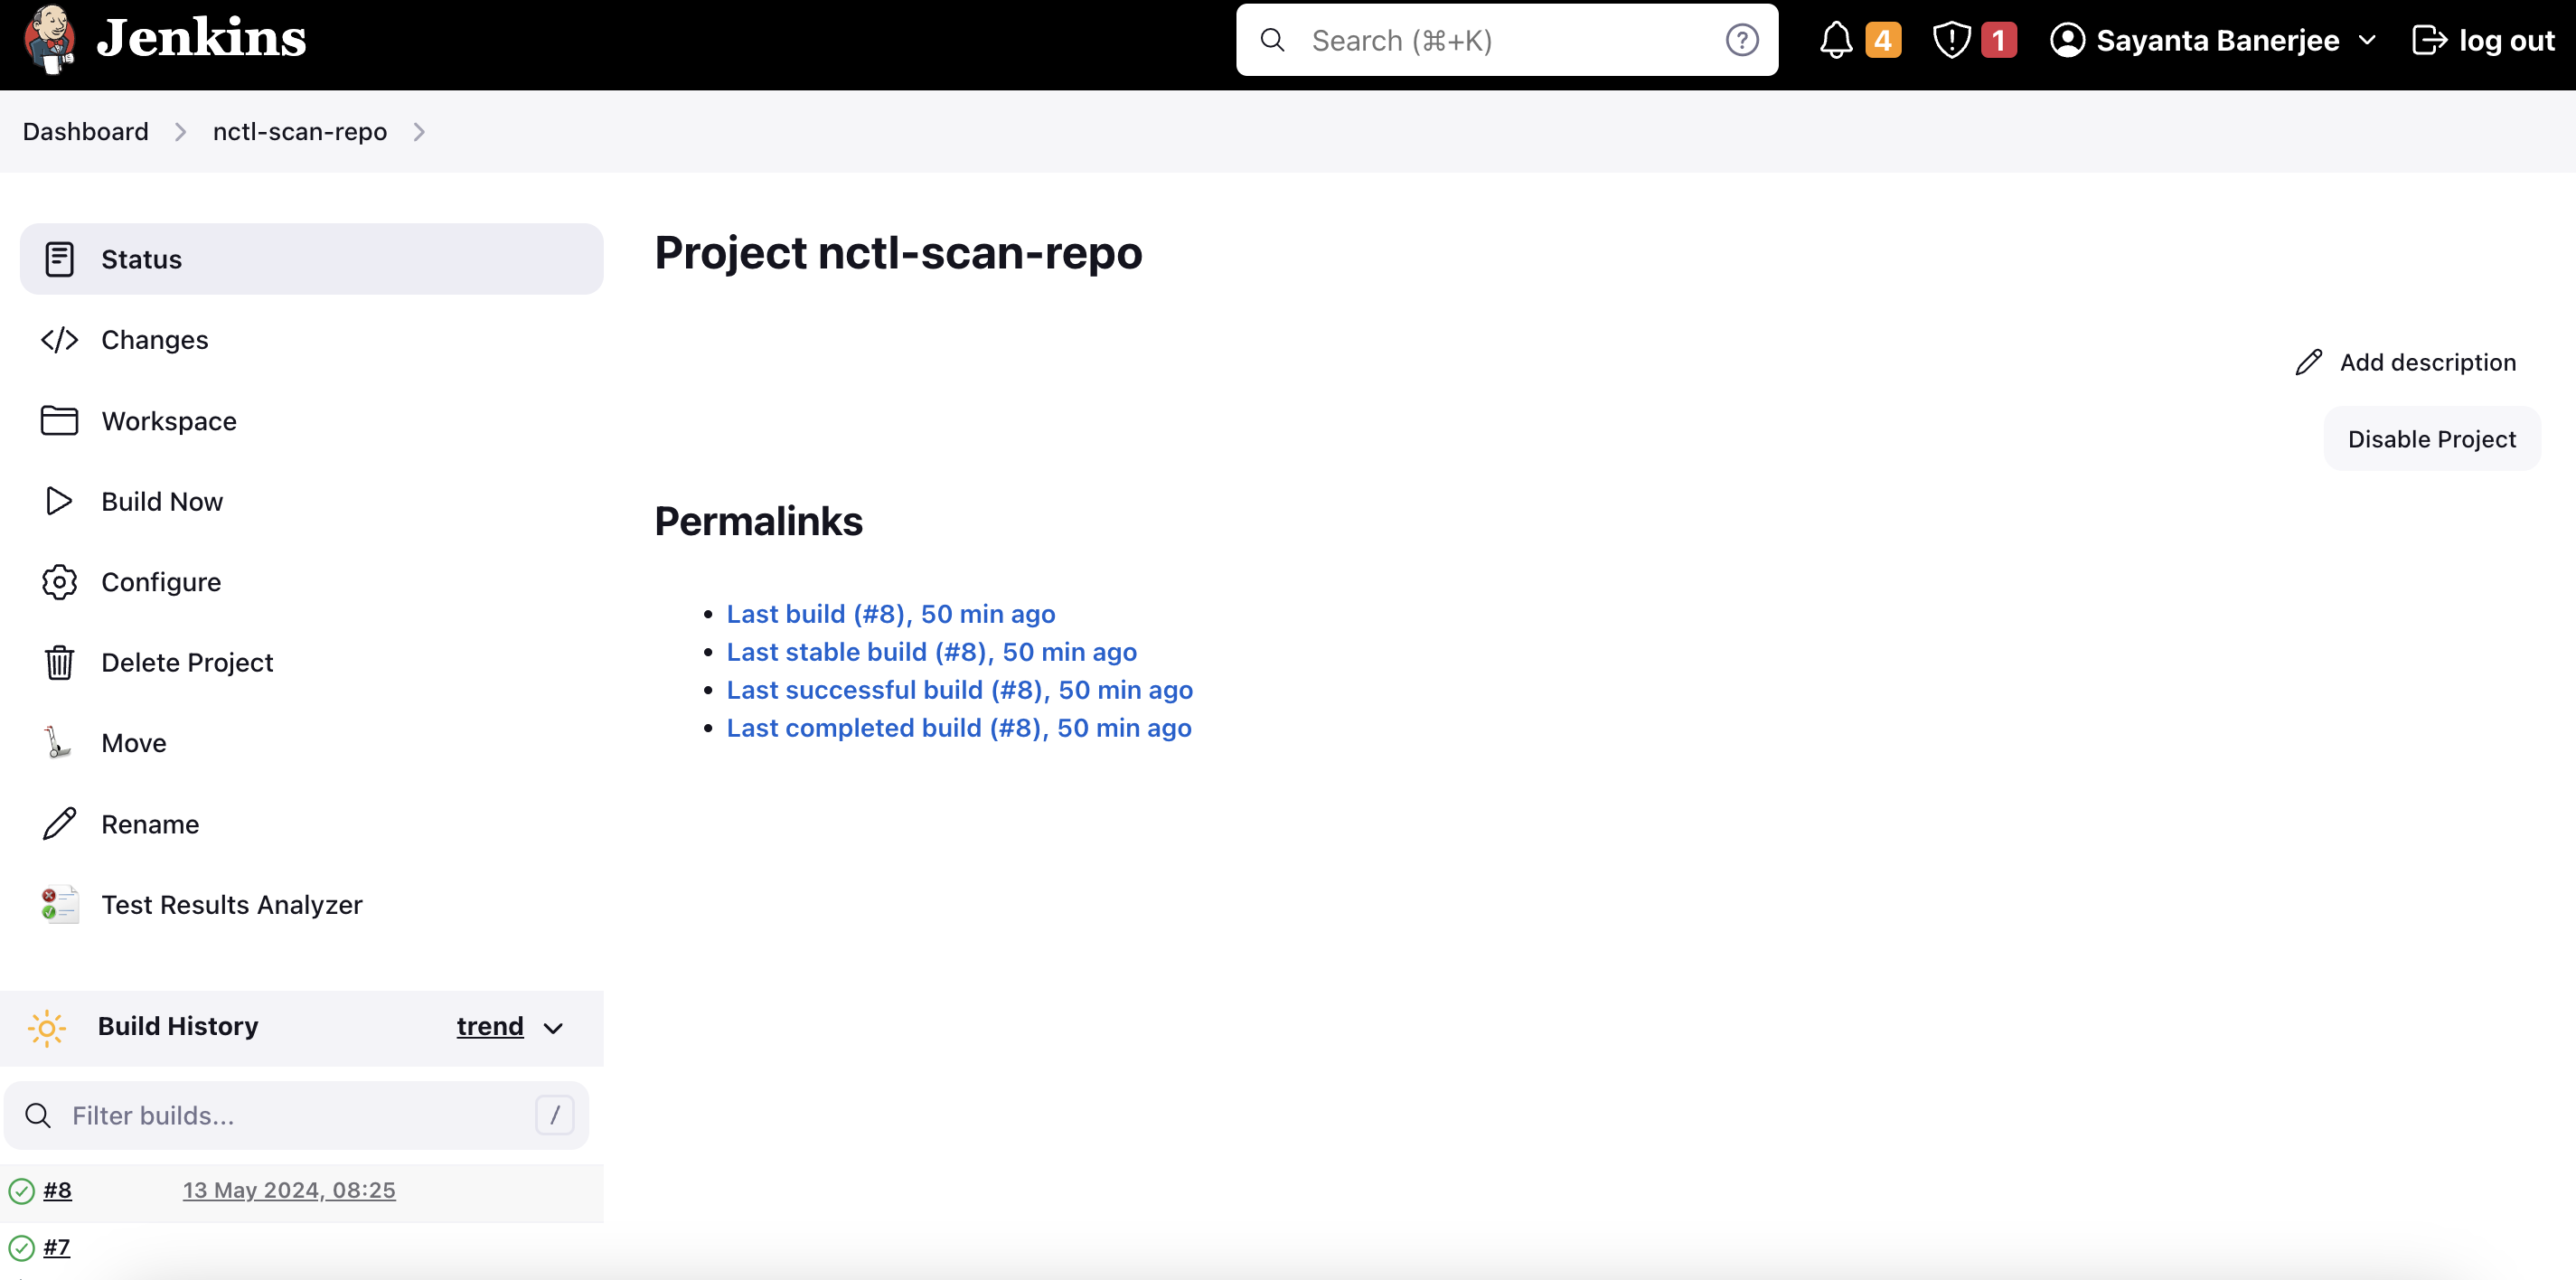
- Now, click on the build number under Build History to see details on the completion of the job. The status page will open by default where the information on the success or the failure of the job will be visible.
- Click on Console Output on the navigation bar to have a look at the scan results.
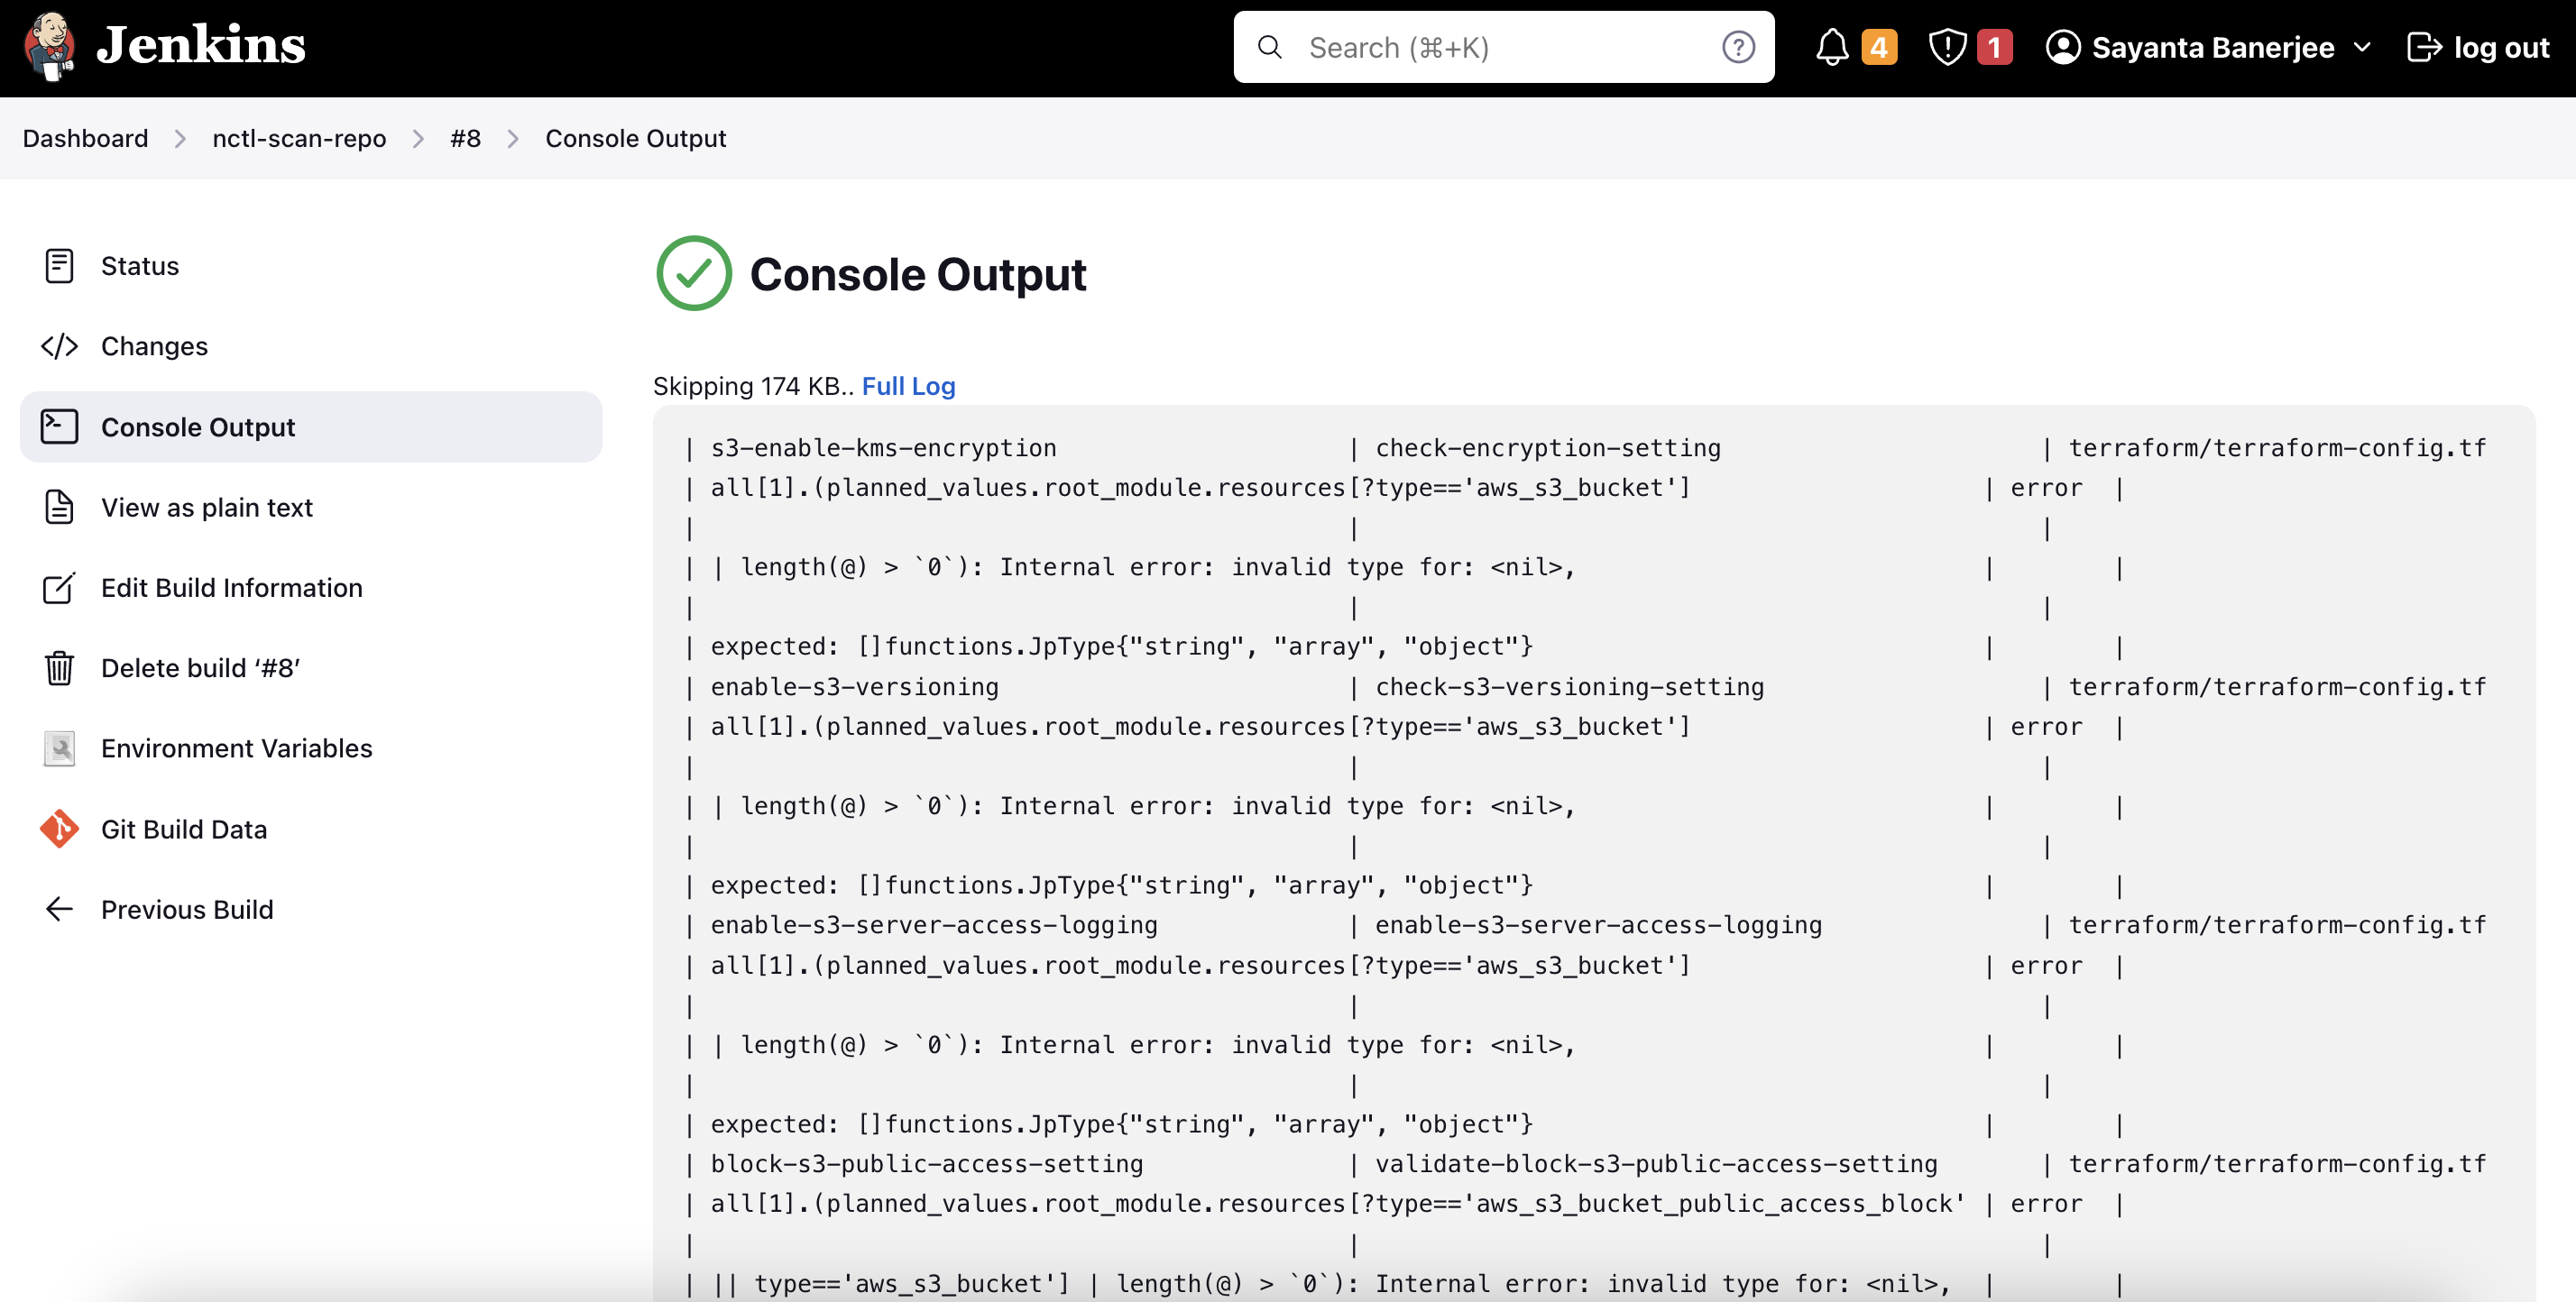
- Scroll down to the end of the page to verify the publishing of the report to the NCH tenant.
To have a look at the scan report in NCH:
- Log into NCH and go to Policies>Policy Reports. The Policy Reports can be viewed based on Categories, Clusters, Namespaces, and Repositories.
- Navigate to the Repositories tab to find the scanned repository under the list of repositories.

- Click on the repository hyperlink to get a detailed view of the scanned report.