GitOps Integration
Contain steps to deploy policy exceptions through GitOps

Policy Exceptions are temporary deviations that are required when following policy practices might not be possible because they can hinder operational needs.
Every policy exception request is sent to an admin for review. The admin can either accept or reject the request. If the request gets accepted, the PolicyException resource gets deployed and the user who requested the exception gets notified via email.
A Nirmata Admin User can manage the approval and review settings of Policy Exception Requests as per requirements.
To manage the Policy Exception settings:
Require Two Factor Authentication (2FA) to approve a request option will require setting up two-factor authentication and compel users to complete the two-factor authentication to approve an exception request.Automatically approve requests by Administrators option will automatically approve policy exception requests that are raised by administrators without going through the approval process.Revoke all approvals if the requestor changes the resources or policies for the exception option will revoke any previous approvals given to an exception request if the user changes any of the target selectors like cluster, violations, or namespaces for the request.Reviewers and required approvals section by choosing any of the available options.Any Administrator or Platform user option will allow any Admin or Platform user to review the raised exception request.Selected Administrators option will allow only the selected Admin users for the review of the requests. Multiple Admin users can be selected from the available dropdown. An Admin user can also add or remove reviewers on specific requests.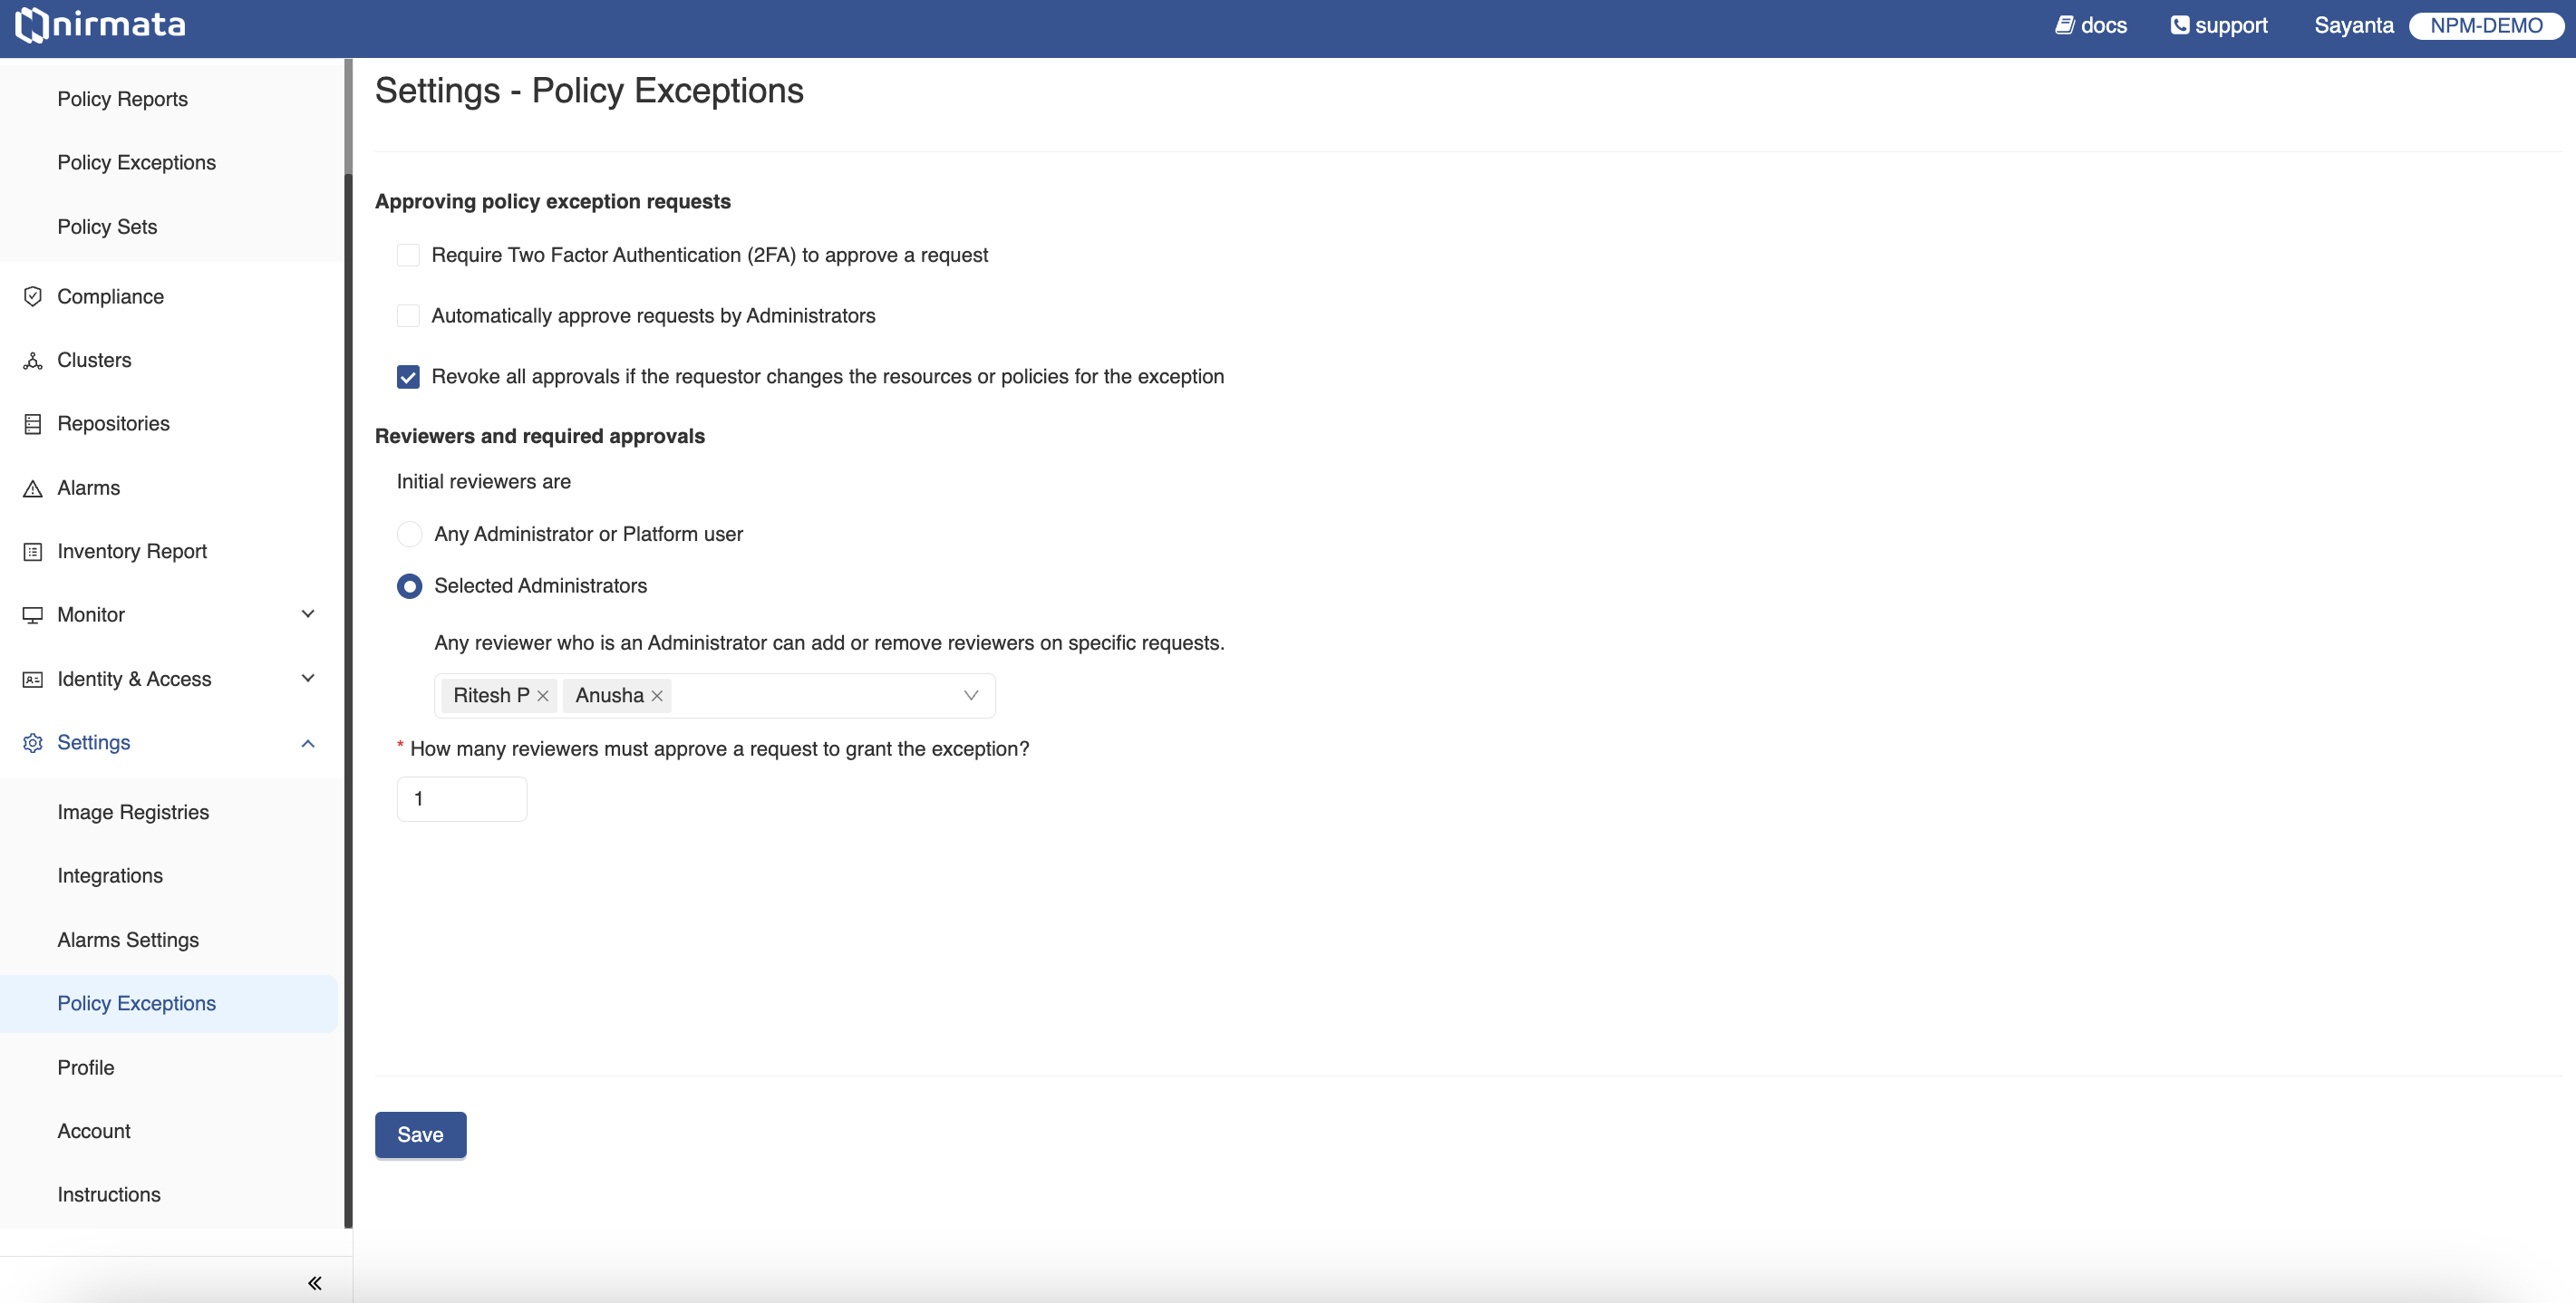
Policy Exception Request can be raised directly from the Policy Exceptions page or from the Policy Reports page of a particular namespace of a cluster.
Note: Existing clusters in NCH need to provide extra permissions for Policy Exception expiry feature to work. The extra permission is for the
kverno-cleanup-controllerto delete policy exceptions from the cluster. Check out thenirmata:policyexception-managerClusterRoleBinding in Nirmata Kube Controller to see the changes.
To raise a Policy Exception Request:
Request Policy Exception button located on the right hand top corner of the screen. Fill out the Policy Exception Request form with all the details.Immediately after approval to apply the exception immediately after approval from the reviewers.1 day, 1 week, 1 month, or Never Expires.NOTE: Exceptions should be short-lived. Thus, it is not recommended to use
Never Expires.
All Violations option.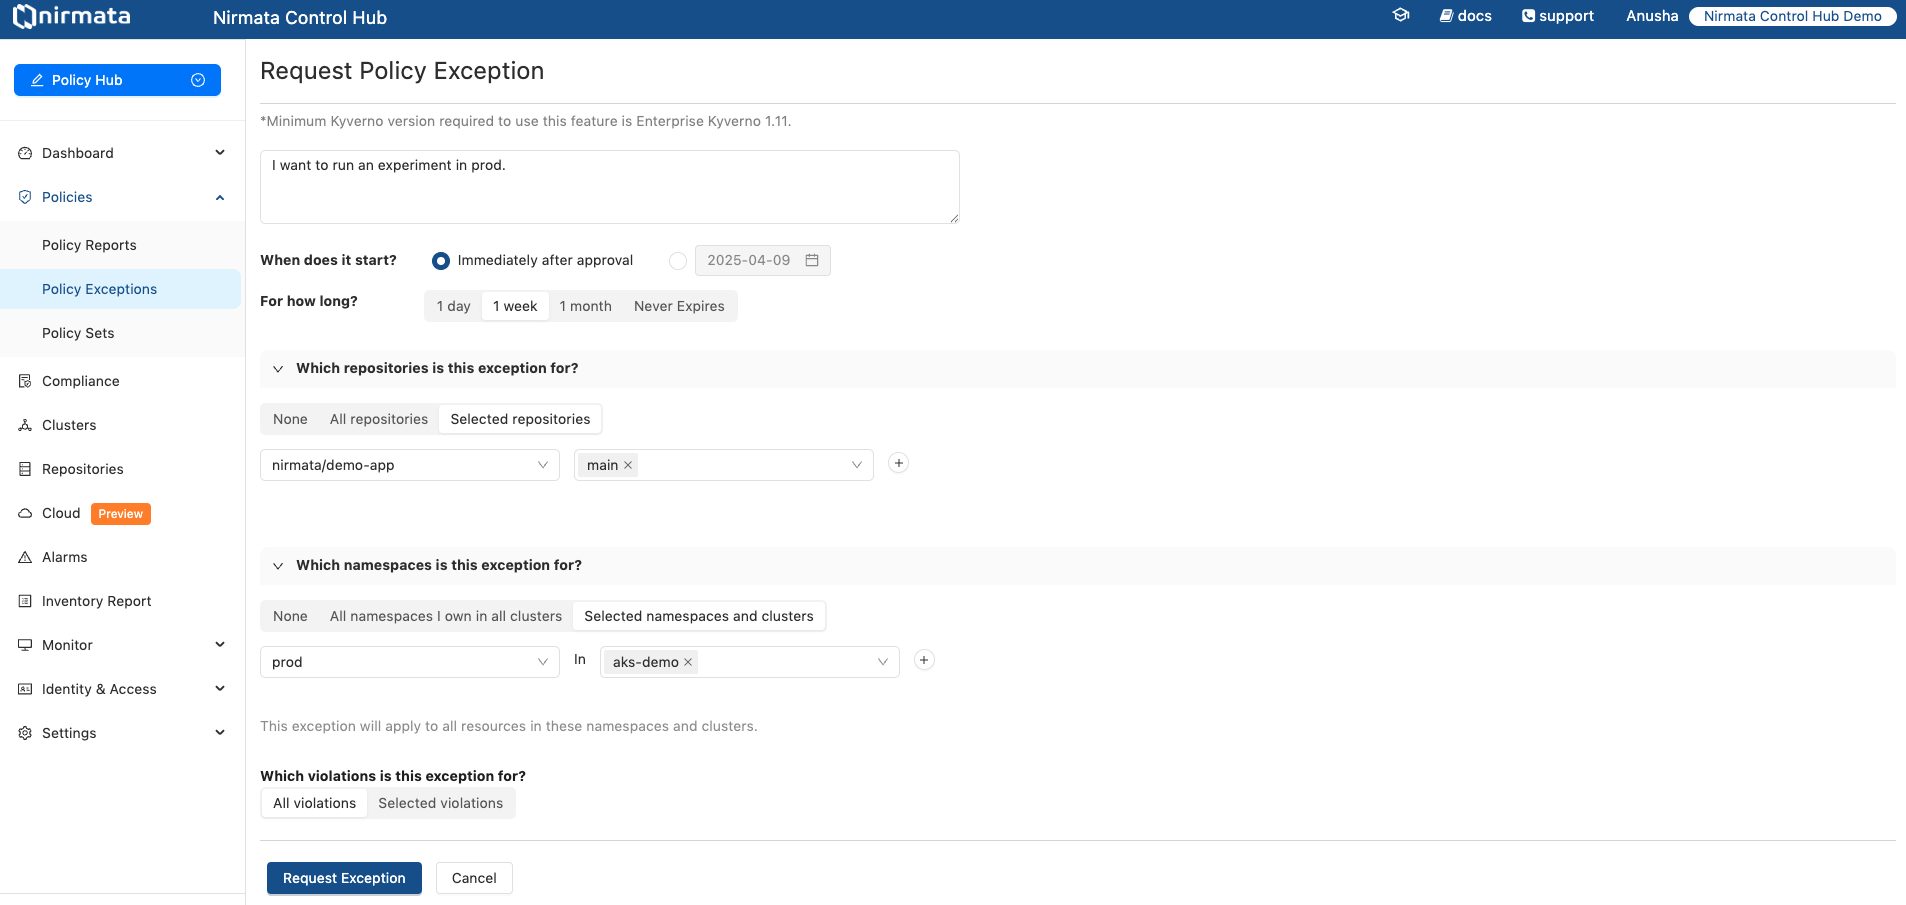
Request Exception button to raise the Policy Exception Request. It will send an alert to the admin for a review.Note: The Policy Exception Request can be raised in the same way through the Policy Reports page. For that, go to the Policy Reports page and view the available namespaces. Click on any of the namespaces that will require a Policy Exception, and raise a Policy exception request by clicking on the
Request Policy Exceptionbutton.
To review the Policy Exception Requests:
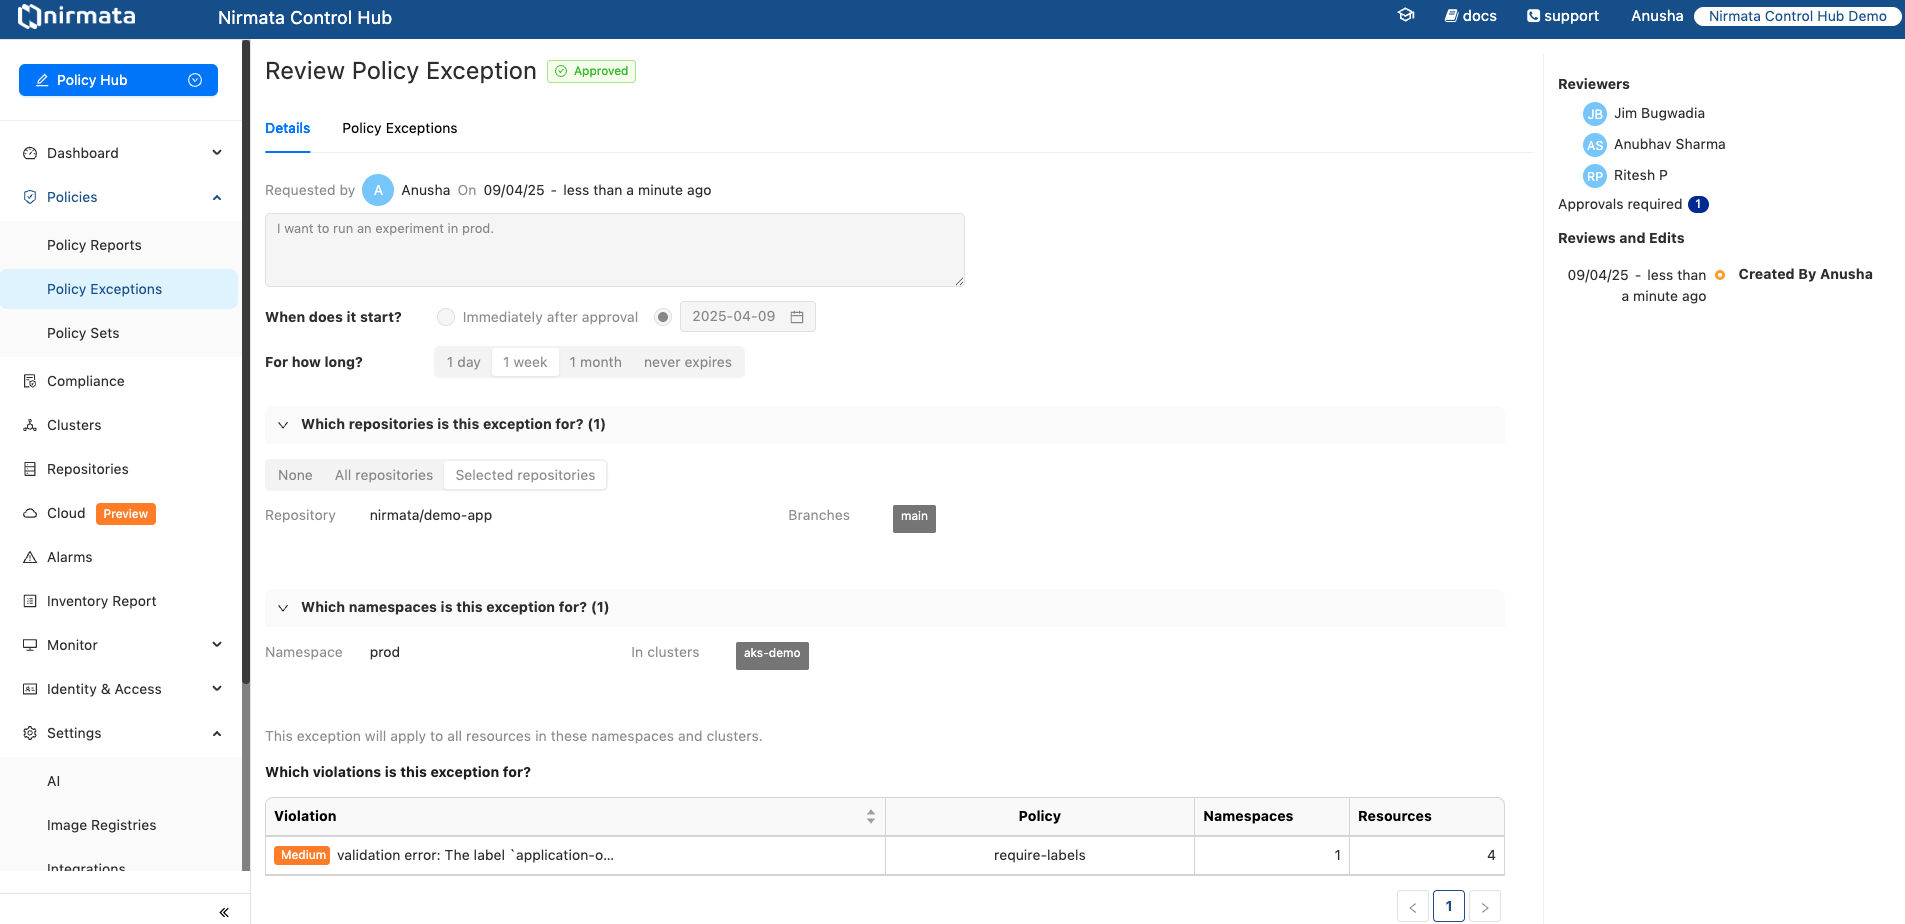
If a Policy Exception Request is approved, NCH deploys the corresponding PolicyException resource to the target environments. These can be viewed under Policy Exceptions -> Deployed Policy Exceptions tab along with their deployment status and expiry details.
NOTE: For expiry of policy exceptions, NCH uses the Cleanup Controller in Kyverno. This controller needs permissions to perform the cleanup action. Make sure the ClusterRoleBinding nirmata:policyexception-manager is present in the cluster. Review all nirmata resources here.
Contain steps to deploy policy exceptions through GitOps