
Policy Sets
Policy Sets are a collection of individual policies that allow a set of configuration standards to be applied to various objects within the Kubernetes clusters.
Creating a Policy Set
To create a new Policy Set:
- Go to Policies>Policy Sets. The Policy Sets page displays the existing policy sets along with their details.

Click on the
Add Policy Setbutton located on the top right-hand corner of the page.Nirmata provides curated policy sets for Pod Security Standards and RBAC Best Practices. Nirmata manages these policies and upgrades them as necessary. The policies can be found in the kyverno-policies repository.
It is not mandatory to use Nirmata’s curated policy sets. Create a custom policy set by clicking on Add Custom Policy Set. This option provides more control over the lifecycle of the underlying policies.
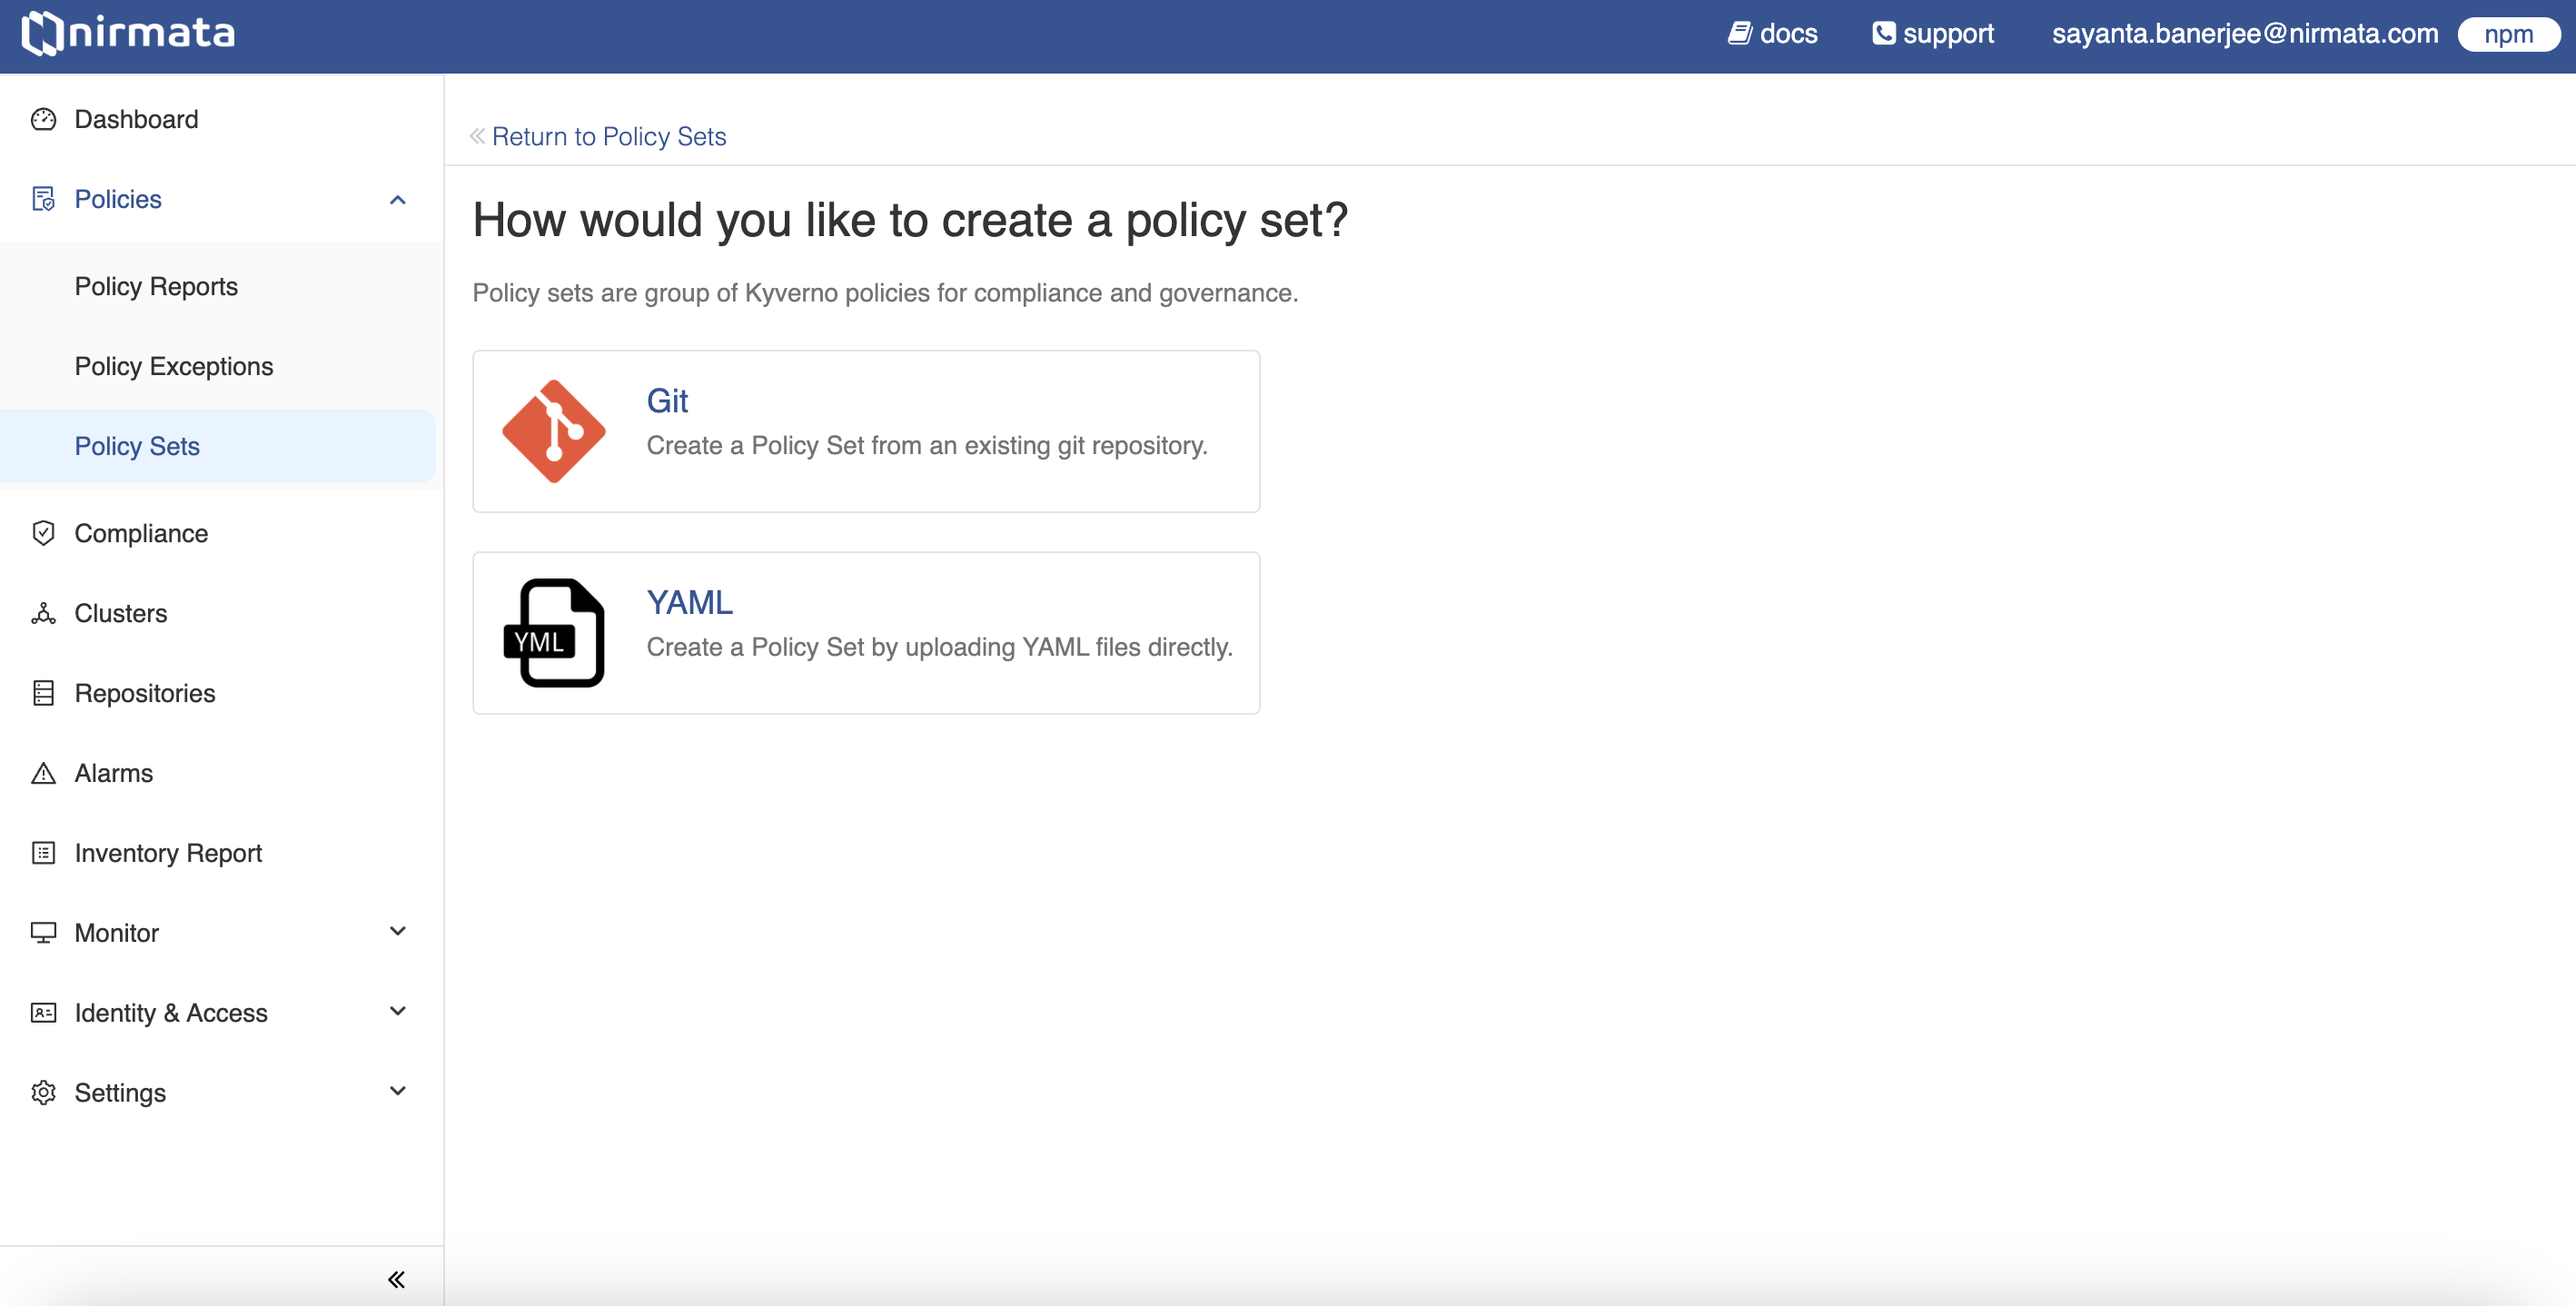
The page displays two options to create a policy set:
a. Git (recommended) - Select this option to create a Policy Set from an existing Git repository.
b. YAML - Select this option to create a Policy Set by uploading YAML files directly.
Creating a Git Policy Set (Recommended)
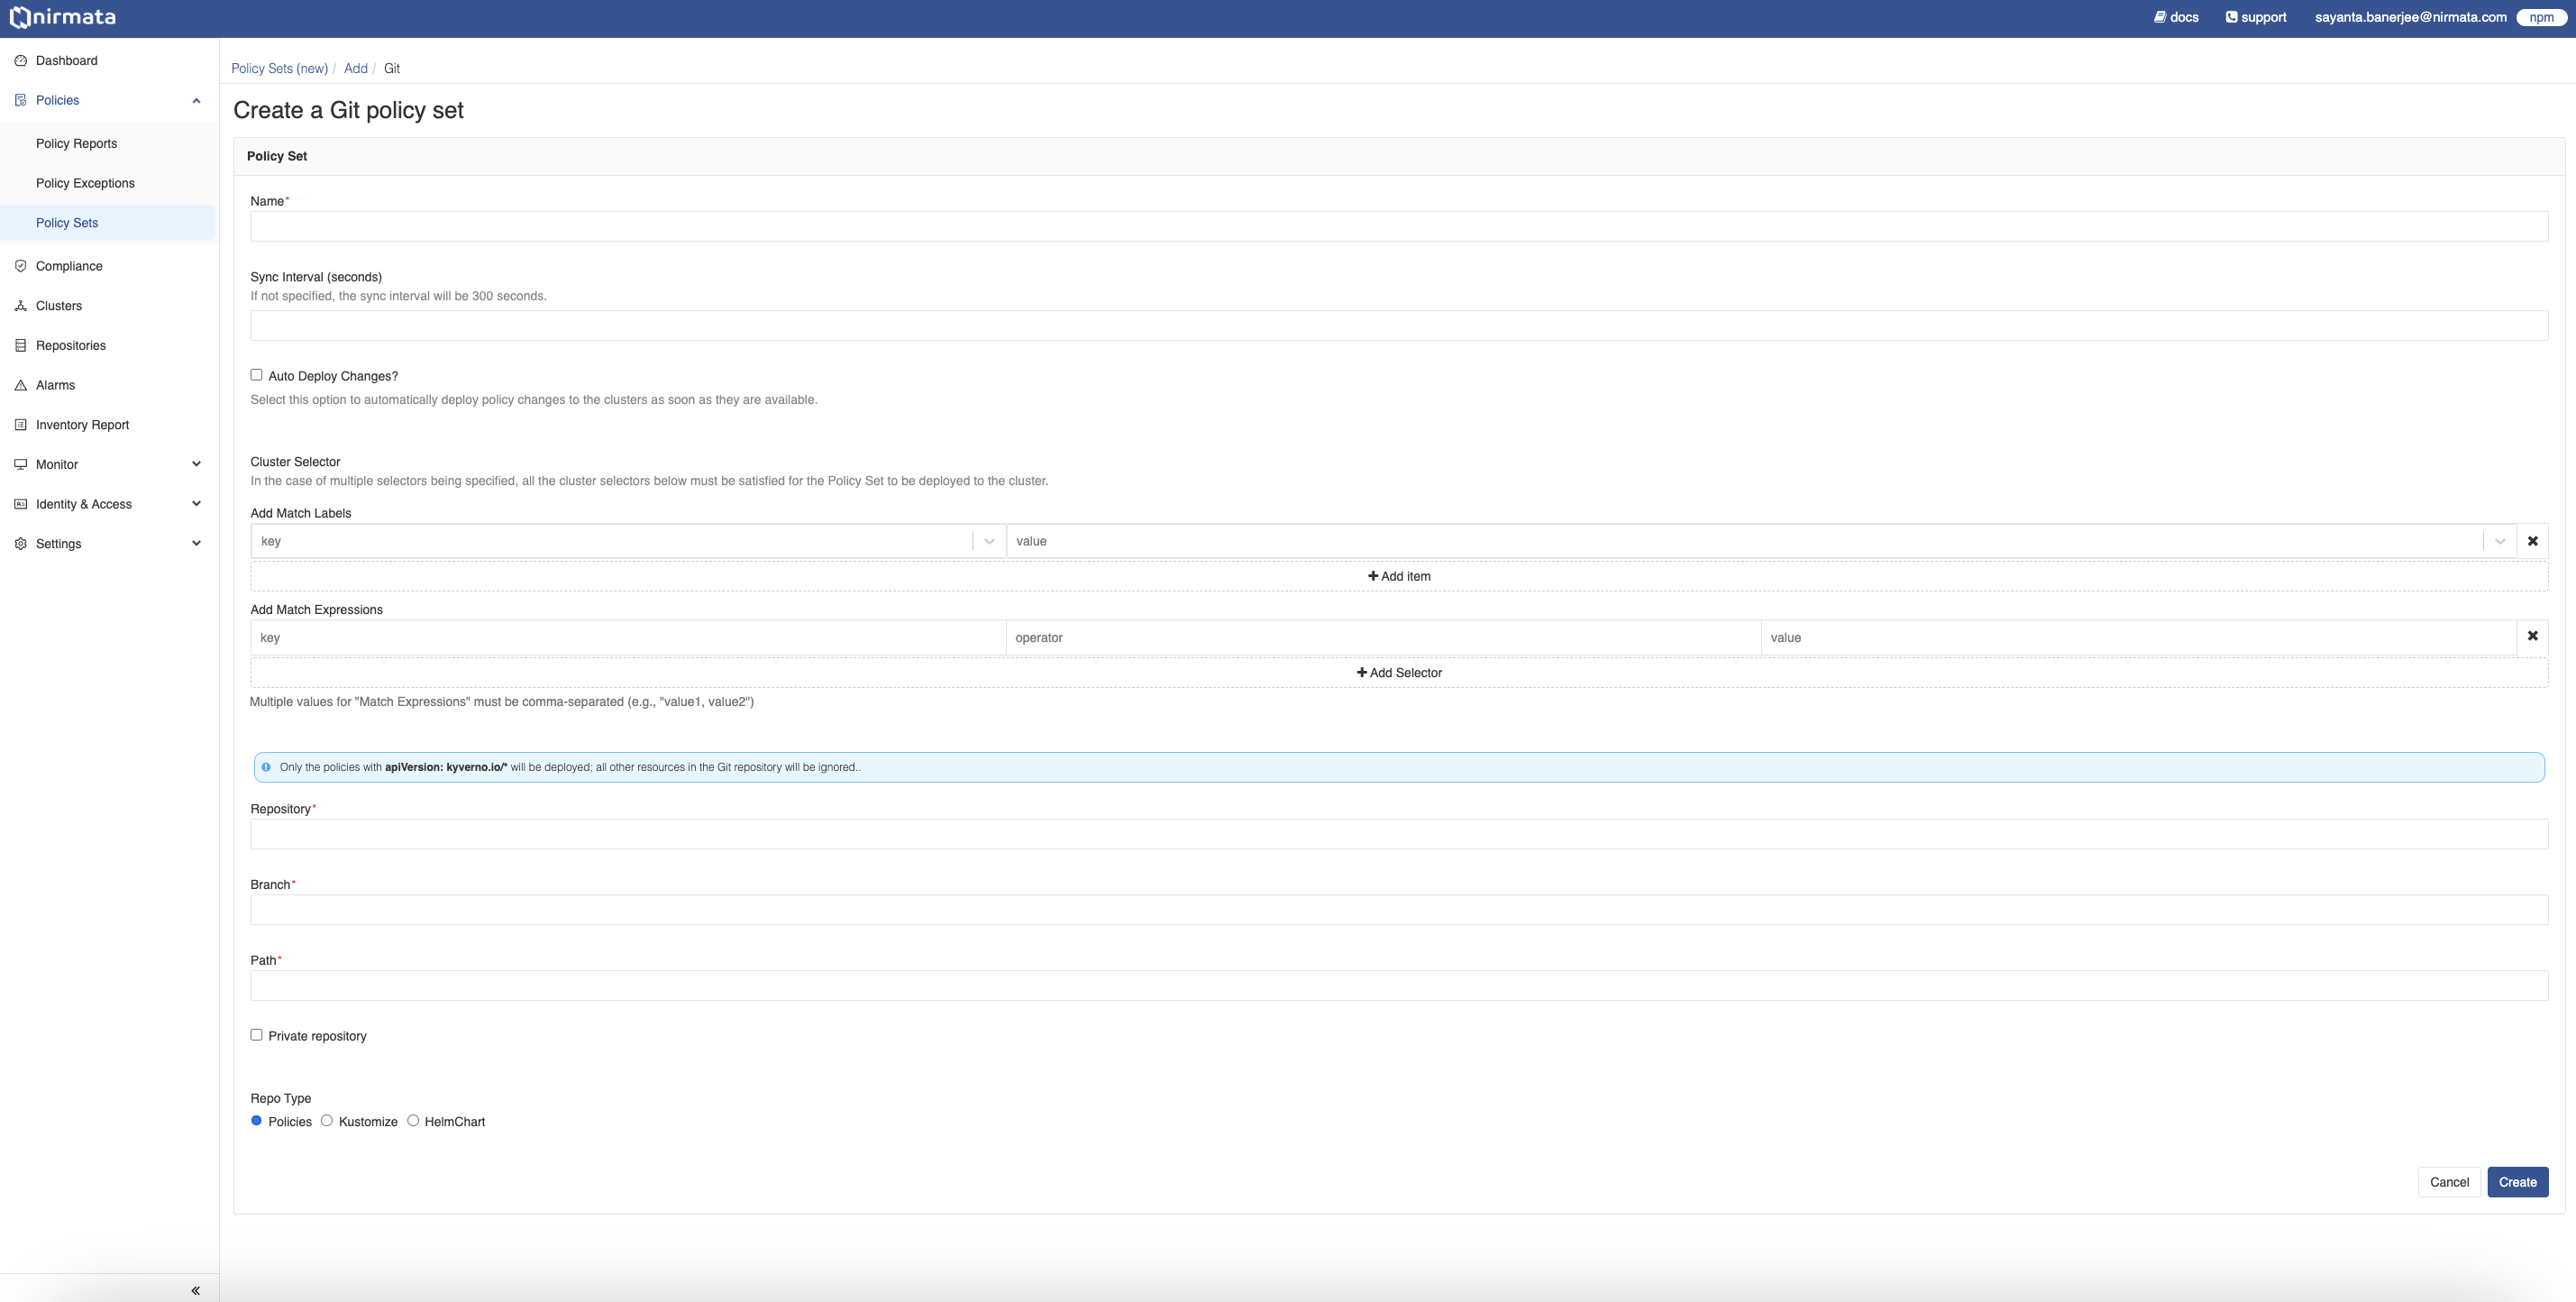
To create a Git Policy Set, click on the Git option. The Policy Set form is displayed. In that form:
- Provide a unique name and description for the Policy Set.
- Specify the time for sync interval in seconds under the
Sync Interval (seconds)field. If not specified, the default sync interval will be 300 seconds. - Select the
Default Policy Setcheckbox if you want to make this policy set as a default whenever future clusters are onboarded. - Select
Auto Deploy Changescheckbox if you want the changes in Git to automatically sync to the clusters. - Specify any cluster selectors under the
Cluster Selectorfield by addingMatch LabelsandMatch Expressionsin the form of key-value pairs.
a. Add Match Labels by entering the values within thekeyandvaluesections.
b. Click onAdd itemto add multiple Match Labels.
c. Add Match Expressions by entering the values within thekeyandvaluesections and specifying the operator within theoperatorsection from the drop-down list. The availableoperatoroptions are In, Not In, Exists, and Does Not Exist. Multiple values forMatch Expressionsmust be comma-separated (e.g., “value1, value2”).
d. Click onAdd Selectorto add multiple Match Expressions.
Note: In the case of multiple selectors being specified, all the cluster selectors must be satisfied for the Policy Set to be deployed to the cluster.
- After specifying the cluster selectors, fill out the Git Repository, Branch, and Path details to fetch the policies.
- If the repository is private, click on the
Private repositorycheckbox. TheK8s secretsform will be displayed. In that form:
a. Enter the name of thenamespace,secret, andtoken key.
NOTE: Create a Kubernetes secret in the provided namespace containing Git credentials. This allows the Operator to connect to your private Git repo to fetch the policies.
- After that, determine the repository type by clicking on the radio button beside
Policies,Kustomize, andHelmChart.
a. IfHelmChartis selected, an additional form will be displayed to specify theHelm Customizationsin the form of key-value pair.
b. Enter the values for customization within thekeyandvaluesection.
c. Click onAdd itemto add multiple customizations. - Finally, click Create. Upon clicking, the Policy Set gets created and the Upload Policies section opens.
Creating a YAML Policy Set
To create a YAML Policy Set:
- Click on the YAML option. The Policy Set form is displayed.
- In the Name field, enter a unique name for the Policy Set.
- Click Create. Upon clicking, the Policy Set gets created and the Upload Policies section opens.

- Next, click on the section to upload the YAML policy.
- After that, click on the Import and Validate Policies button. This will open the Add Policies section, where the policy added is validated and mentioned with a check mark if it passes the validation.
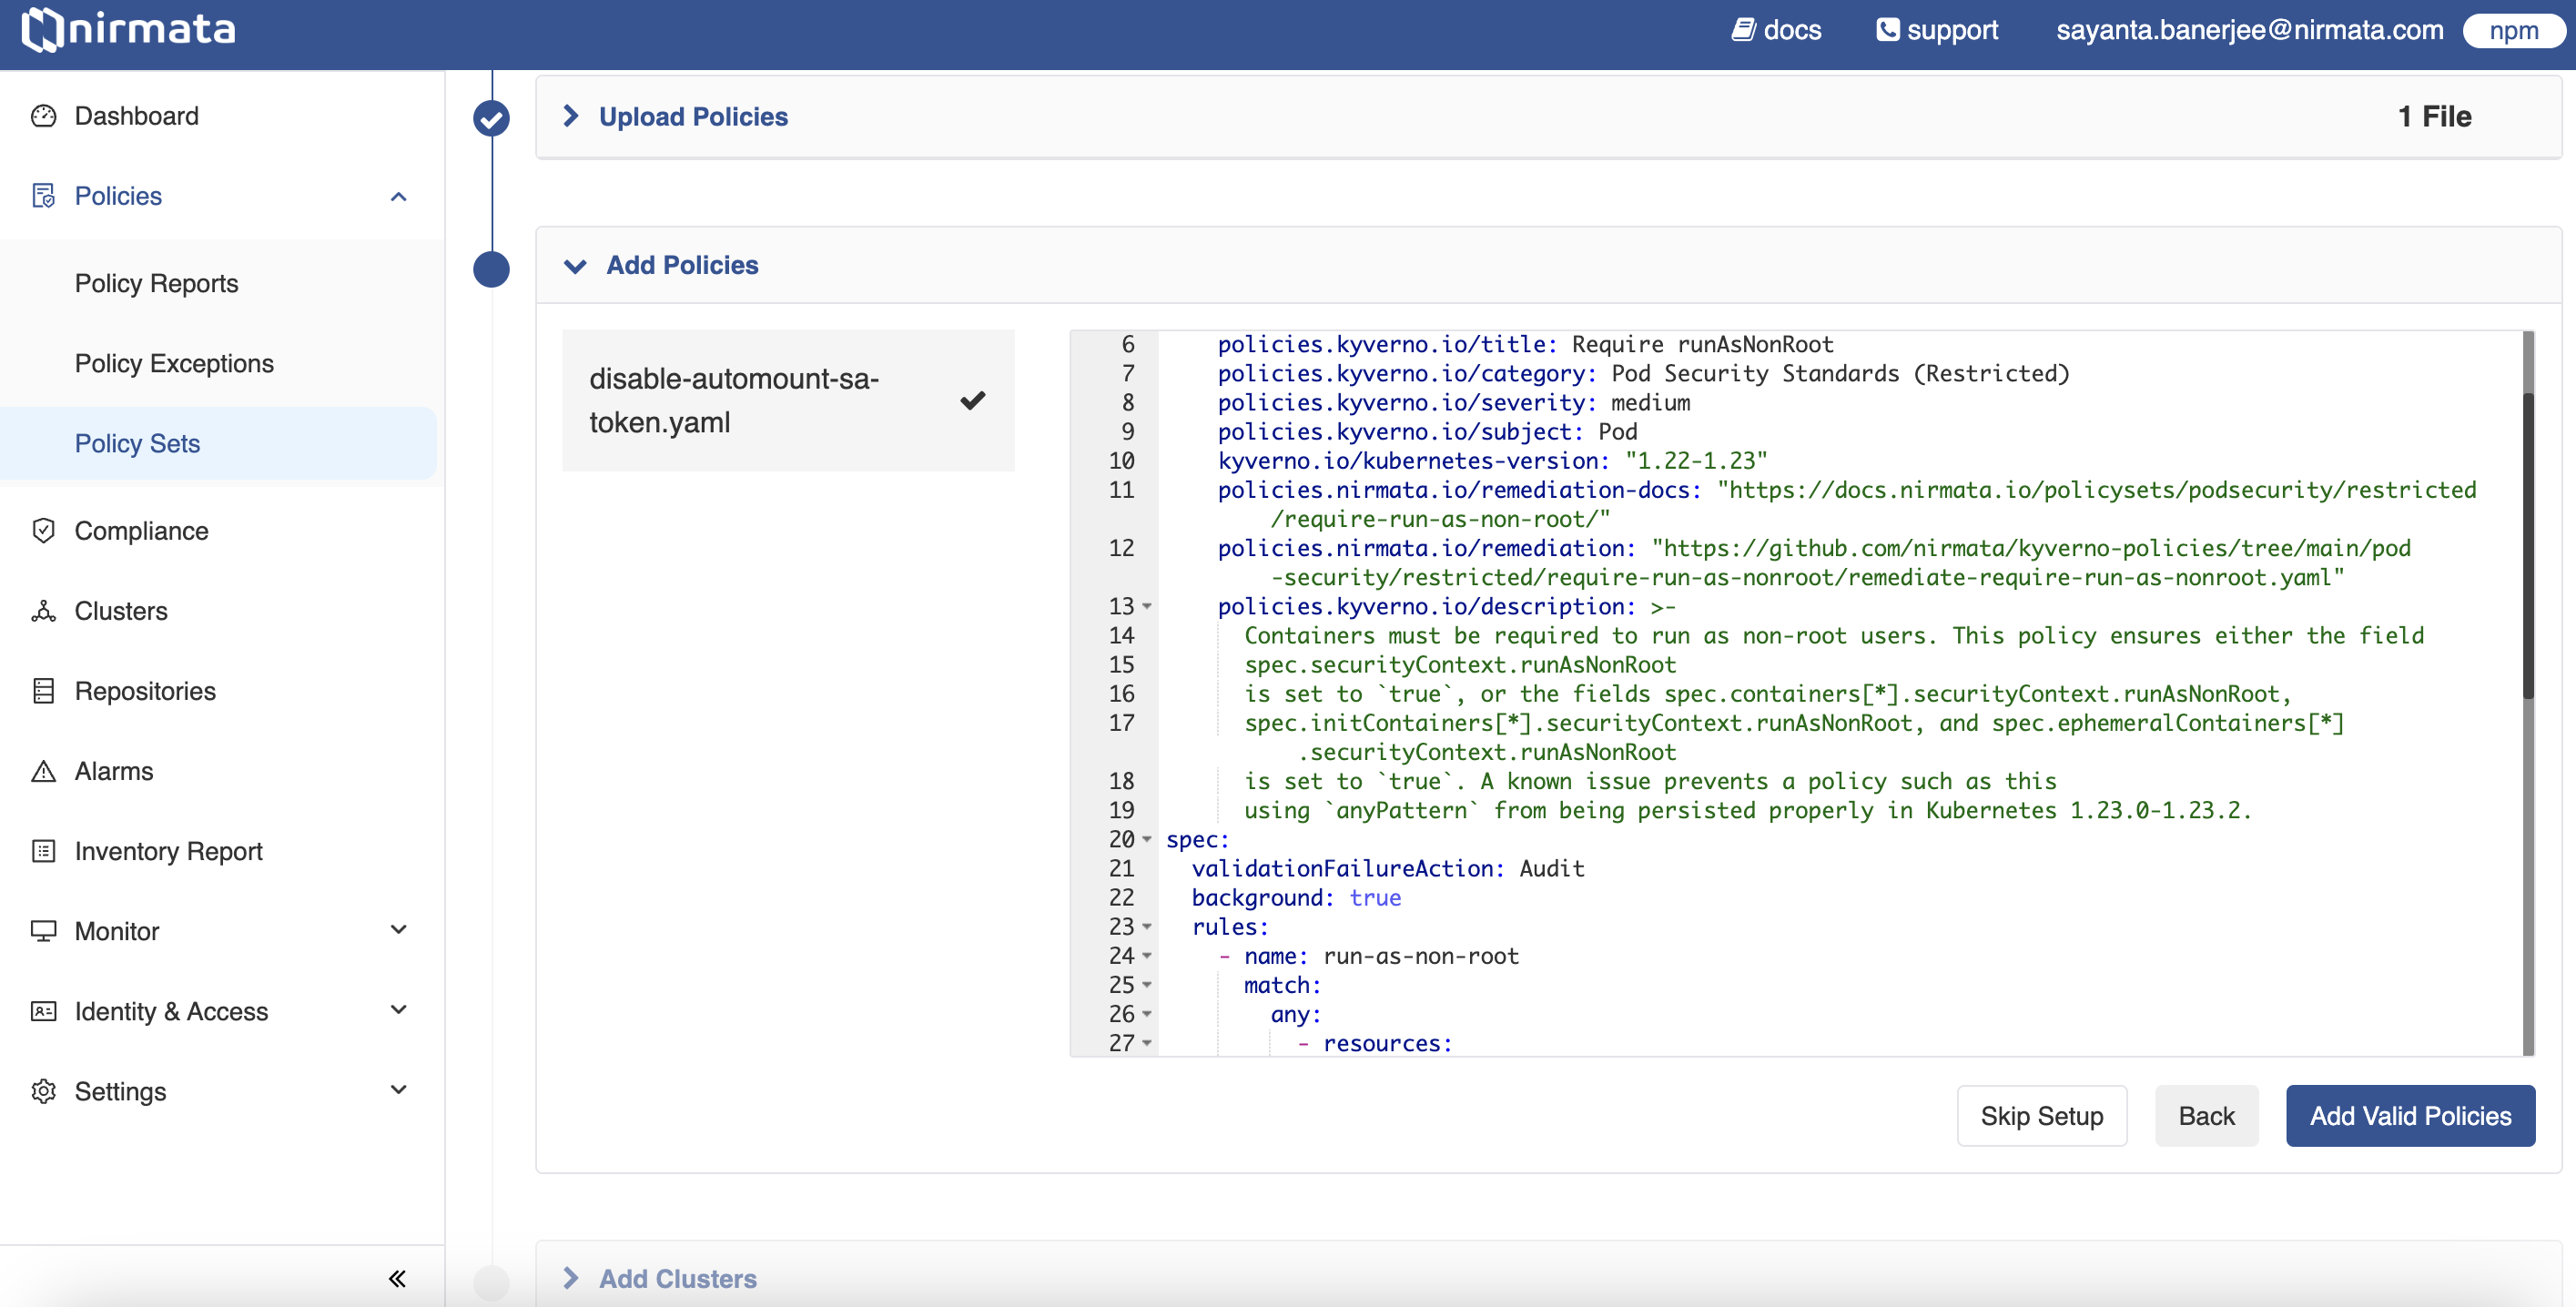
- Click on the Add Valid Policies button. The Add Clusters section is displayed with the list of available clusters.
- Choose the cluster/s by clicking the checkbox on which the Policy Set created needs to be deployed.
- Afterwards, click on the Add Clusters button. A success message is displayed.

- Finally, click Done.
Viewing a Policy Set
To view a newly created Policy Set:
- Go to Policies>Policy Sets. The Policy Sets page displays the existing policy sets along with their details.
- Click on the Policy Set card that is newly created. The created Policy Set page opens.
- The Policy Set page contains information on the current policy version, the number of clusters subscribed with the policy set, the number of policies present in the policy set, and the last rollout status.
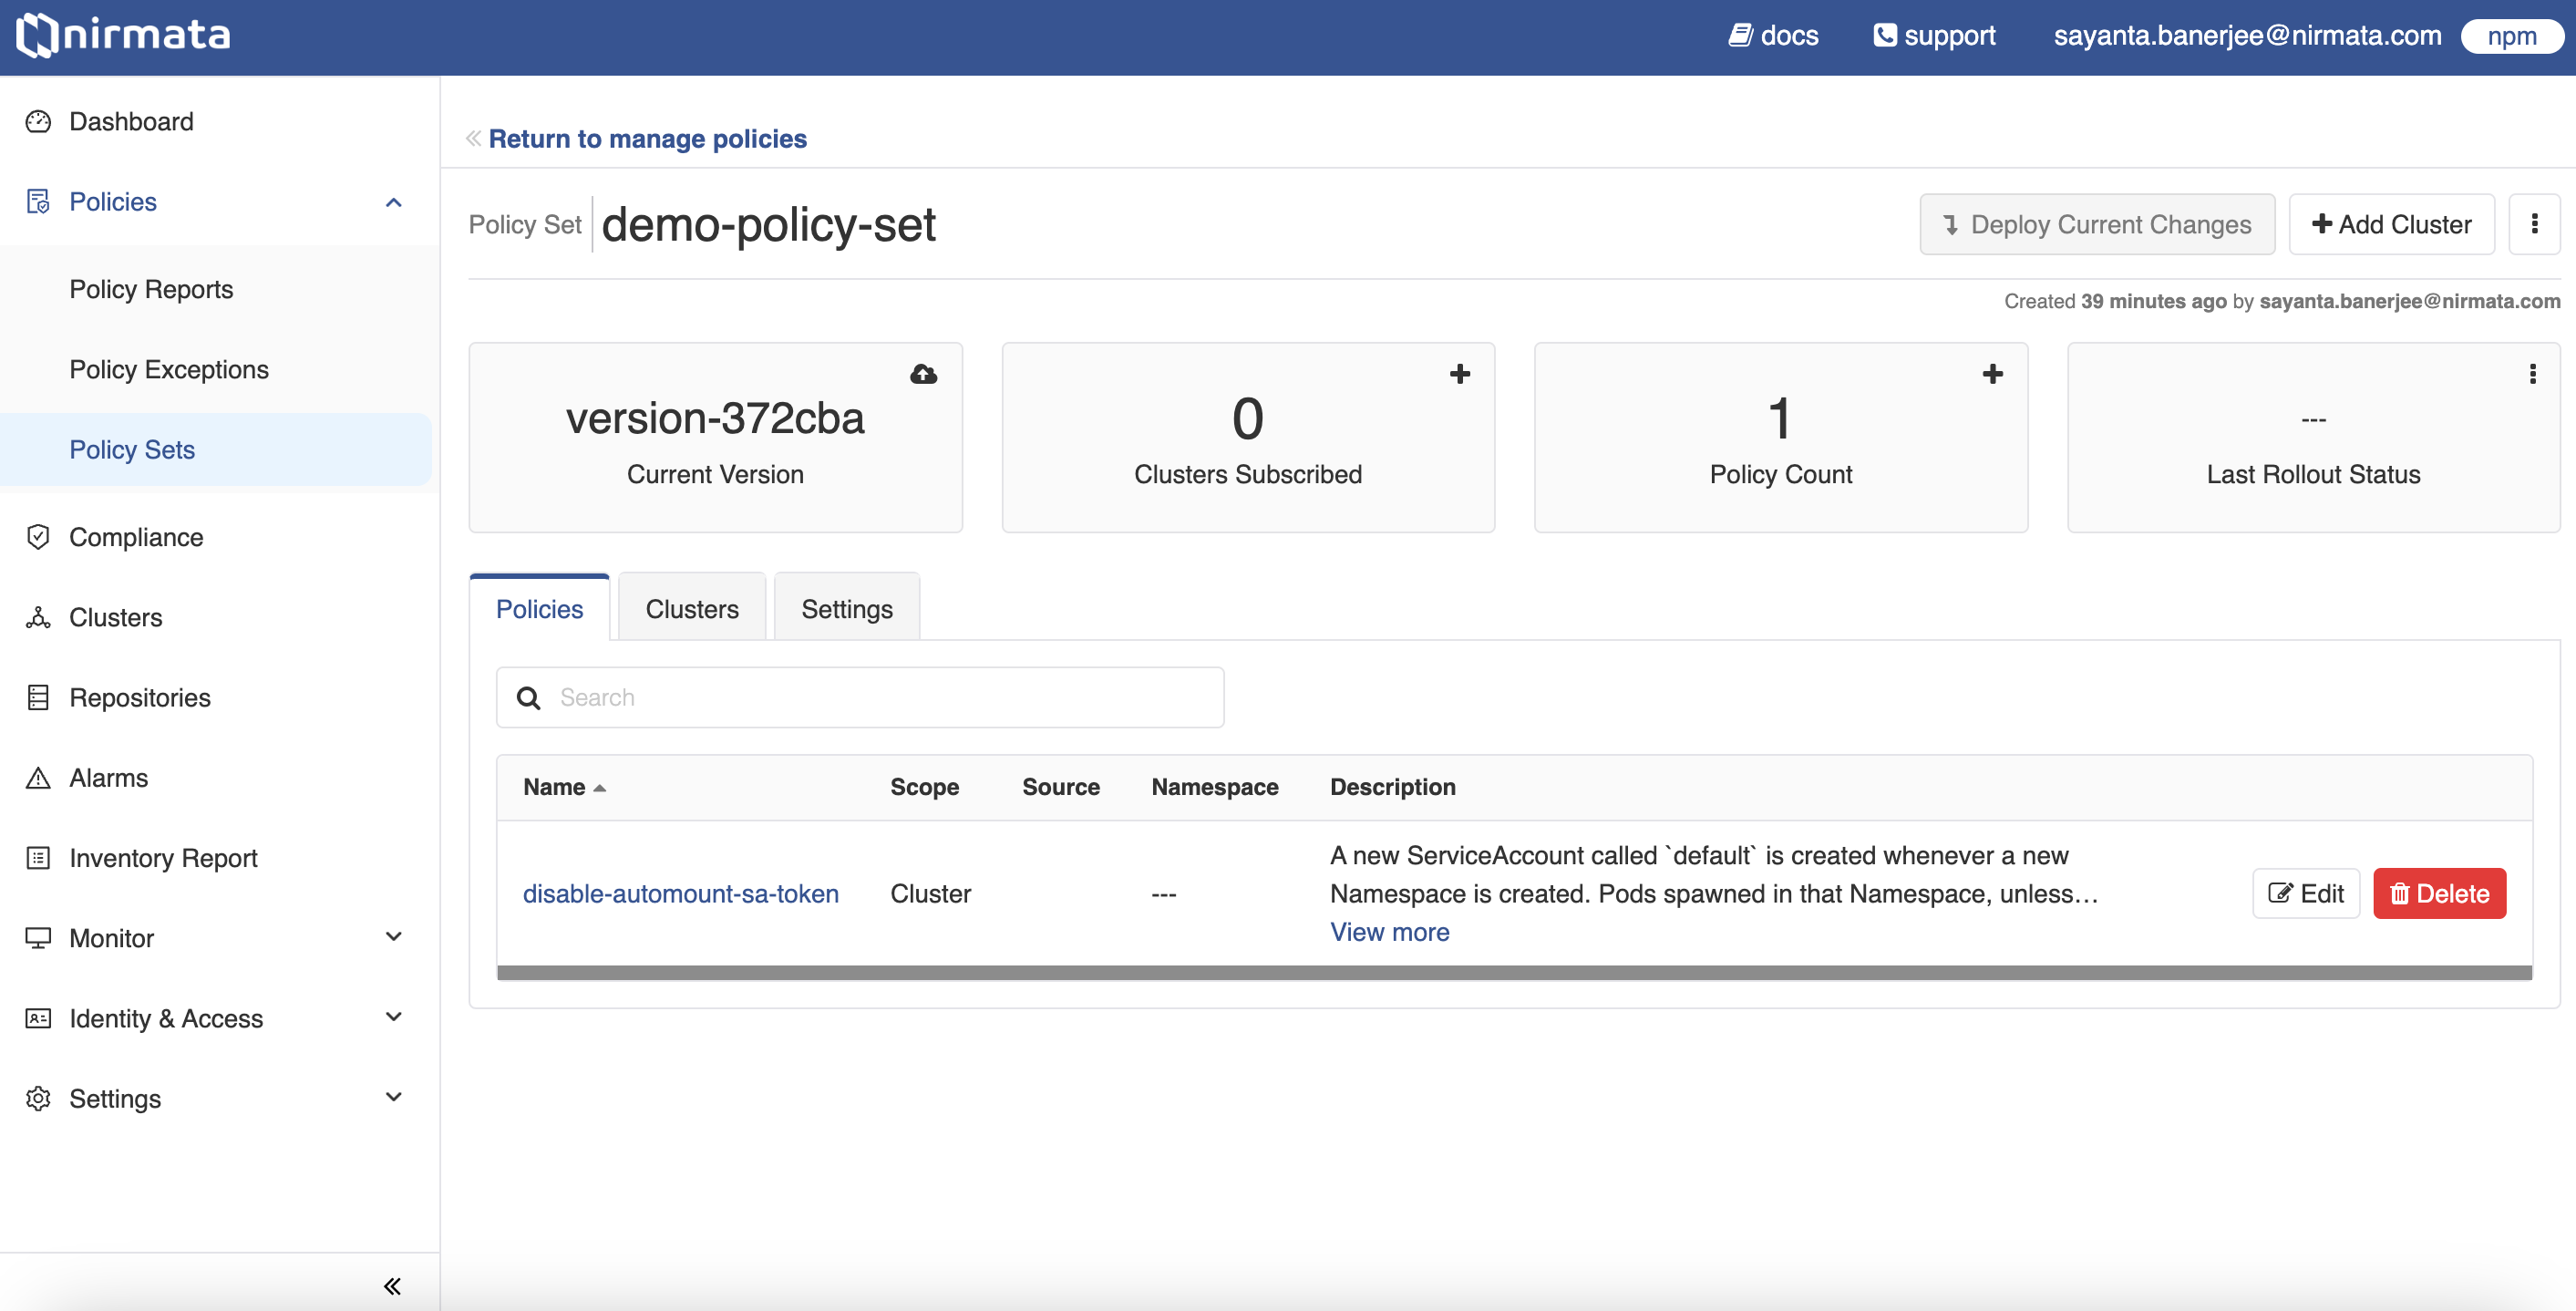
- More clusters and policies can be added by clicking on the
+button available within the cards. Alternatively, clicking on theAdd Clusterbutton on the top right corner will do the same for adding clusters in the Policy Set. - The Policies tab opens by default. It contains information of the policies present in the Policy Set, including the Name of the policy, the Source of the policy, the Scope defined, any associated Namespace, and the Description of the policy.
- Click on the Clusters and Settings tab to know more information about the subscribed clusters with the Policy Set and the settings of the overall Policy Set.
Deploying Policy Set to Clusters
In addition to specifying matching cluster labels and expressions for the policy sets, you can also directly choose the clusters to deploy policy sets.
- Go to the policy set that you want to deploy.
- Click on
Add Clusterand select one or more clusters from the list.
Verifying Policy Set Deployment
- Go to the policy set and click on the
Deployed Policiestab. All the deployed policies along with their Status will be shown. - Alternatively, if you have access to the kubeconfig of the cluster, use
kubectlto view policies on the command line.
kubectl get policyset -A
kubectl get cpol