---
title: "Nirmata Control Hub"
description: "Centralized management and collaboration across pipelines, clusters, and cloud"
diataxis: how-to
applies_to:
product: "nirmata-control-hub"
audience: ["platform-engineer"]
last_updated: 2026-04-16
url: https://docs.nirmata.io/docs/control-hub/
---
> **Applies to:** Nirmata Control Hub 4.0 and later
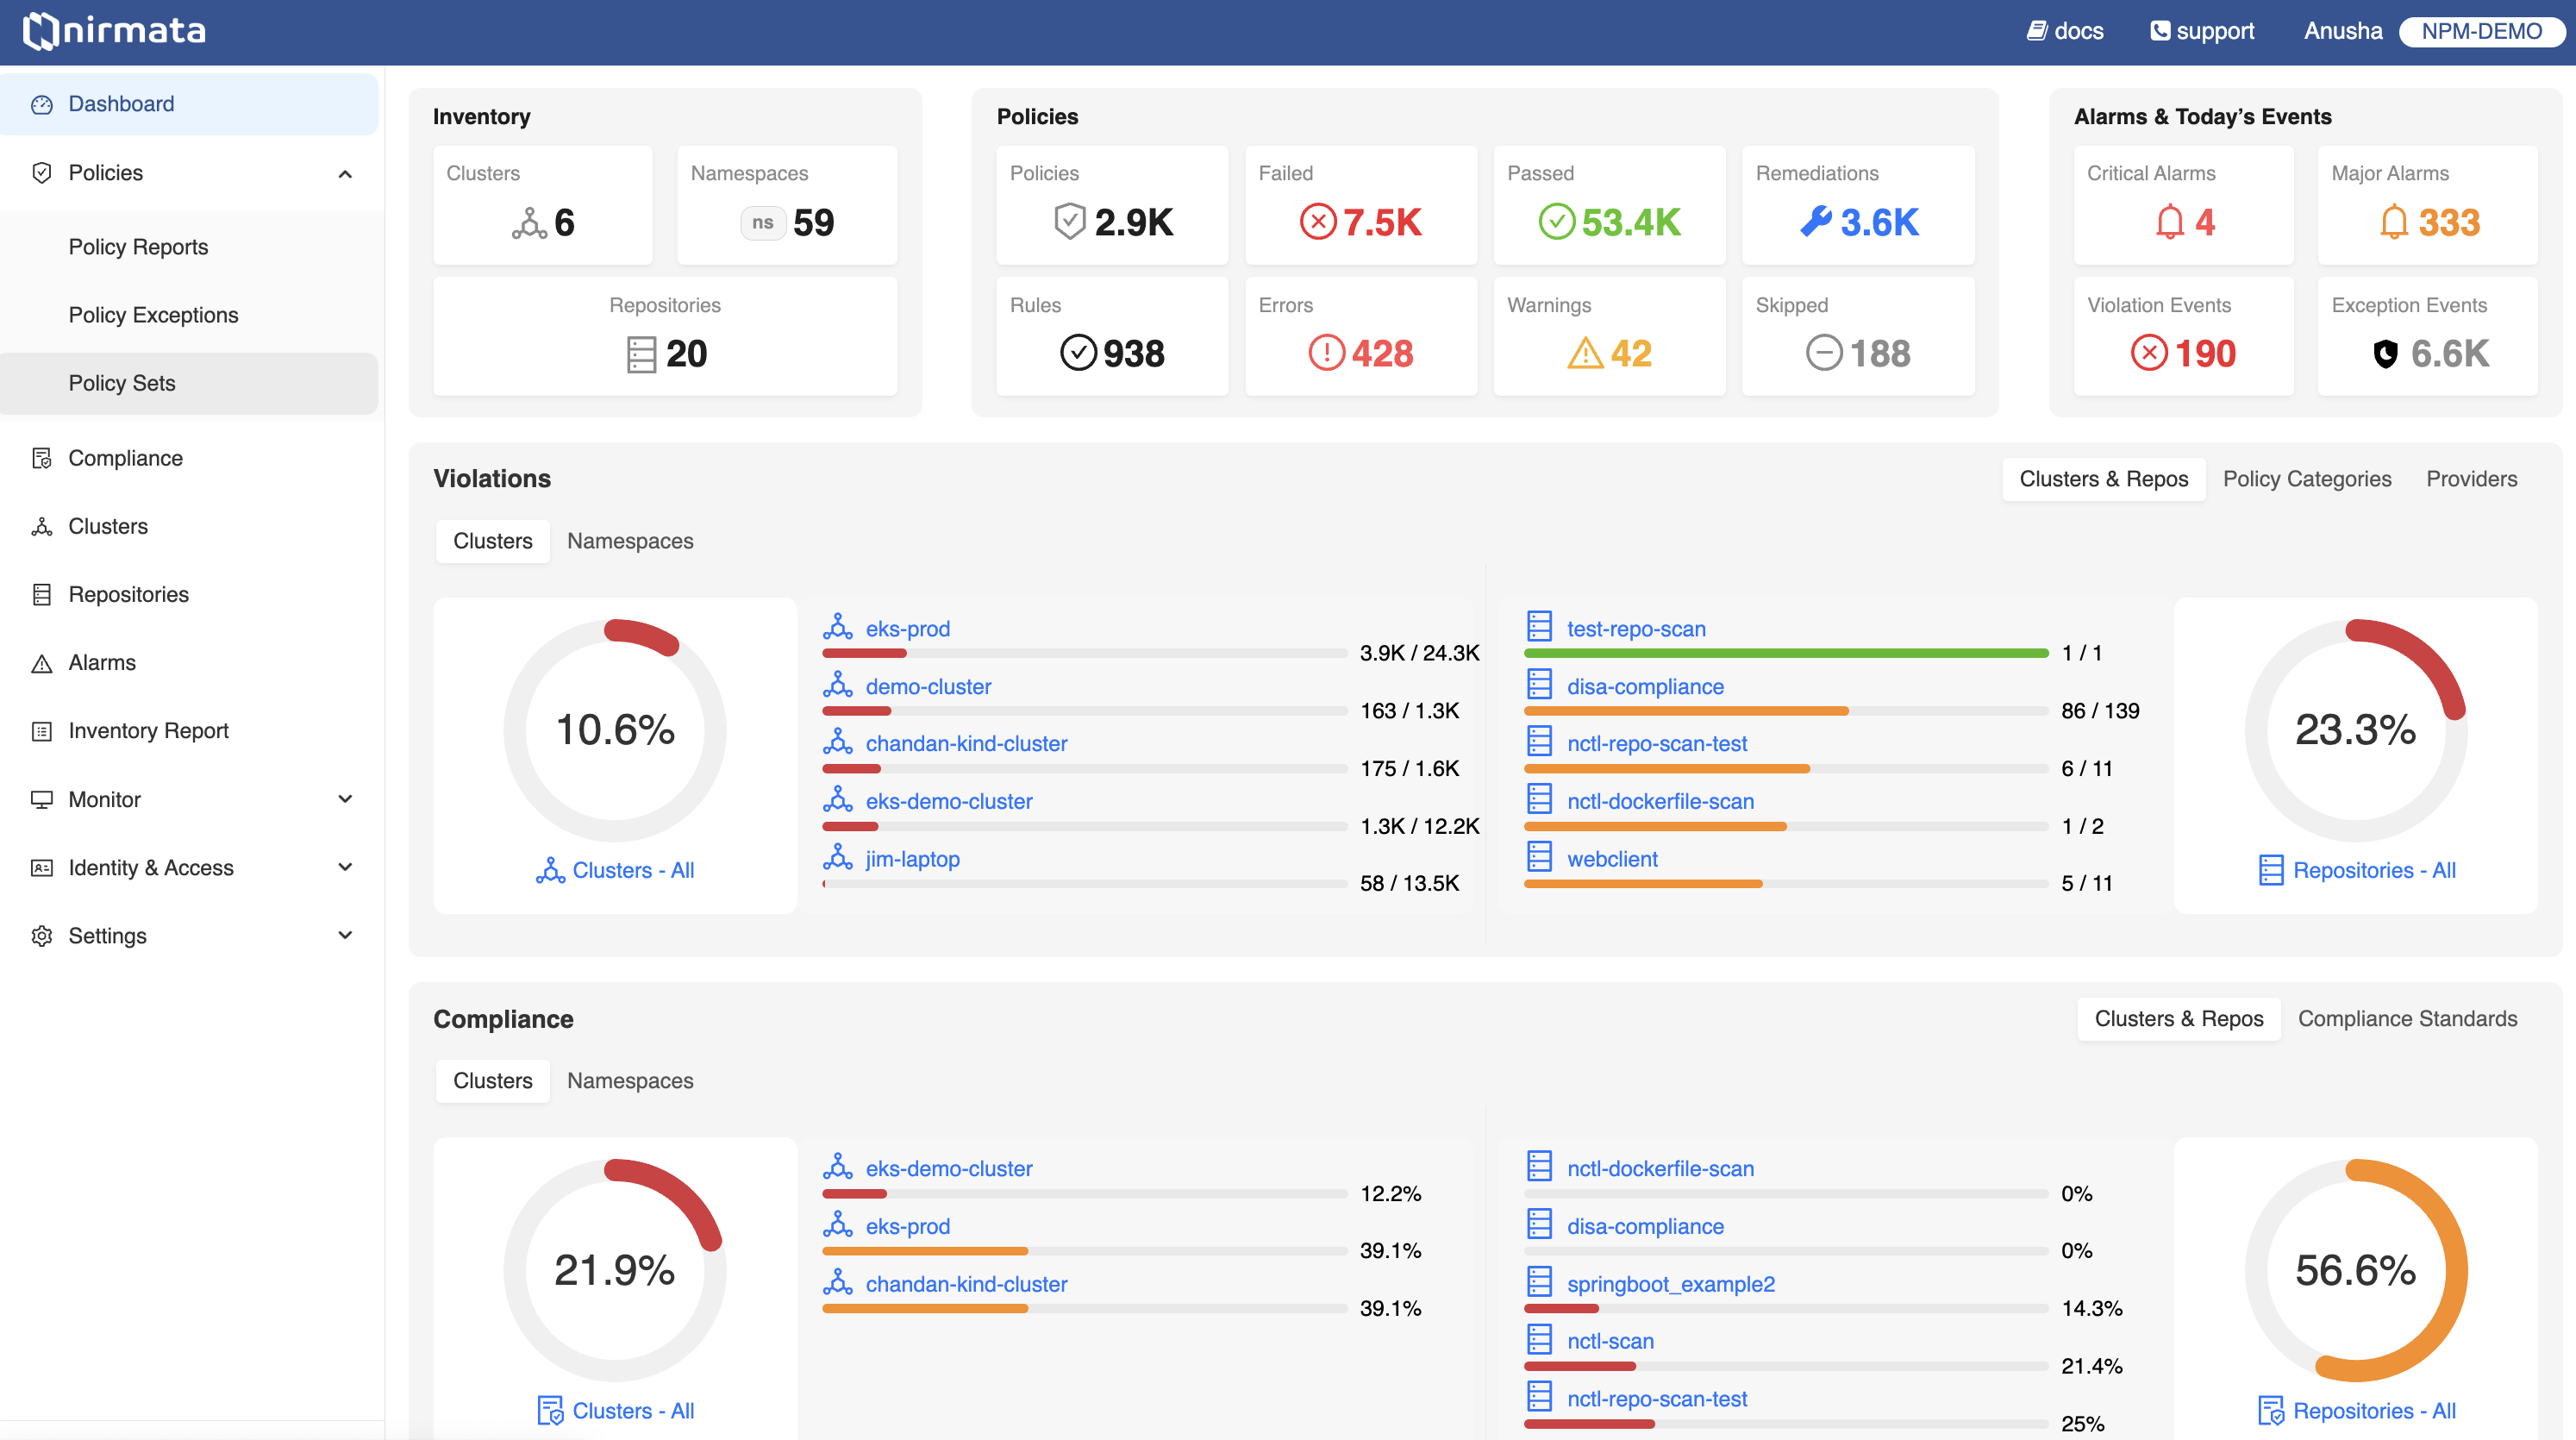
Nirmata Control Hub provides enterprise-grade policy governance and AI agent management across Kubernetes clusters, IaC pipelines, and cloud resources. It is built on [Kyverno](https://kyverno.io/), a CNCF Graduated project created by Nirmata.
## What's Inside
- [**Cluster Onboarding**]({{< relref "Cluster/" >}}) — Onboard and manage Kubernetes clusters
- [**Policy Hub**]({{< relref "policy-hub/" >}}) — Policy sets, reports, exceptions, remediations, and compliance
- [**Agent Hub**]({{< relref "agent-hub/" >}}) — Deploy and run AI governance agents *(In Private Preview)*
- [**Monitoring**]({{< relref "Monitoring/" >}}) — Cluster health, activity, and alerts
- [**Identity & Access**]({{< relref "identity-access/" >}}) — Users, teams, SAML/OIDC, and API keys
- [**Settings**]({{< relref "Settings/" >}}) — Integrations, GitHub App, Terraform, and MFA
- [**How-To Guides**]({{< relref "how-to/" >}}) — Step-by-step workflows for common tasks
---
## Get Started
## Activating Account
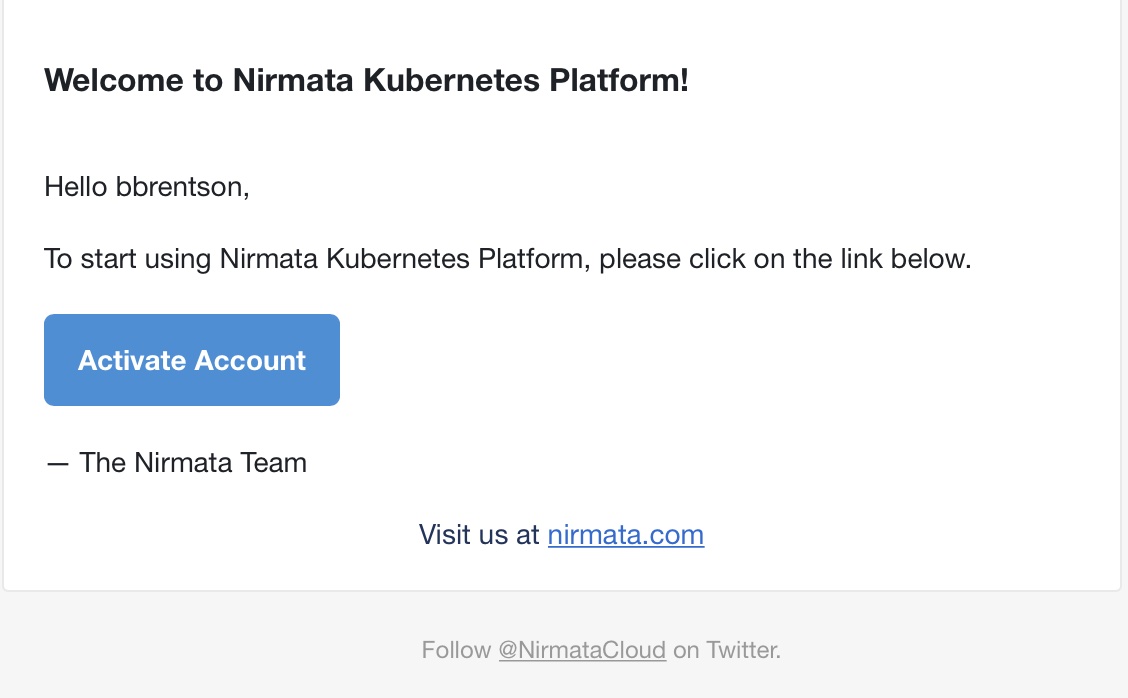
After registering for an account, you should receive an email with instructions on how to activate your account. If you do not receive an email, check your spam filters or other processes that could be blocking it. If this does not resolve the issue, contact [Nirmata Customer Support](https://nirmata.com/contact-us).
If you receive the activation email, click the Activate Account button.
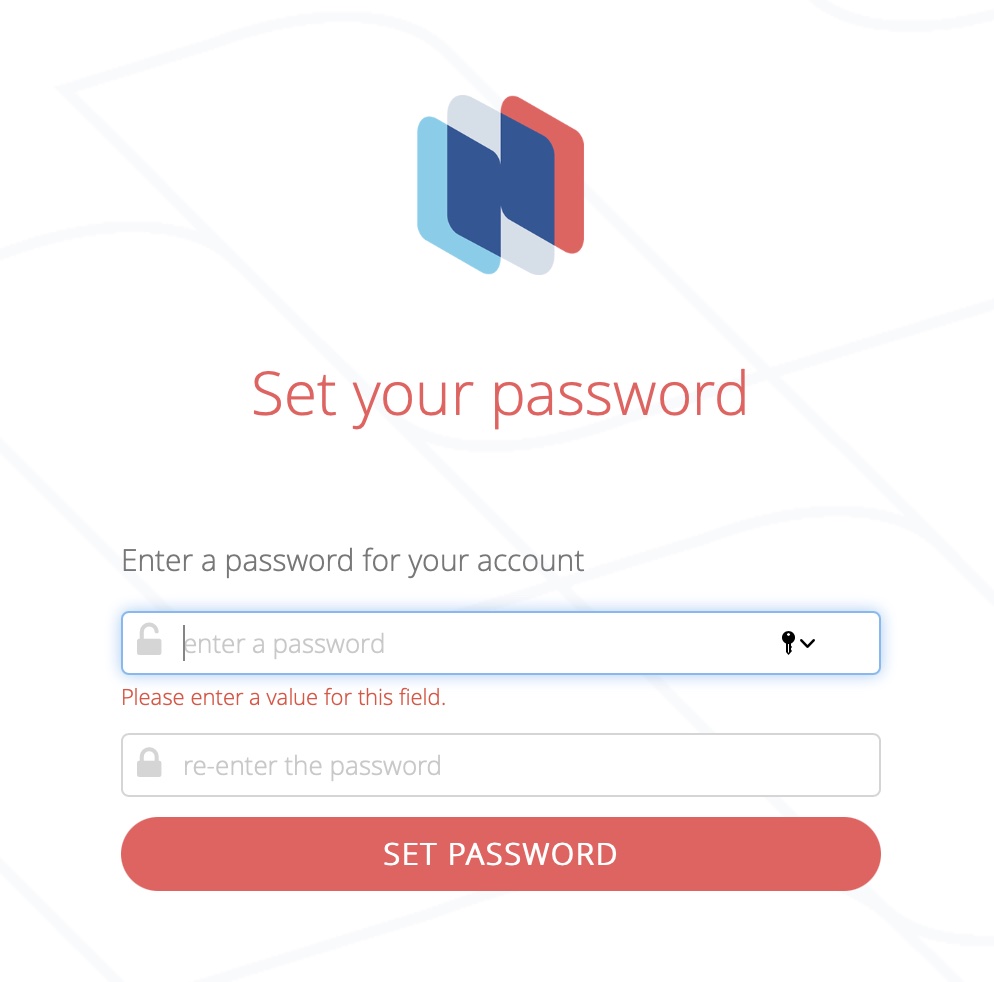
 This will open a web browser and take the user to a Nirmata page in order to create the user's initial password. Supply a password meeting or exceeding the requirements listed on the page.
 ### Get Started
After your account is fully activated, it's time to begin configuring the Kubernetes clusters that Nirmata Control Hub will work with. The opening screen shows an introduction page explaining what Nirmata Control Hub aims to accomplish. There are two buttons at the bottom of the page: See Features and Get Started.
For the purposes of this tutorial, click the **Get Started** button.
The next page lists the steps that need to be completed. These include installing the Nirmata Controller, connecting your cluster to Nirmata Control Hub, and then working with the systems within the framework by monitoring cluster details and policy violations.
### Get Started
After your account is fully activated, it's time to begin configuring the Kubernetes clusters that Nirmata Control Hub will work with. The opening screen shows an introduction page explaining what Nirmata Control Hub aims to accomplish. There are two buttons at the bottom of the page: See Features and Get Started.
For the purposes of this tutorial, click the **Get Started** button.
The next page lists the steps that need to be completed. These include installing the Nirmata Controller, connecting your cluster to Nirmata Control Hub, and then working with the systems within the framework by monitoring cluster details and policy violations.
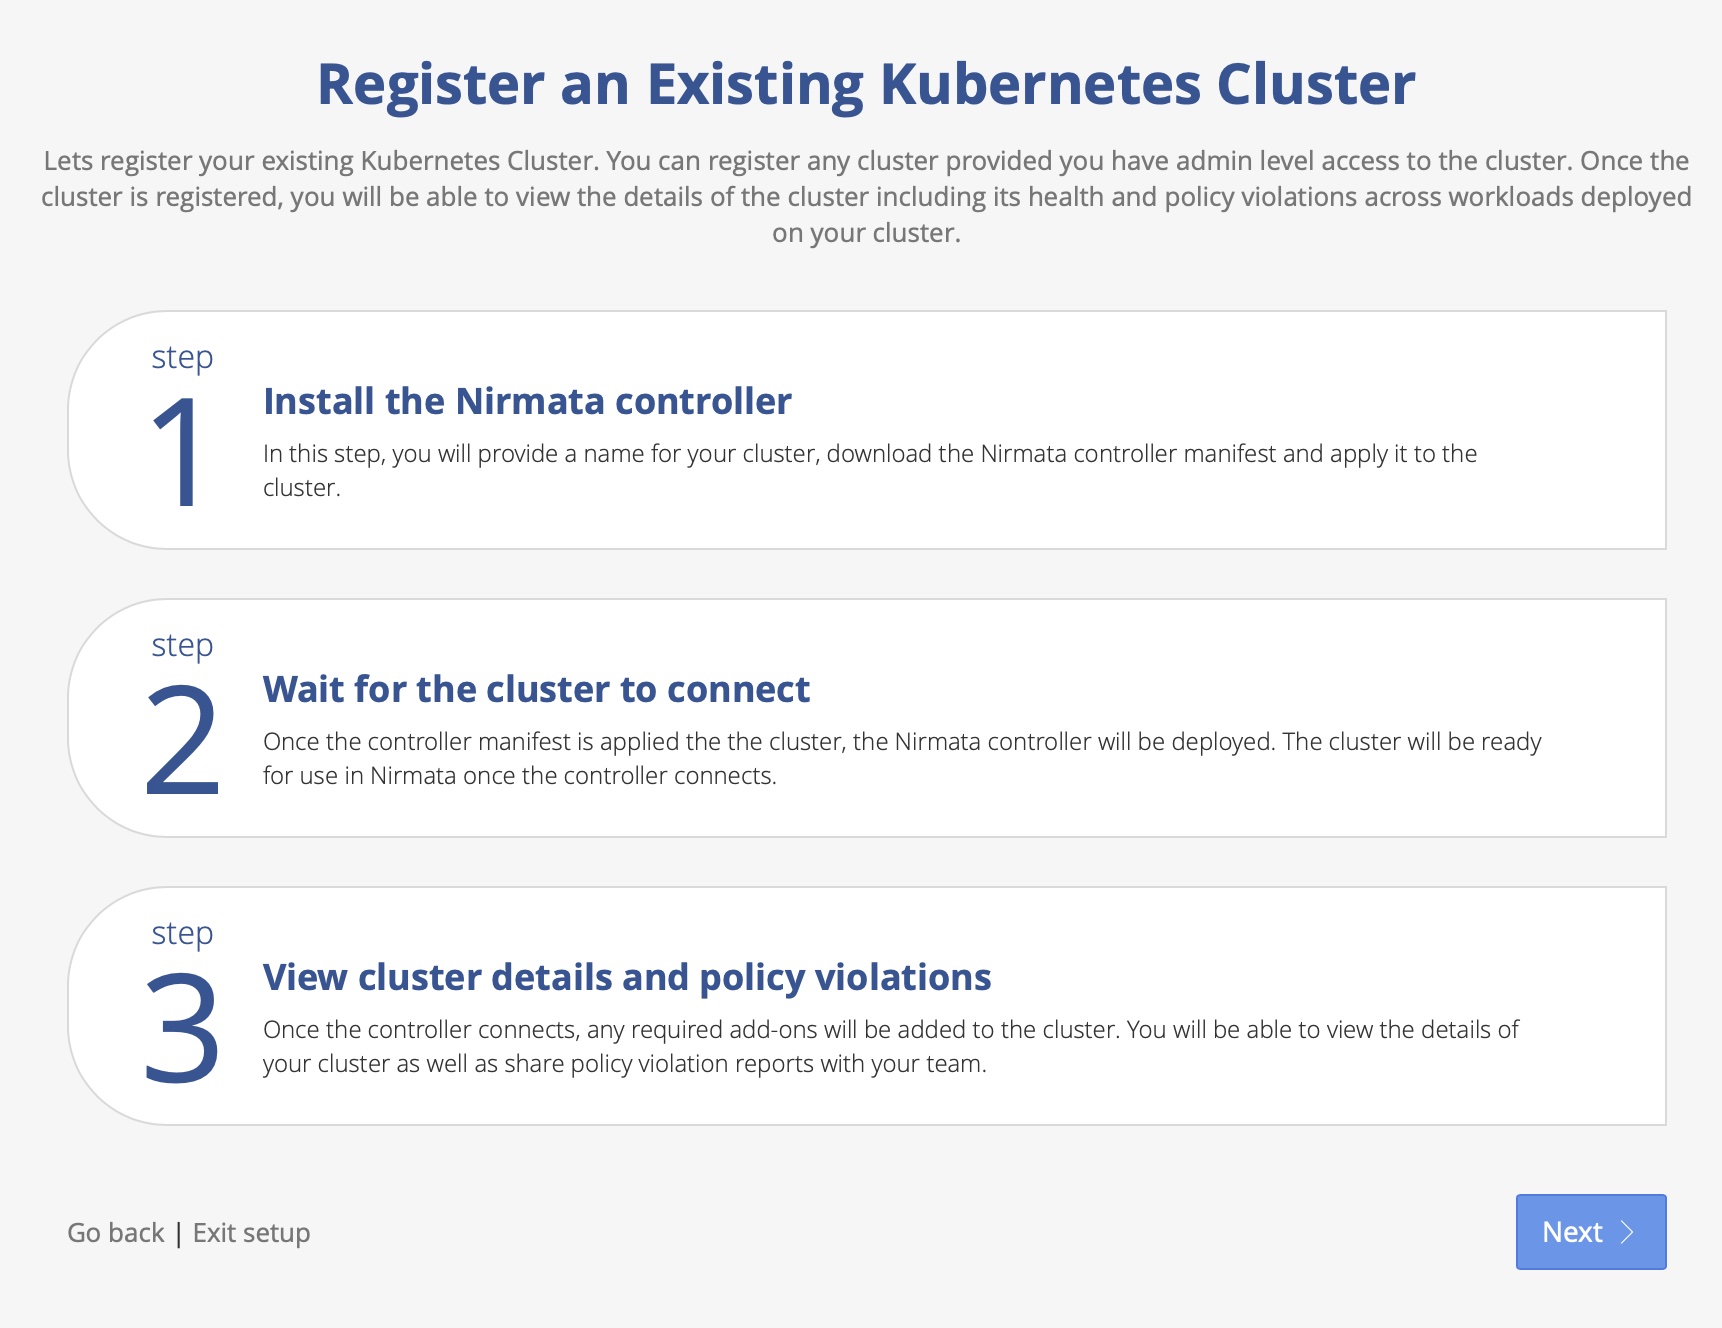 Click **Next** to proceed to the next screen. This will take you to the [Cluster Onboarding](./../cluster/) step.
---
## Policy Hub
> **Applies to:** Nirmata Control Hub 4.0 and later
Policy Hub is the central place in Nirmata Control Hub for managing all aspects of Kyverno policy governance across your clusters — from applying policy sets to reviewing violations, managing exceptions, and tracking compliance.
## Capabilities
- [Policy Sets]({{< relref "policy-sets/" >}}) — Apply curated and custom policy sets to clusters and namespaces
- [Policy Reports]({{< relref "policy-reports/" >}}) — View and share policy violation reports across clusters
- [Policy Exceptions]({{< relref "policy-exceptions/" >}}) — Manage temporary deviations from policy with approval workflows
- [Auto Remediations]({{< relref "Remediations/" >}}) — Automated, context-aware suggestions for resolving violations
- [Repository Scanning]({{< relref "repository-scan-reports/" >}}) — Scan Git repositories for policy compliance
- [Compliance]({{< relref "Compliance/" >}}) — Map policy violations to compliance controls and standards
- [Offline Cluster Scanning]({{< relref "offline-cluster-scanning/" >}}) — Scan clusters without in-cluster agents using nctl
---
## Agent Hub
> **Applies to:** Nirmata AI Agents 1.0 and later
> **In Private Preview** — Agent Hub is available to select customers. [Contact us to learn more](https://nirmata.com/request-a-demo/).
Agent Hub is where you deploy, configure, and run AI-powered governance agents from Nirmata Control Hub. Agents continuously monitor your clusters, run on-demand tasks, or execute scheduled governance workflows — all managed from a single control plane.
## Agent Types
- [Service Agents]({{< relref "service-agents/" >}}) — Autonomous in-cluster agents that run 24/7 to detect and remediate policy violations via GitOps PRs
- [Cloud Agents]({{< relref "cloud-agents/" >}}) — On-demand and scheduled agents launched from Control Hub for analysis, auditing, and reporting
- [Agent Skills]({{< relref "agent-skills/" >}}) — Extend agents with specialized governance skills *(In Private Preview)*
---
## Cluster Onboarding
> **Applies to:** Nirmata Control Hub 4.0 and later
## Prerequisites
Before onboarding your Kubernetes cluster to Nirmata Control Hub, ensure that your cluster is CNCF-compliant. You can onboard both cloud-provided and local Kubernetes clusters, such as kind and minikube clusters.
## Onboarding Workflow - UI Wizard
### Step 1: Add Cluster
1. Navigate to the Clusters page in Nirmata Control Hub.
1. Click on the Add Cluster button to open the onboarding wizard.
1. Enter Cluster Information:
1. Provide a name for your cluster.
1. Optionally, add labels to your cluster for better identification.
### Step 2: Choose Onboarding Method
You have two options for onboarding:
1. NCTL (Nirmata CLI): Recommended for users who want a streamlined process.
1. Helm: For users who prefer to use Helm charts. You can switch to the Helm tab for detailed instructions.
>NOTE: We recommend using NCTL if you are just trying out Nirmata, with version 4.7.0 or higher required for a smooth onboarding experience.
Follow the steps mentioned in the wizard and once the command runs successfully, run the `I have run the commands - Verify Kyverno` button.
### Step 3: Verify Kyverno Health
In this stage, we check the health of Kyverno running in the cluster to ensure it is optimally configured:
* No Greenfield Cluster Required: If your cluster is running an older version of Nirmata Enterprise for Kyverno or even open-source Kyverno, it can still be onboarded without issues.
* We will also recommend newer Nirmata Enterprise for Kyverno versions if an update is needed for optimal performance.
### Step 4: Select PolicySets
Nirmata provides several built-in policy sets that you can deploy to your cluster:
* Pod Security Standards (17 controls in total) are available by default during onboarding.
* You can choose to deploy these policies immediately or select them later if you prefer to manage policies on your own.
>NOTE: Deploying policy sets during onboarding is optional, and you can skip this step if you already have your own set of policies.
### Step 5: Final Verification
Once the above steps are completed, the final stage ensures that all related components are properly installed and running:
* Kyverno (opensource or enterprise).
* Kyverno Operator for health monitoring and policy management.
* PolicySets (optional. Only if you had installed policysets in previous step.)
* Nirmata kube-controller, the agent that communicates with Nirmata SaaS and monitors your cluster.
## Onboarding with the Helm chart
### Add and update Helm repo
Add the Nirmata Helm chart repository.
```bash
helm repo add nirmata https://nirmata.github.io/kyverno-charts/
helm repo update nirmata
```text
### Install Nirmata Kube Controller
#### Using a User API Token
```bash
helm install nirmata-kube-controller nirmata/nirmata-kube-controller -n nirmata --create-namespace \
--set cluster.name=test \
--set namespace=nirmata \
--set apiToken= \
--set features.policyExceptions.enabled=true \
--set features.policySets.enabled=true
```text
#### Using a Service Account Token (Recommended for Automation)
For GitOps pipelines and automated cluster registration workflows, you can authenticate using an Nirmata Control Hub Service Account token instead of a user API token. The `serviceAccountToken` field replaces `apiToken` and accepts the Service Account secret generated in Nirmata Control Hub.
```bash
helm install nirmata-kube-controller nirmata/nirmata-kube-controller -n nirmata --create-namespace \
--set cluster.name= \
--set serviceAccountToken= \
--set features.policyExceptions.enabled=true \
--set features.policySets.enabled=true \
--set clusterOnboardingToken= \
--set nirmataURL=wss://nirmata.io/tunnels
```text
To create a Service Account and generate a token:
1. Log in to [Nirmata Control Hub](https://nirmata.io)
2. Navigate to **Identity & Access** from the left sidebar
3. Go to the **Service Accounts** section and create a new Service Account with the appropriate cluster registration permissions
4. Copy the generated secret and use it as the `serviceAccountToken` value
>NOTE: You will have a clusterOnboardingToken only if you are installing from the UI wizard. If you are making this a part of automation, you can skip this field.
### Install Nirmata Enterprise for Kyverno Operator
The enterprise kyverno operator is used to monitor Kyverno, and its policies. It is also used to prevent tampering of Kyverno configuration and policies in the cluster.
To install the enterprise kyverno operator, run the following commands.
```bash
helm install kyverno-operator nirmata/nirmata-kyverno-operator -n nirmata-system \
--create-namespace \
--set enablePolicyset=true
```text
>NOTE: To install reports server along with enterprise kyverno, follow the documentation [here](../../controllers/n4k/reports-server/#installation). The below command installs **only** enterprise kyverno (without reports-server).
### Install Nirmata Enterprise for Kyverno
```bash
helm install kyverno nirmata/kyverno -n kyverno --create-namespace \
--set features.policyExceptions.namespace="kyverno" \
--set crds.reportsServer.enabled=false \
--set features.policyExceptions.enabled=true
```
## Secure Installation Tips
### Configure Nirmata Permissions
See [Cluster Deployment Options](deployment-options/) to choose between Read-Only mode (you manage resources with your own tools) and Read-Write mode (Nirmata deploys Policies and Policy Exceptions directly).
---
## Monitoring
> **Applies to:** Nirmata Control Hub 4.0 and later
As an admin or security professional, you need to view the details of all activities (audit) and events initiated or performed on Nirmata Control Hub. This information is required not only for troubleshooting but also for checking Kyverno policy compliance.
The Policy Monitor provides you with activity details, events, policy health, and policy engine health information.
---
## Identity and Access
> **Applies to:** Nirmata Control Hub 4.0 and later
---
Identity & Access Management lets you manage users, set user privileges, and configure access methods such as SAML, OIDC, and MFA.
Identity and Access Management allows you to configure:
1. Users
2. OpenID Connect (OIDC) based authentication
---
## Settings
> **Applies to:** Nirmata Control Hub 4.0 and later
The settings feature in Nirmata allows you to edit and update your user profile details. Users can access their account information in *Settings* > *Account*, and set up **Git**, **Jira**, and **Vault** integrations with Nirmata.
>Note: Administrators have access to all resources and can manage other users.
In this section you will learn more about the following:
1. [Account](/docs/control-hub/settings/account)
2. [Profile](/docs/control-hub/settings/profile)
3. [Alarms](/docs/control-hub/settings/alarms)
4. [Integrations](/docs/control-hub/settings/integrations)
---
## Workflows
This section contains information about the different workflows for NCTL and Nirmata Control Hub.
---
## Troubleshooting Guide
> **Applies to:** Nirmata Control Hub 4.0 and later
### Cluster with proxy
To allow the Nirmata Kubernetes Controller to connect successfully in a cluster with a proxy environment, edit the `nirmata-kube-controller` deployment by running the following command on any node that has `kubectl` installed:
```bash
kubectl edit deployment nirmata-kube-controller -n nirmata
```text
Add the environment variables `NO_PROXY`, `HTTP_PROXY`, and `HTTPS_PROXY` with their respective values under the env of the container in nirmata-kube-controller deployment and then save to apply the changes.
```yaml
env:
- name: TOKEN
...
- name: NO_PROXY
value:
- name: HTTP_PROXY
value: http://:
- name: HTTPS_PROXY
value: https://:
...
```text
### Verify nirmata-kube-controller installation
To check if the Nirmata Kubernetes Controller was installed correctly, run this command to verify the controller pod is running:
```bash
kubectl get pod -n nirmata
```text
### Reinstalling Nirmata Kubernetes Controller
If the Nirmata Kubernetes Controller is not installed or has failed, you can remove existing resources by running the commands given below:
```bash
kubectl delete namespaces nirmata
kubectl delete clusterrolebindings nirmata-cluster-admin-binding
kubectl delete clusterrolebindings nirmata-controller-binding
kubectl delete clusterroles nirmata:nirmata-readonly
```text
And then install the Nirmata Kubernetes Controller by downloading the YAML from the Nirmata Control Hub and running this command:
```bash
kubectl create -f nirmata-kube-controller.yaml
```text
>NOTE: The name of the downloaded manifest YAML file may be different, so use the appropriate filename in the commands.
Click **Next** to proceed to the next screen. This will take you to the [Cluster Onboarding](./../cluster/) step.
---
## Policy Hub
> **Applies to:** Nirmata Control Hub 4.0 and later
Policy Hub is the central place in Nirmata Control Hub for managing all aspects of Kyverno policy governance across your clusters — from applying policy sets to reviewing violations, managing exceptions, and tracking compliance.
## Capabilities
- [Policy Sets]({{< relref "policy-sets/" >}}) — Apply curated and custom policy sets to clusters and namespaces
- [Policy Reports]({{< relref "policy-reports/" >}}) — View and share policy violation reports across clusters
- [Policy Exceptions]({{< relref "policy-exceptions/" >}}) — Manage temporary deviations from policy with approval workflows
- [Auto Remediations]({{< relref "Remediations/" >}}) — Automated, context-aware suggestions for resolving violations
- [Repository Scanning]({{< relref "repository-scan-reports/" >}}) — Scan Git repositories for policy compliance
- [Compliance]({{< relref "Compliance/" >}}) — Map policy violations to compliance controls and standards
- [Offline Cluster Scanning]({{< relref "offline-cluster-scanning/" >}}) — Scan clusters without in-cluster agents using nctl
---
## Agent Hub
> **Applies to:** Nirmata AI Agents 1.0 and later
> **In Private Preview** — Agent Hub is available to select customers. [Contact us to learn more](https://nirmata.com/request-a-demo/).
Agent Hub is where you deploy, configure, and run AI-powered governance agents from Nirmata Control Hub. Agents continuously monitor your clusters, run on-demand tasks, or execute scheduled governance workflows — all managed from a single control plane.
## Agent Types
- [Service Agents]({{< relref "service-agents/" >}}) — Autonomous in-cluster agents that run 24/7 to detect and remediate policy violations via GitOps PRs
- [Cloud Agents]({{< relref "cloud-agents/" >}}) — On-demand and scheduled agents launched from Control Hub for analysis, auditing, and reporting
- [Agent Skills]({{< relref "agent-skills/" >}}) — Extend agents with specialized governance skills *(In Private Preview)*
---
## Cluster Onboarding
> **Applies to:** Nirmata Control Hub 4.0 and later
## Prerequisites
Before onboarding your Kubernetes cluster to Nirmata Control Hub, ensure that your cluster is CNCF-compliant. You can onboard both cloud-provided and local Kubernetes clusters, such as kind and minikube clusters.
## Onboarding Workflow - UI Wizard
### Step 1: Add Cluster
1. Navigate to the Clusters page in Nirmata Control Hub.
1. Click on the Add Cluster button to open the onboarding wizard.
1. Enter Cluster Information:
1. Provide a name for your cluster.
1. Optionally, add labels to your cluster for better identification.
### Step 2: Choose Onboarding Method
You have two options for onboarding:
1. NCTL (Nirmata CLI): Recommended for users who want a streamlined process.
1. Helm: For users who prefer to use Helm charts. You can switch to the Helm tab for detailed instructions.
>NOTE: We recommend using NCTL if you are just trying out Nirmata, with version 4.7.0 or higher required for a smooth onboarding experience.
Follow the steps mentioned in the wizard and once the command runs successfully, run the `I have run the commands - Verify Kyverno` button.
### Step 3: Verify Kyverno Health
In this stage, we check the health of Kyverno running in the cluster to ensure it is optimally configured:
* No Greenfield Cluster Required: If your cluster is running an older version of Nirmata Enterprise for Kyverno or even open-source Kyverno, it can still be onboarded without issues.
* We will also recommend newer Nirmata Enterprise for Kyverno versions if an update is needed for optimal performance.
### Step 4: Select PolicySets
Nirmata provides several built-in policy sets that you can deploy to your cluster:
* Pod Security Standards (17 controls in total) are available by default during onboarding.
* You can choose to deploy these policies immediately or select them later if you prefer to manage policies on your own.
>NOTE: Deploying policy sets during onboarding is optional, and you can skip this step if you already have your own set of policies.
### Step 5: Final Verification
Once the above steps are completed, the final stage ensures that all related components are properly installed and running:
* Kyverno (opensource or enterprise).
* Kyverno Operator for health monitoring and policy management.
* PolicySets (optional. Only if you had installed policysets in previous step.)
* Nirmata kube-controller, the agent that communicates with Nirmata SaaS and monitors your cluster.
## Onboarding with the Helm chart
### Add and update Helm repo
Add the Nirmata Helm chart repository.
```bash
helm repo add nirmata https://nirmata.github.io/kyverno-charts/
helm repo update nirmata
```text
### Install Nirmata Kube Controller
#### Using a User API Token
```bash
helm install nirmata-kube-controller nirmata/nirmata-kube-controller -n nirmata --create-namespace \
--set cluster.name=test \
--set namespace=nirmata \
--set apiToken= \
--set features.policyExceptions.enabled=true \
--set features.policySets.enabled=true
```text
#### Using a Service Account Token (Recommended for Automation)
For GitOps pipelines and automated cluster registration workflows, you can authenticate using an Nirmata Control Hub Service Account token instead of a user API token. The `serviceAccountToken` field replaces `apiToken` and accepts the Service Account secret generated in Nirmata Control Hub.
```bash
helm install nirmata-kube-controller nirmata/nirmata-kube-controller -n nirmata --create-namespace \
--set cluster.name= \
--set serviceAccountToken= \
--set features.policyExceptions.enabled=true \
--set features.policySets.enabled=true \
--set clusterOnboardingToken= \
--set nirmataURL=wss://nirmata.io/tunnels
```text
To create a Service Account and generate a token:
1. Log in to [Nirmata Control Hub](https://nirmata.io)
2. Navigate to **Identity & Access** from the left sidebar
3. Go to the **Service Accounts** section and create a new Service Account with the appropriate cluster registration permissions
4. Copy the generated secret and use it as the `serviceAccountToken` value
>NOTE: You will have a clusterOnboardingToken only if you are installing from the UI wizard. If you are making this a part of automation, you can skip this field.
### Install Nirmata Enterprise for Kyverno Operator
The enterprise kyverno operator is used to monitor Kyverno, and its policies. It is also used to prevent tampering of Kyverno configuration and policies in the cluster.
To install the enterprise kyverno operator, run the following commands.
```bash
helm install kyverno-operator nirmata/nirmata-kyverno-operator -n nirmata-system \
--create-namespace \
--set enablePolicyset=true
```text
>NOTE: To install reports server along with enterprise kyverno, follow the documentation [here](../../controllers/n4k/reports-server/#installation). The below command installs **only** enterprise kyverno (without reports-server).
### Install Nirmata Enterprise for Kyverno
```bash
helm install kyverno nirmata/kyverno -n kyverno --create-namespace \
--set features.policyExceptions.namespace="kyverno" \
--set crds.reportsServer.enabled=false \
--set features.policyExceptions.enabled=true
```
## Secure Installation Tips
### Configure Nirmata Permissions
See [Cluster Deployment Options](deployment-options/) to choose between Read-Only mode (you manage resources with your own tools) and Read-Write mode (Nirmata deploys Policies and Policy Exceptions directly).
---
## Monitoring
> **Applies to:** Nirmata Control Hub 4.0 and later
As an admin or security professional, you need to view the details of all activities (audit) and events initiated or performed on Nirmata Control Hub. This information is required not only for troubleshooting but also for checking Kyverno policy compliance.
The Policy Monitor provides you with activity details, events, policy health, and policy engine health information.
---
## Identity and Access
> **Applies to:** Nirmata Control Hub 4.0 and later
---
Identity & Access Management lets you manage users, set user privileges, and configure access methods such as SAML, OIDC, and MFA.
Identity and Access Management allows you to configure:
1. Users
2. OpenID Connect (OIDC) based authentication
---
## Settings
> **Applies to:** Nirmata Control Hub 4.0 and later
The settings feature in Nirmata allows you to edit and update your user profile details. Users can access their account information in *Settings* > *Account*, and set up **Git**, **Jira**, and **Vault** integrations with Nirmata.
>Note: Administrators have access to all resources and can manage other users.
In this section you will learn more about the following:
1. [Account](/docs/control-hub/settings/account)
2. [Profile](/docs/control-hub/settings/profile)
3. [Alarms](/docs/control-hub/settings/alarms)
4. [Integrations](/docs/control-hub/settings/integrations)
---
## Workflows
This section contains information about the different workflows for NCTL and Nirmata Control Hub.
---
## Troubleshooting Guide
> **Applies to:** Nirmata Control Hub 4.0 and later
### Cluster with proxy
To allow the Nirmata Kubernetes Controller to connect successfully in a cluster with a proxy environment, edit the `nirmata-kube-controller` deployment by running the following command on any node that has `kubectl` installed:
```bash
kubectl edit deployment nirmata-kube-controller -n nirmata
```text
Add the environment variables `NO_PROXY`, `HTTP_PROXY`, and `HTTPS_PROXY` with their respective values under the env of the container in nirmata-kube-controller deployment and then save to apply the changes.
```yaml
env:
- name: TOKEN
...
- name: NO_PROXY
value:
- name: HTTP_PROXY
value: http://:
- name: HTTPS_PROXY
value: https://:
...
```text
### Verify nirmata-kube-controller installation
To check if the Nirmata Kubernetes Controller was installed correctly, run this command to verify the controller pod is running:
```bash
kubectl get pod -n nirmata
```text
### Reinstalling Nirmata Kubernetes Controller
If the Nirmata Kubernetes Controller is not installed or has failed, you can remove existing resources by running the commands given below:
```bash
kubectl delete namespaces nirmata
kubectl delete clusterrolebindings nirmata-cluster-admin-binding
kubectl delete clusterrolebindings nirmata-controller-binding
kubectl delete clusterroles nirmata:nirmata-readonly
```text
And then install the Nirmata Kubernetes Controller by downloading the YAML from the Nirmata Control Hub and running this command:
```bash
kubectl create -f nirmata-kube-controller.yaml
```text
>NOTE: The name of the downloaded manifest YAML file may be different, so use the appropriate filename in the commands.