---
title: "API Tokens"
diataxis: how-to
applies_to:
product: "nirmata-control-hub"
audience: ["platform-engineer"]
last_updated: 2026-03-25
url: https://docs.nirmata.io/docs/control-hub/identity-access/api-keys/
---
A Nirmata API Token is an access key that is required to login to Nirmata Control Hub via NCTL, or to make raw API requests to Nirmata Control Hub. The API token is available in the Nirmata Control Hub profile.
### Generating API Tokens
To generate an API token in Nirmata Control Hub:
1. Go to **Settings**>**Profile**. The page displays all the information related to the Nirmata Control Hub profile along with the API key.
2. Click on the `Generate API Key` button located on the top right corner of the screen. A dialog box appears with a prompt to enter the password.
>Note: If an API Key was already generated and the generated token is within the expiry time, the API Key will be automatically fetched within the dialog box.
3. Next, enter the password set for the Nirmata Control Hub profile under the `Password` section and leave the `API Key` section empty.
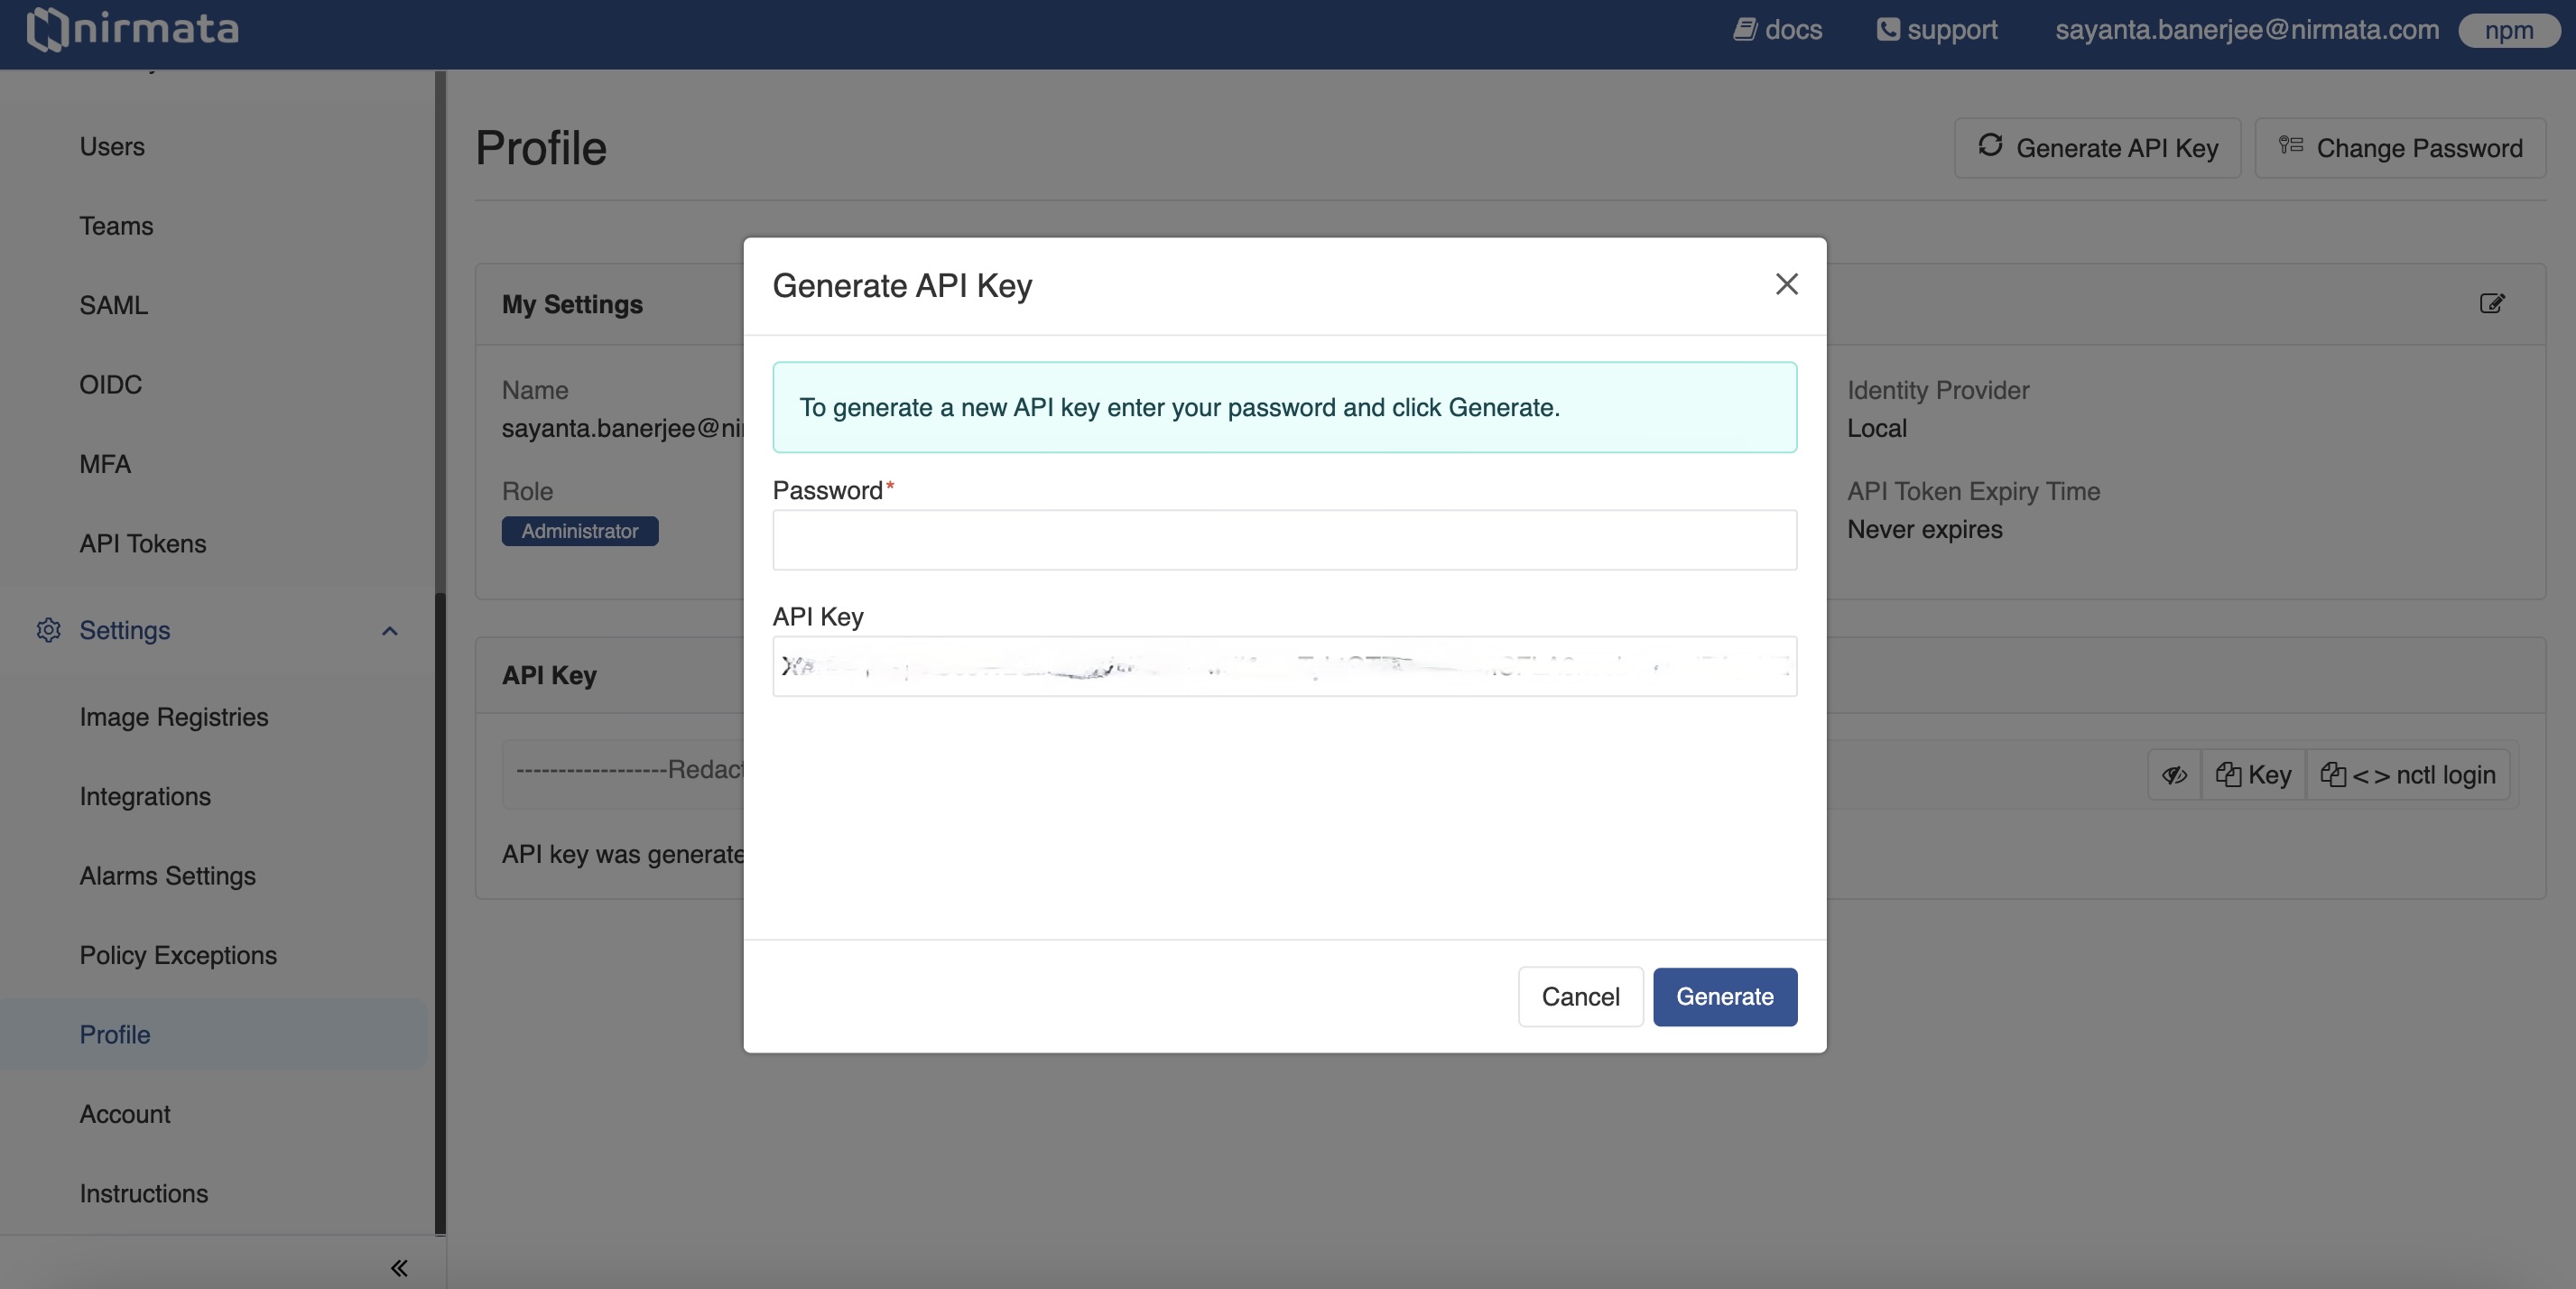
4. Finally, click **Generate** to generate a new API Key.
### Managing API Token Settings
A Nirmata Admin User can manage and review API Token settings as per requirements.
To manage API Token settings:
1. Go to **Identity & Access** -> **API Tokens**. The Settings page for API Tokens opens.
2. Manage the generation and usage of API Tokens for users by clicking the radio button beside the available options:
a. Selecting `None` will prevent all users from generating and using API Tokens.
b. Selecting `All users` will allow all users to generate and use API Tokens. Click the radio button beside `Token lifetime` to set a specific expiry time for API Tokens, or select `Never expires` to set tokens that don't expire.
c. Selecting `Selected users based on their` allows you to choose specific users based on their role and ID provider:
i. Select `Role` or `ID Provider` from the dropdown menu.
ii. Choose the specific role or ID provider from the next dropdown.
iii. Click the radio button beside `Token lifetime` to set a specific expiry time, or select `Never expires` to set tokens that don't expire for users of the selected role or ID provider.
iv. Click the `+` button to add additional roles or ID providers.
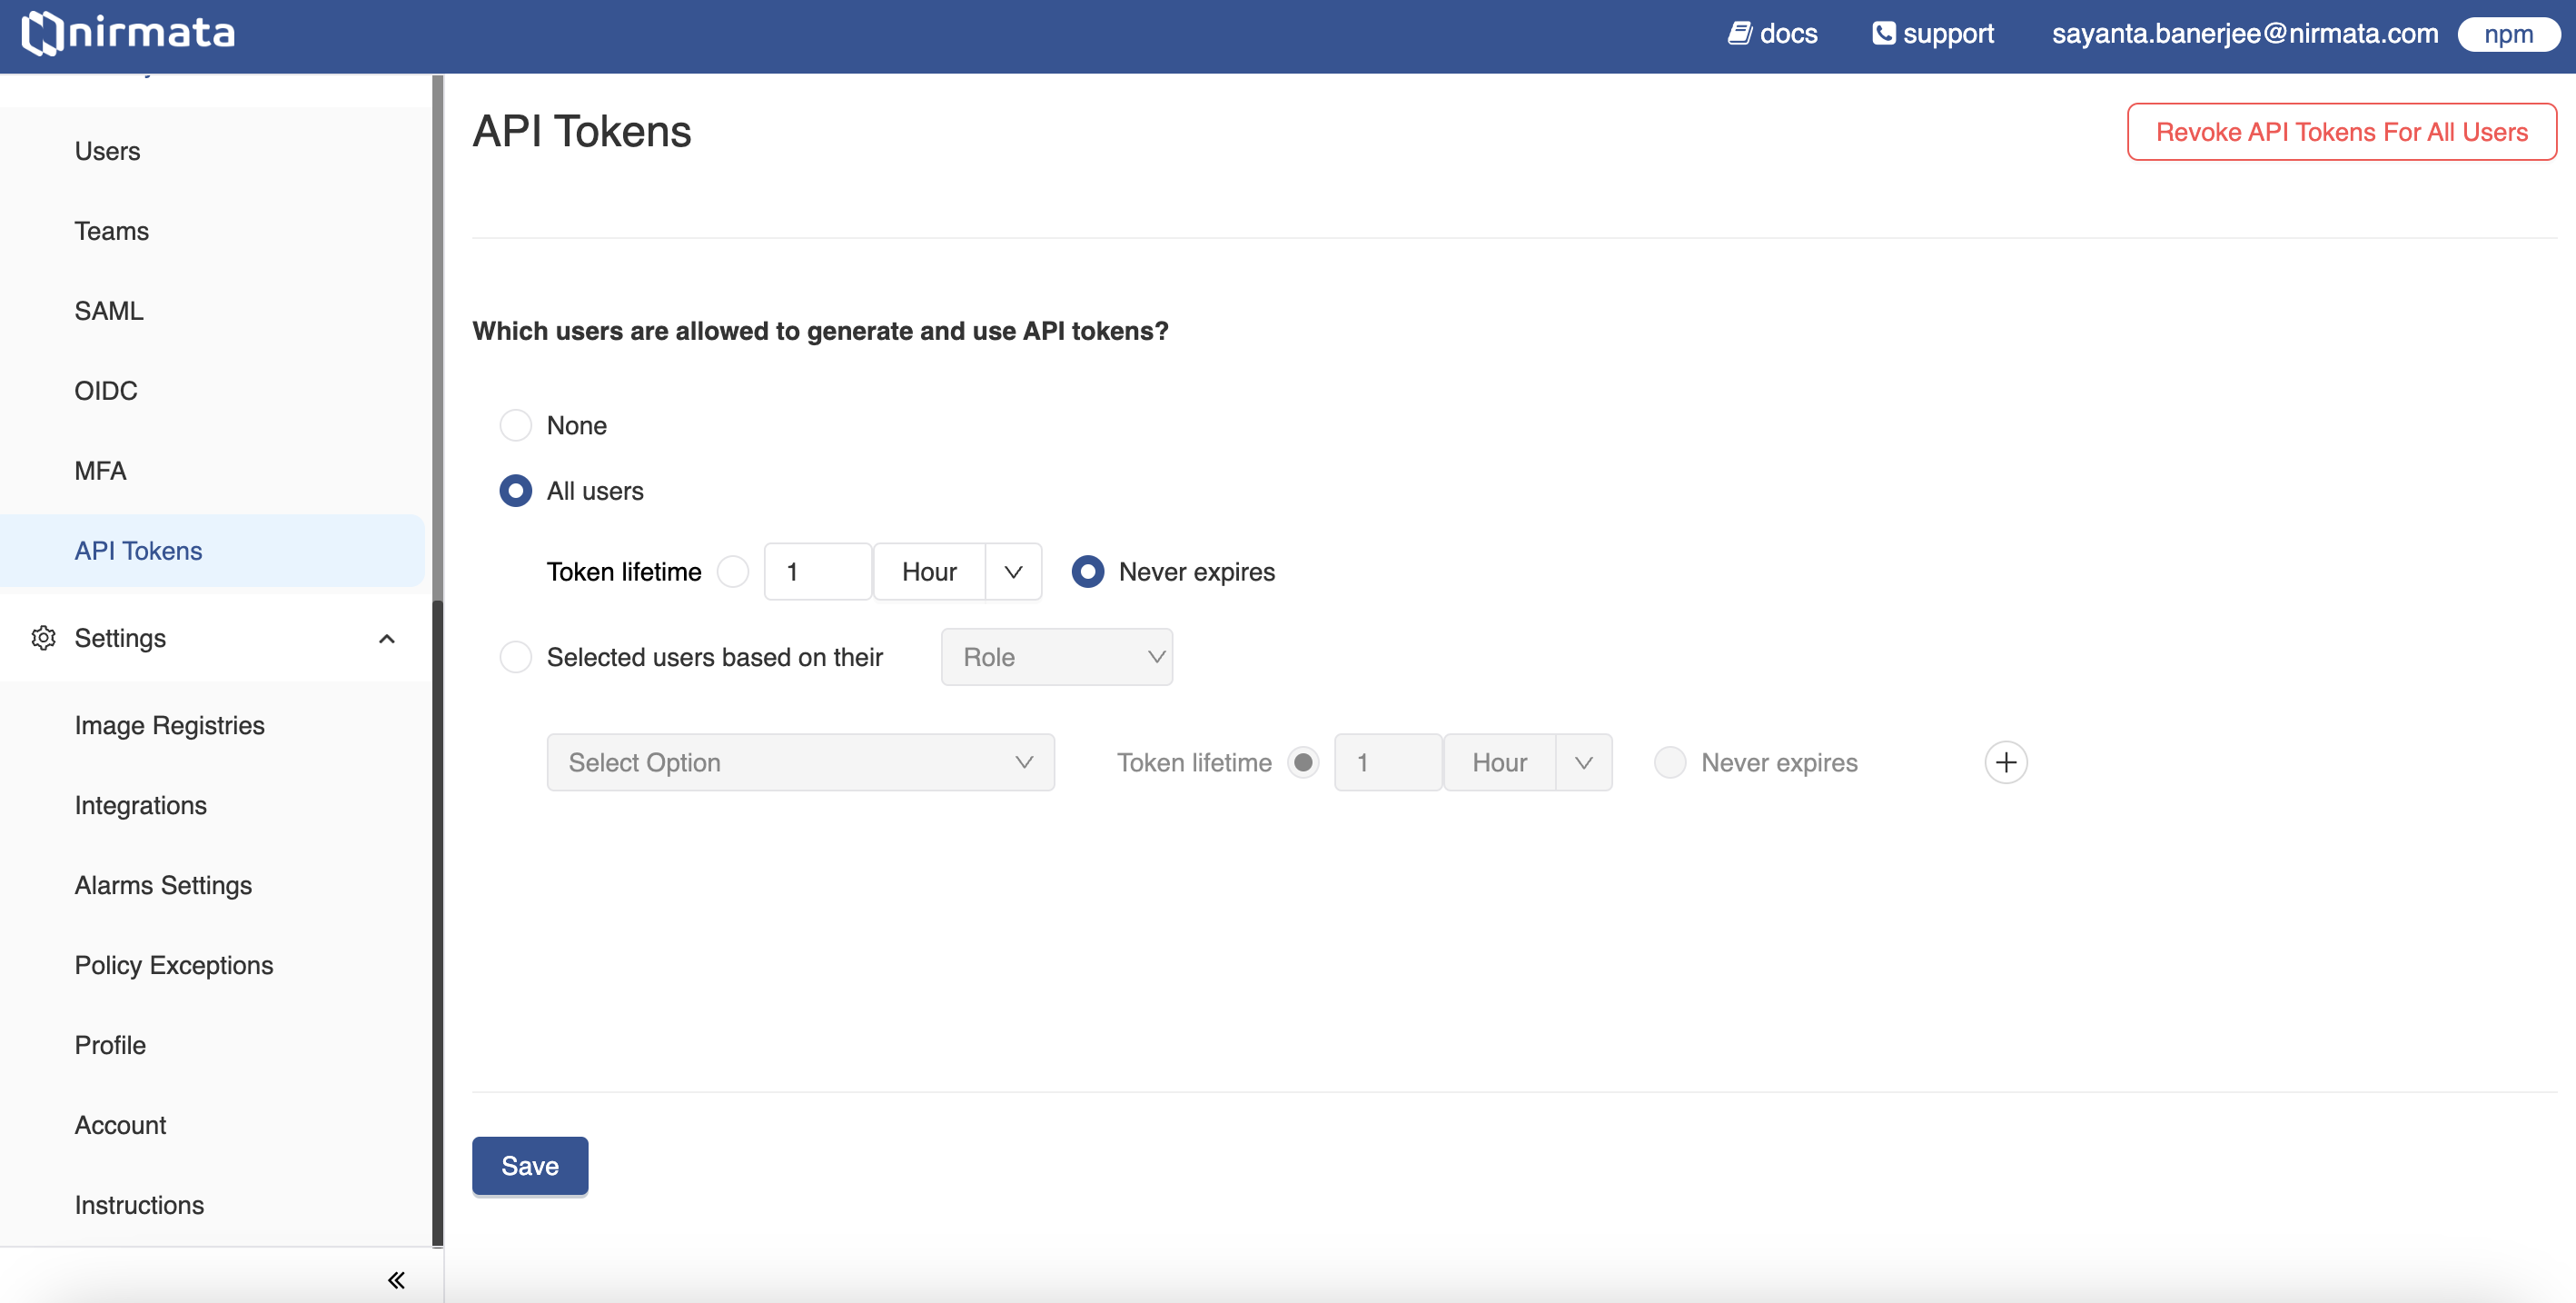
3. Click **Save**.