---
title: "Pipeline Scanning"
diataxis: how-to
applies_to:
product: "nirmata-control-hub"
audience: ["platform-engineer","cluster-admin"]
last_updated: 2026-03-25
url: https://docs.nirmata.io/docs/control-hub/how-to/pipelinescanning/
---
## Pipeline Scanning Workflow
[nctl scan](https://docs.nirmata.io/docs/nctl/commands/nctl_scan/) can be used within the local CLI environment; however, its true potential is unlocked when utilized within CI pipelines to scan code repositories.
 Platform or security team administrators are responsible for defining the policies that an organization needs to adhere to. These policies are stored as YAML files in Git repositories, as OCI images in the OCI registry, or are made available as Helm charts. The DevOps users or IT team is responsible for managing the configuration files, whether they are Kubernetes manifests, IaC files, or any JSON specs stored in Git repositories.
Users who want to make changes to the manifests in these repositories will create a pull request (PR). CI pipelines are configured to trigger on various actions, such as creating a PR, merging code to the main branch, or running at regular intervals.
## Setting up the CI Pipeline
NCTL works with any CI pipeline (GitHub Action, GitLab CI, Jenkins, Harness CI, etc.).
---
## GitHub Action
A dedicated GitHub Action is available through the [GitHub marketplace](https://github.com/marketplace/actions/nctl-scan-installer). With this action, `nctl scan` can be used in GitHub Actions workflows to scan the configuration files present in the repository against policies that are defined centrally. In case of a failure, the entire action can be configured to fail, meaning that the test pipeline will fail, and users will get quick feedback on their changes. The results of the scan are available in Nirmata Control Hub for viewing. Nirmata Control Hub provides insights to platform administrators on the overall governance of different code repositories in their organization.
### Understanding the GitHub Action Workflow
To have a look at the workflow manifest file, refer to the `scan-outputs.yaml` file in the `.github/workflows` section of the **nctl-shift-left** [Github repository](https://github.com/nirmata/nctl-shift-left/).
Use the readily available `nctl` action.
````bash
- name: nctl-scan-installer
uses: nirmata/action-install-nctl-scan@v0.0.6
````
Set the right environment secrets.
````bash
env:
NIRMATA_TOKEN: ${{secrets.NIRMATA_TOKEN}}
NIRMATA_URL: ${{secrets.NIRMATA_URL}}
````
Perform repository scan.
````bash
- name: NCTL Scan Repository
run: nctl scan repository --policies
````
## View Scan Reports in Nirmata Control Hub
By default, the results of the scan action are published to Nirmata Control Hub. This allows administrators to govern their repositories alongside clusters and namespaces. Below is a snap shot of viewing scan reports in Nirmata Control Hub.
**Note:** This is available as a private preview feature. Reach out to [Nirmata Support](mailto:support@nirmata.com) to enrol for this feature.
---
## Jenkins
`Nctl` works with the Jenkins CI pipeline and can be used in the Jenkins workflow to scan the configuration files present in a repository against the centrally defined policies. The Jenkins job will trigger the scanning of the files and if unsuccessful, the entire job will fail, which will prompt the user with feedback for their changes. Upon successful completion of the job, the scan results will be published to the Nirmata Control Hub for viewing. Nirmata Control Hub provides insights to platform administrators on overall governance of different code repositories in their organization.
### Understanding the Jenkins Workflow
To see pipeline scanning with Jenkins CI in action:
1. Create a Bitbucket or Git repository with some Docker, Kubernetes, and Terraform files. Refer to the [official GitHub docs](https://docs.github.com/en/repositories/creating-and-managing-repositories/quickstart-for-repositories) for creating a repository.
2. Next, log into Jenkins with your credentials which will take you to the dashboard page.
3. After that, click on `New Item` located in the top left corner of the screen. This will initiate the creation of a Jenkins job.
4. Enter the name of the job. Select `Freestyle project` from the list of options to choose from and click `OK`.
5. Now that the job is created, it needs to be configured accordingly for the pipeline scanning to take place. To do so:
Platform or security team administrators are responsible for defining the policies that an organization needs to adhere to. These policies are stored as YAML files in Git repositories, as OCI images in the OCI registry, or are made available as Helm charts. The DevOps users or IT team is responsible for managing the configuration files, whether they are Kubernetes manifests, IaC files, or any JSON specs stored in Git repositories.
Users who want to make changes to the manifests in these repositories will create a pull request (PR). CI pipelines are configured to trigger on various actions, such as creating a PR, merging code to the main branch, or running at regular intervals.
## Setting up the CI Pipeline
NCTL works with any CI pipeline (GitHub Action, GitLab CI, Jenkins, Harness CI, etc.).
---
## GitHub Action
A dedicated GitHub Action is available through the [GitHub marketplace](https://github.com/marketplace/actions/nctl-scan-installer). With this action, `nctl scan` can be used in GitHub Actions workflows to scan the configuration files present in the repository against policies that are defined centrally. In case of a failure, the entire action can be configured to fail, meaning that the test pipeline will fail, and users will get quick feedback on their changes. The results of the scan are available in Nirmata Control Hub for viewing. Nirmata Control Hub provides insights to platform administrators on the overall governance of different code repositories in their organization.
### Understanding the GitHub Action Workflow
To have a look at the workflow manifest file, refer to the `scan-outputs.yaml` file in the `.github/workflows` section of the **nctl-shift-left** [Github repository](https://github.com/nirmata/nctl-shift-left/).
Use the readily available `nctl` action.
````bash
- name: nctl-scan-installer
uses: nirmata/action-install-nctl-scan@v0.0.6
````
Set the right environment secrets.
````bash
env:
NIRMATA_TOKEN: ${{secrets.NIRMATA_TOKEN}}
NIRMATA_URL: ${{secrets.NIRMATA_URL}}
````
Perform repository scan.
````bash
- name: NCTL Scan Repository
run: nctl scan repository --policies
````
## View Scan Reports in Nirmata Control Hub
By default, the results of the scan action are published to Nirmata Control Hub. This allows administrators to govern their repositories alongside clusters and namespaces. Below is a snap shot of viewing scan reports in Nirmata Control Hub.
**Note:** This is available as a private preview feature. Reach out to [Nirmata Support](mailto:support@nirmata.com) to enrol for this feature.
---
## Jenkins
`Nctl` works with the Jenkins CI pipeline and can be used in the Jenkins workflow to scan the configuration files present in a repository against the centrally defined policies. The Jenkins job will trigger the scanning of the files and if unsuccessful, the entire job will fail, which will prompt the user with feedback for their changes. Upon successful completion of the job, the scan results will be published to the Nirmata Control Hub for viewing. Nirmata Control Hub provides insights to platform administrators on overall governance of different code repositories in their organization.
### Understanding the Jenkins Workflow
To see pipeline scanning with Jenkins CI in action:
1. Create a Bitbucket or Git repository with some Docker, Kubernetes, and Terraform files. Refer to the [official GitHub docs](https://docs.github.com/en/repositories/creating-and-managing-repositories/quickstart-for-repositories) for creating a repository.
2. Next, log into Jenkins with your credentials which will take you to the dashboard page.
3. After that, click on `New Item` located in the top left corner of the screen. This will initiate the creation of a Jenkins job.
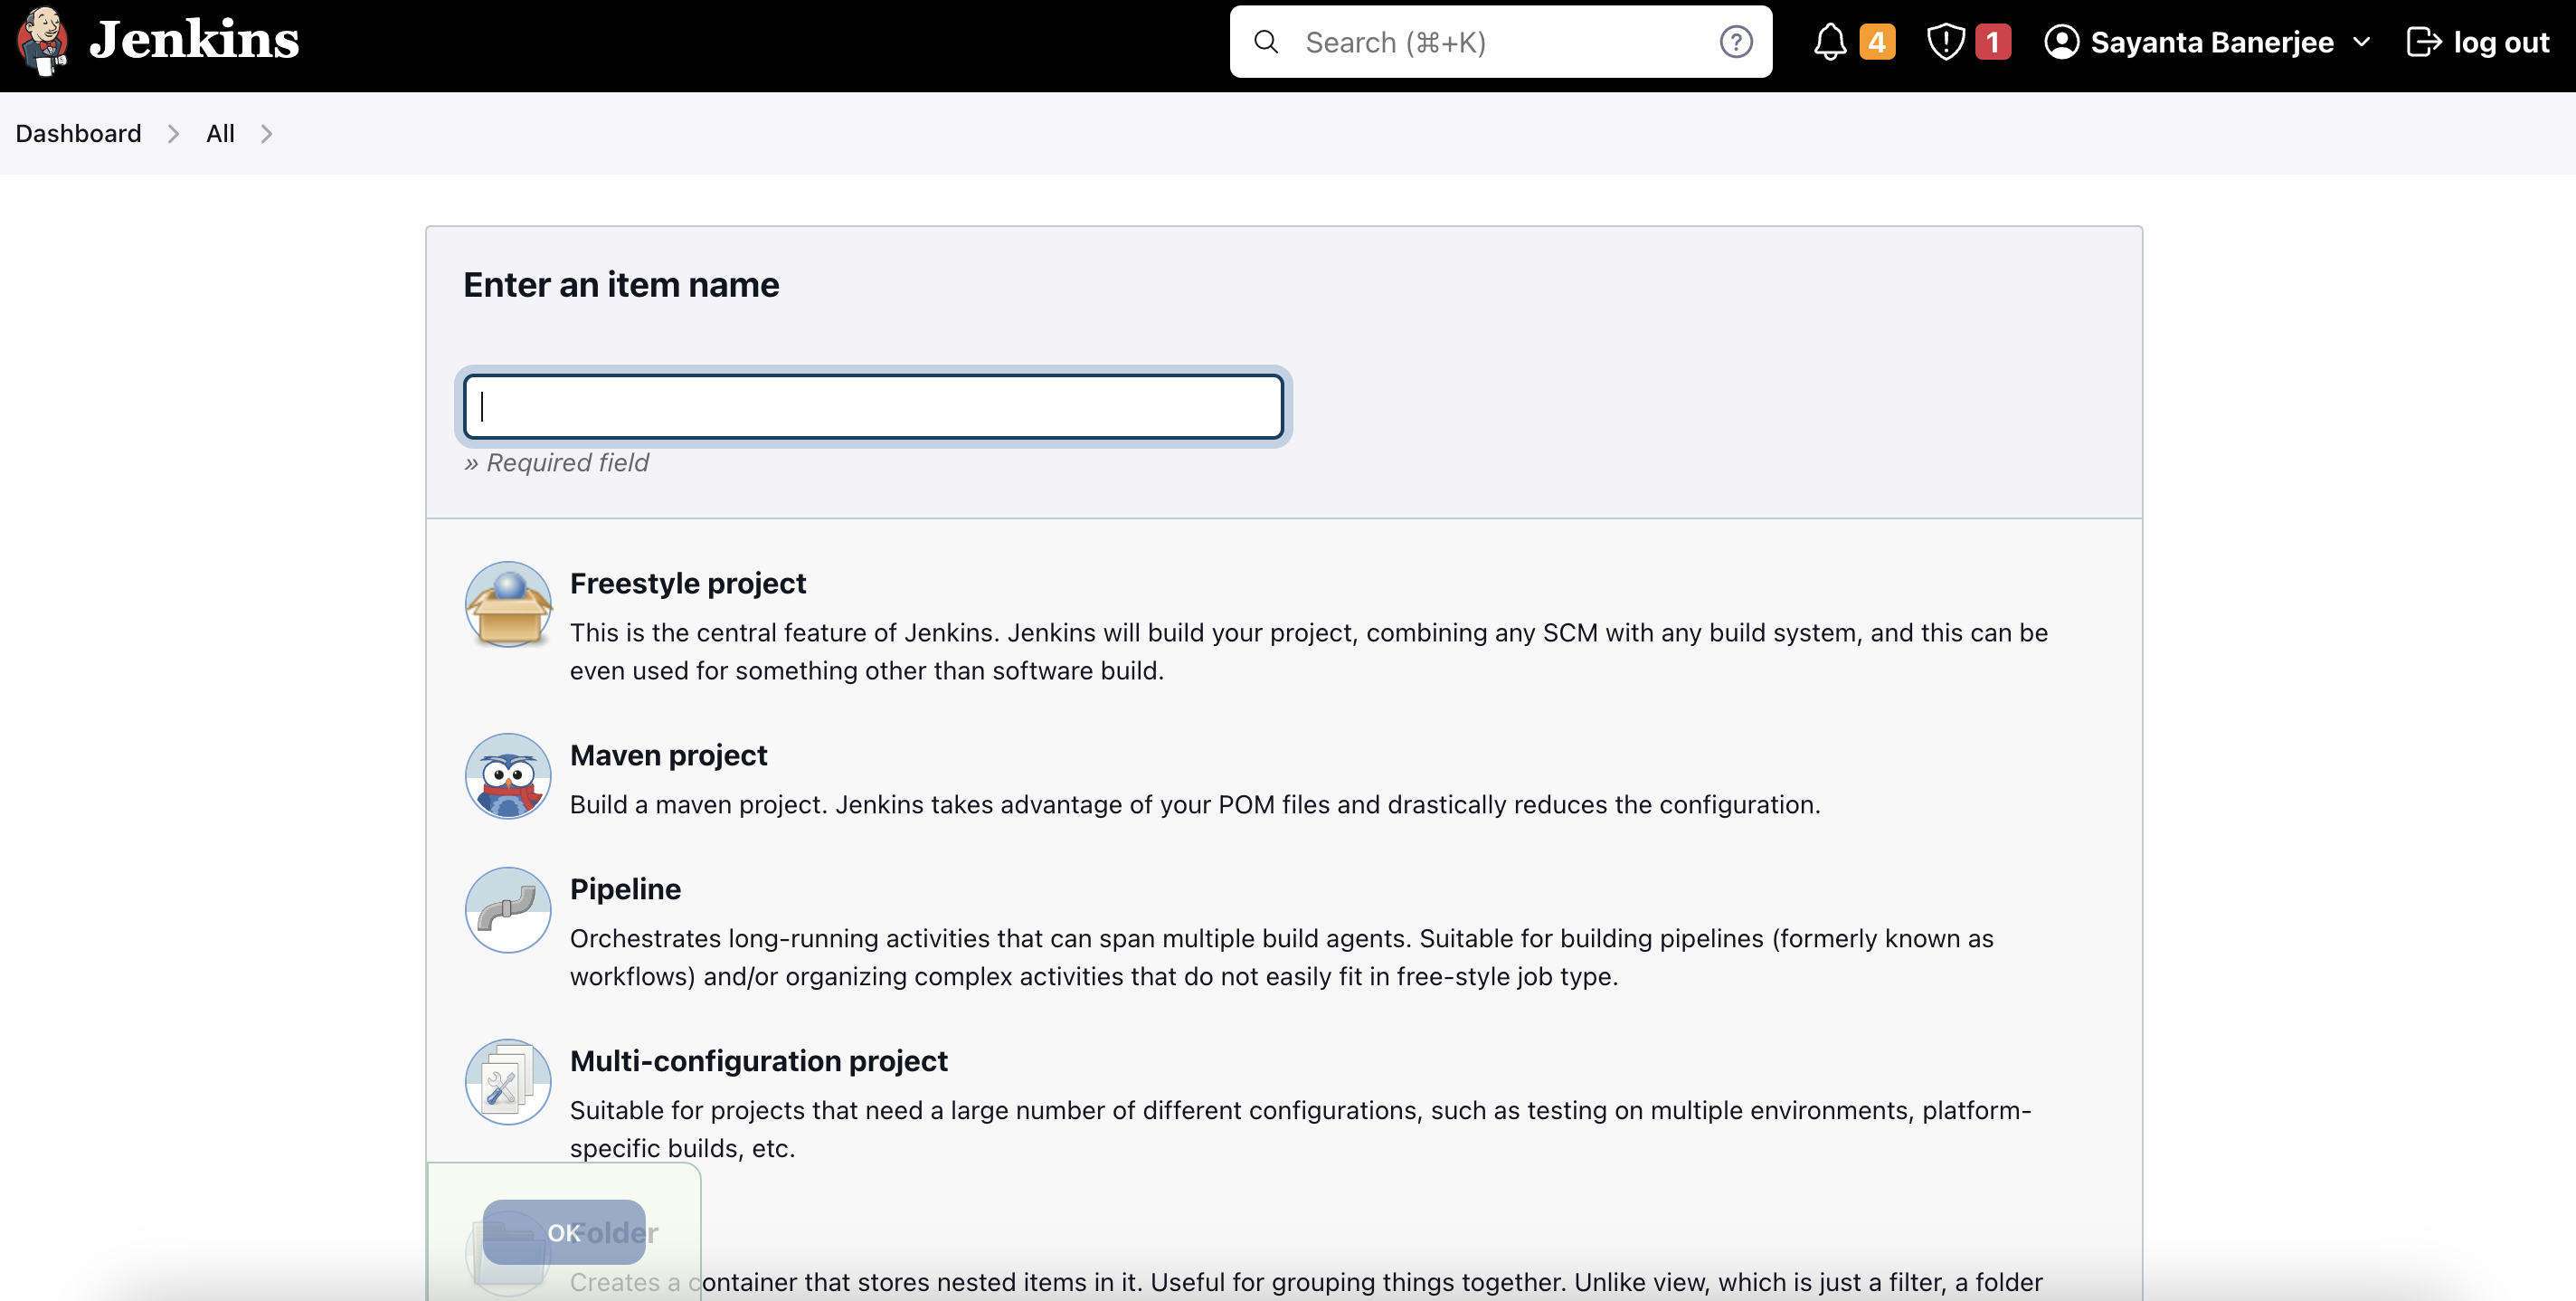
4. Enter the name of the job. Select `Freestyle project` from the list of options to choose from and click `OK`.

5. Now that the job is created, it needs to be configured accordingly for the pipeline scanning to take place. To do so:
a. Click on **General** and fill out `Jira site` with your organization's Atlassian URL.
b. After that, select `Git` as the **Source Code Management** and provide the repository details.
c. Enter the `URL` of your repository and provide the credentials if it's a private one. Leave credentials as none if it is a public repository.
d. Next, specify the branch name where the scanning will take place. Type `./main` if there are no other branches in the repository.
e. Next, under **Additional Behaviours**, click `Add` and select `Check out to specific local branch` from the dropdown and type `main` under **Branch Name**.
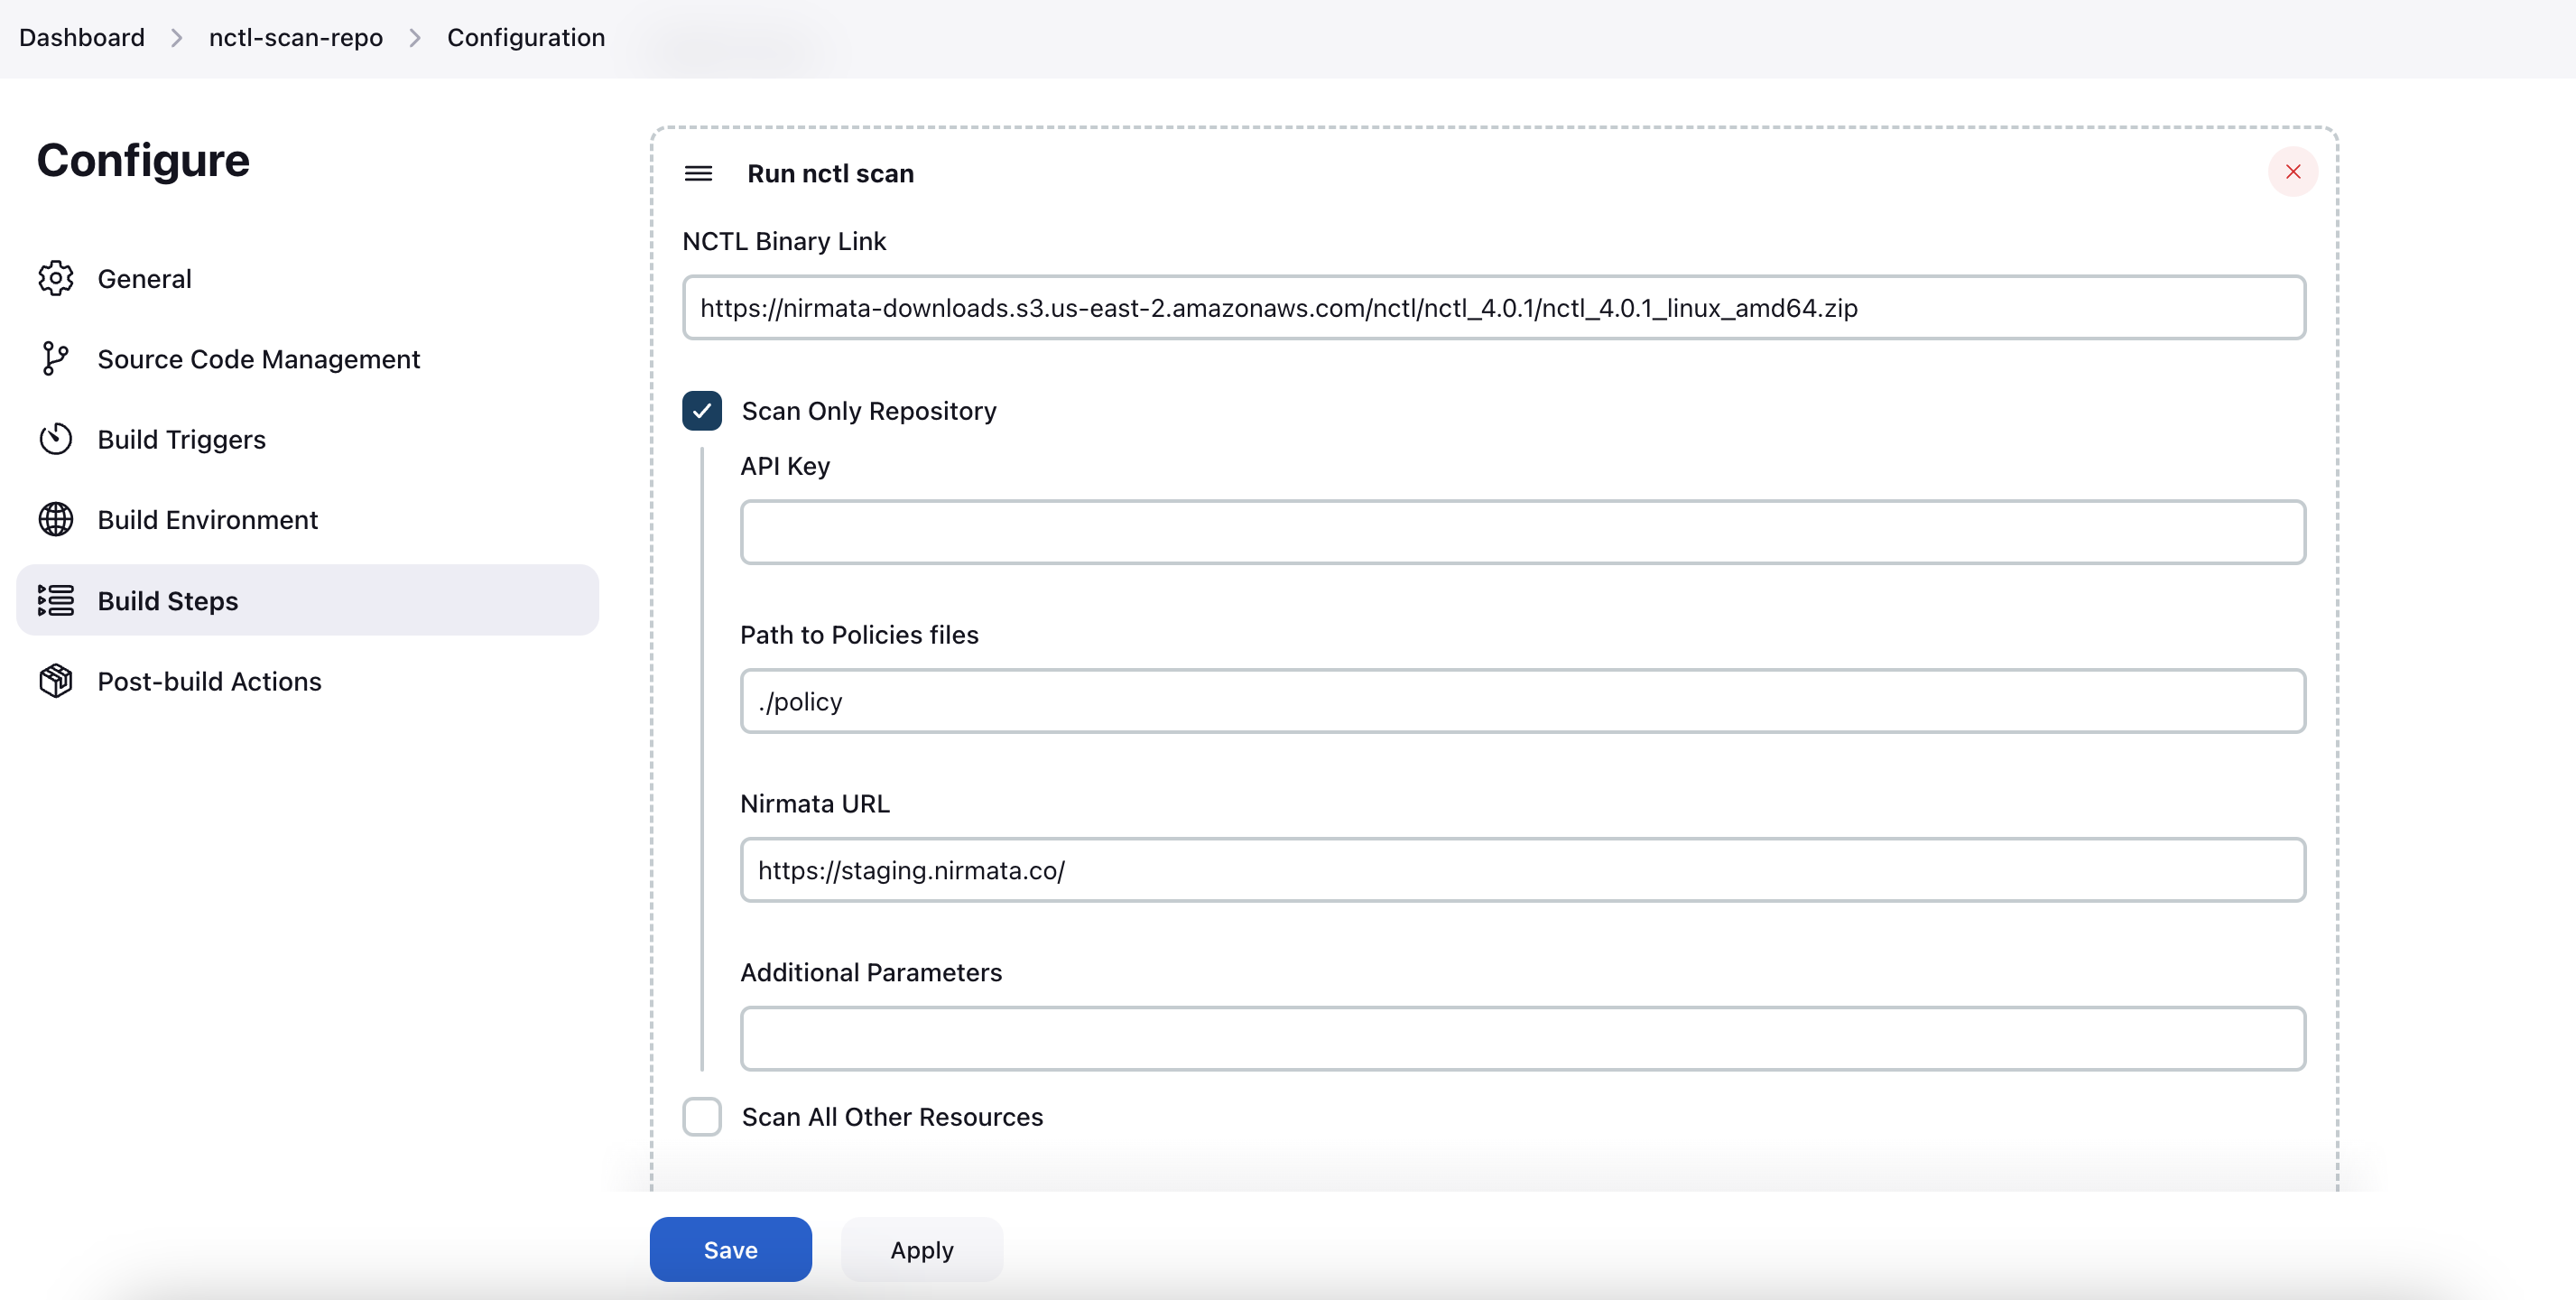
f. After this, scroll down to **Build Steps** and click on **Add build step**.
g. Select `Run Nctl Scan` from the dropdown.
h. Fill out the `NCTL Binary Link` field with the URL of the latest Nctl binary version to download. The required URL is available [here](https://downloads.nirmata.io/nctl/allreleases/).
i. Now, check the box for **Scan Only Repository** which will help integrate Nirmata Control Hub.
j. Under `API Key`, add the API key that can be found in the profile section of the Nirmata Control Hub tenant.
k. Fill out `Path to Policies files` with the path to your policy files and `Nirmata URL` with the Nirmata Control Hub URL (https://www.nirmata.io)
l. Finally, click **Save** to complete the job configuration.
6. Next, click on **Build Now** on the left hand side navigation bar to run the job. This will trigger the pipeline scan and the process can be seen under `Build History` located on the left hand lower corner of the screen.
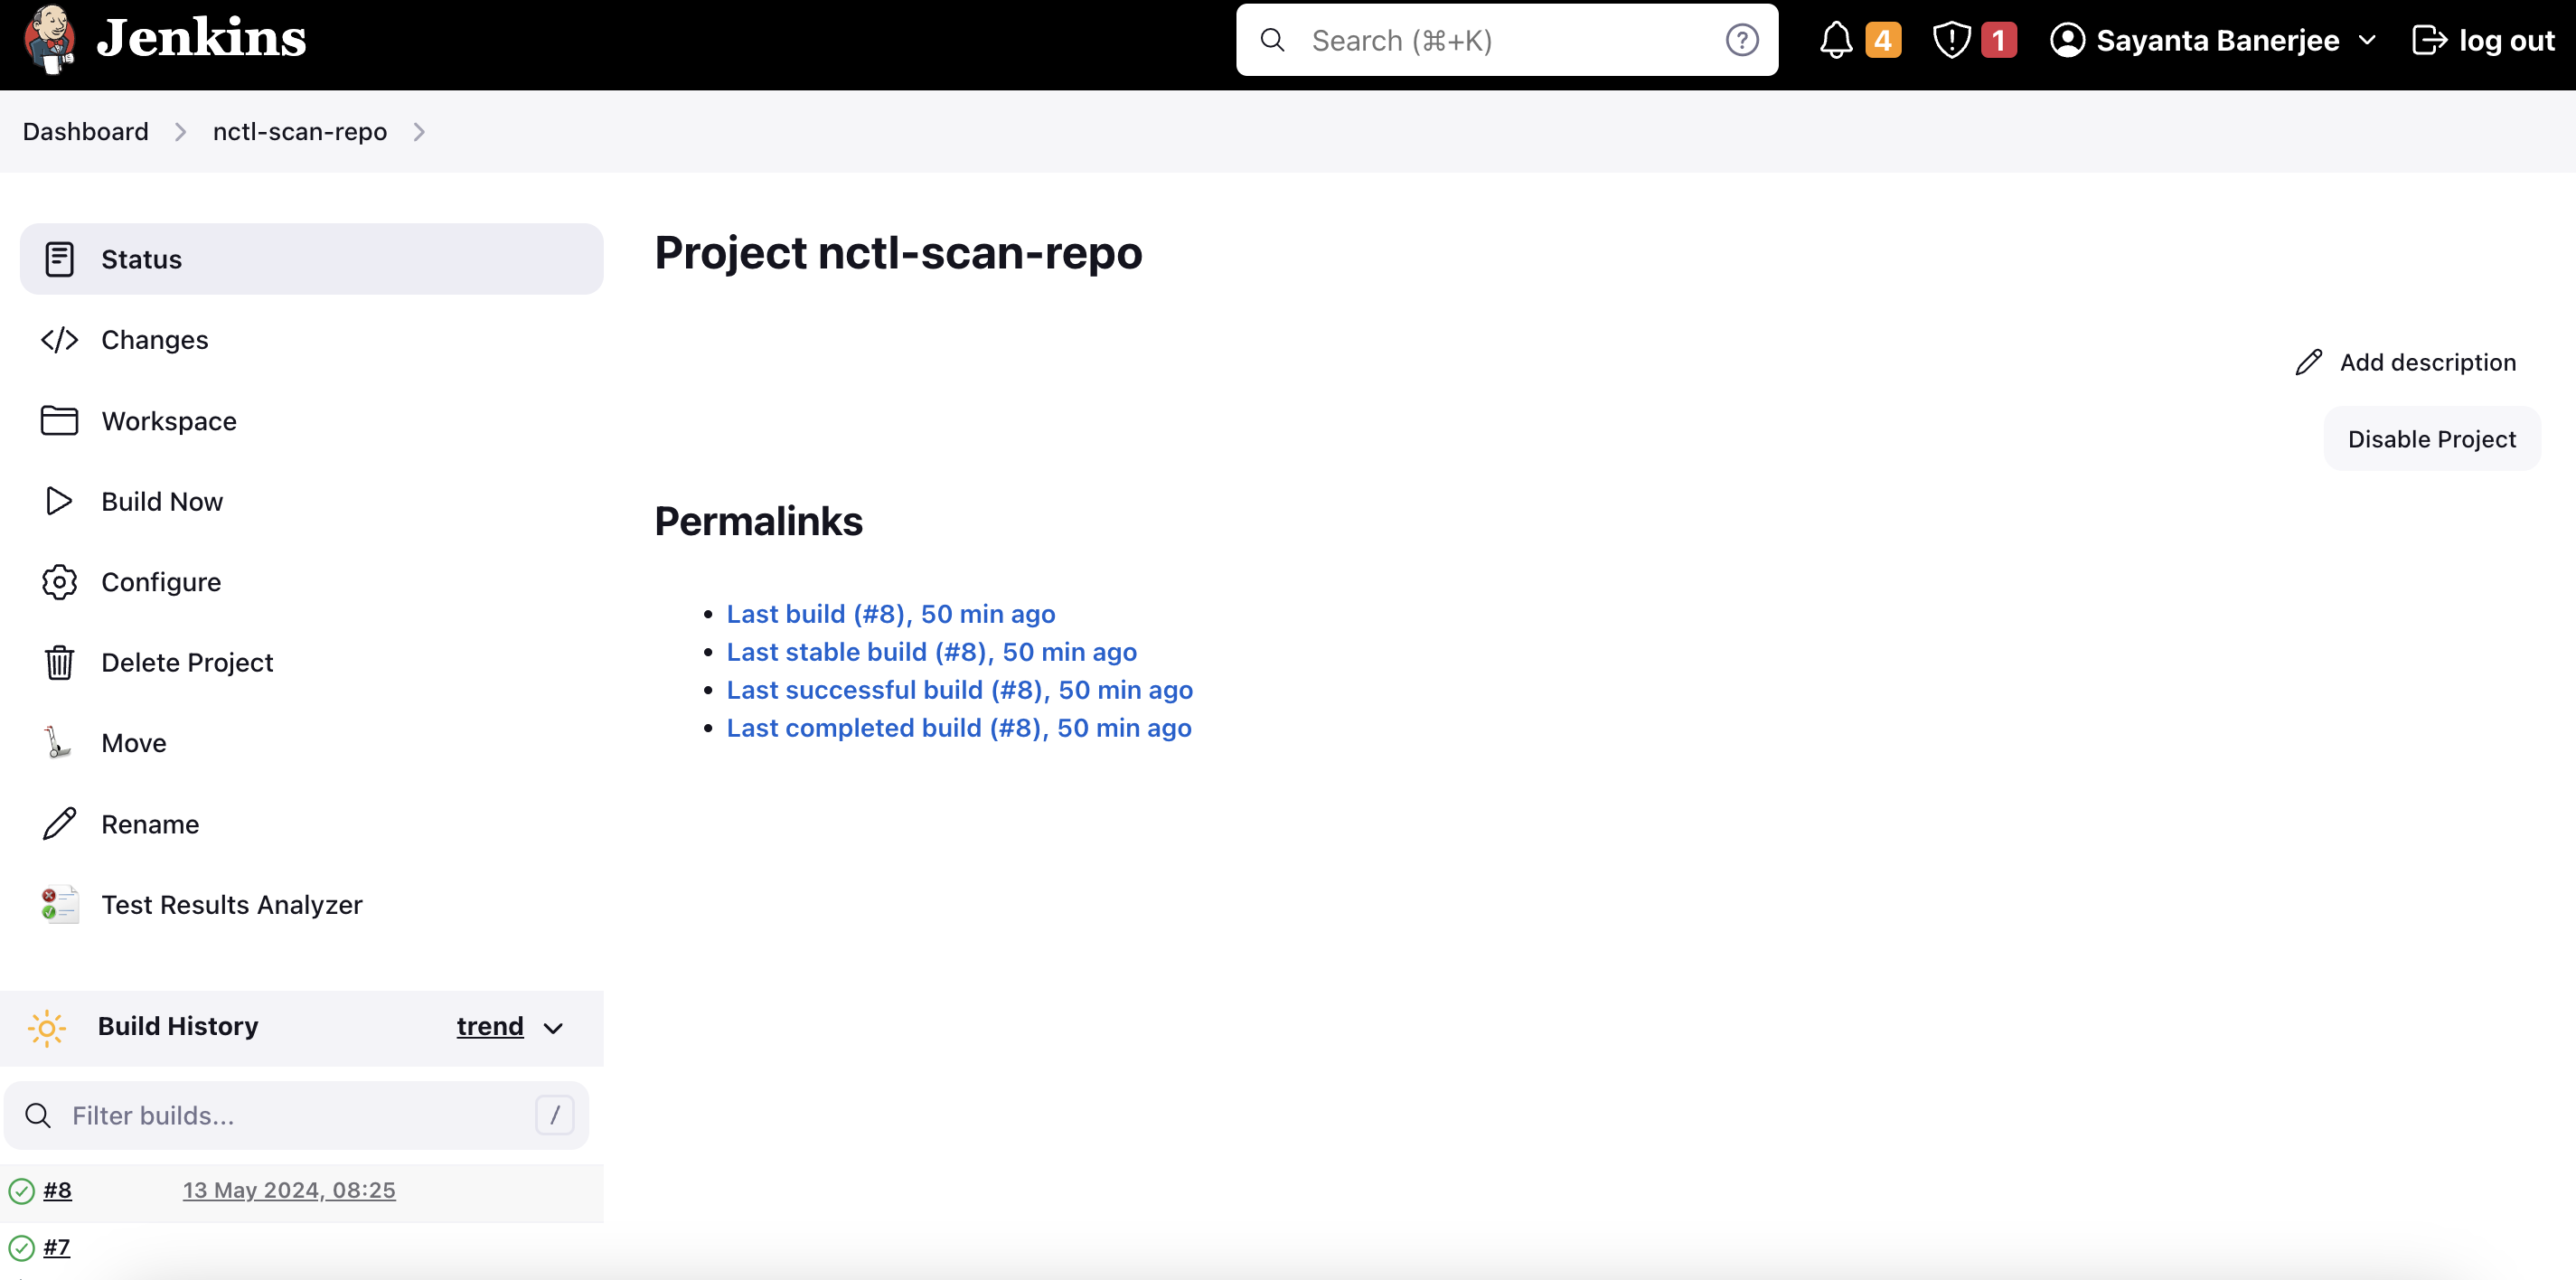
7. Now, click on the build number under **Build History** to see details on the completion of the job. The status page will open by default where the information on the success or the failure of the job will be visible.
8. Click on **Console Output** on the navigation bar to have a look at the scan results.
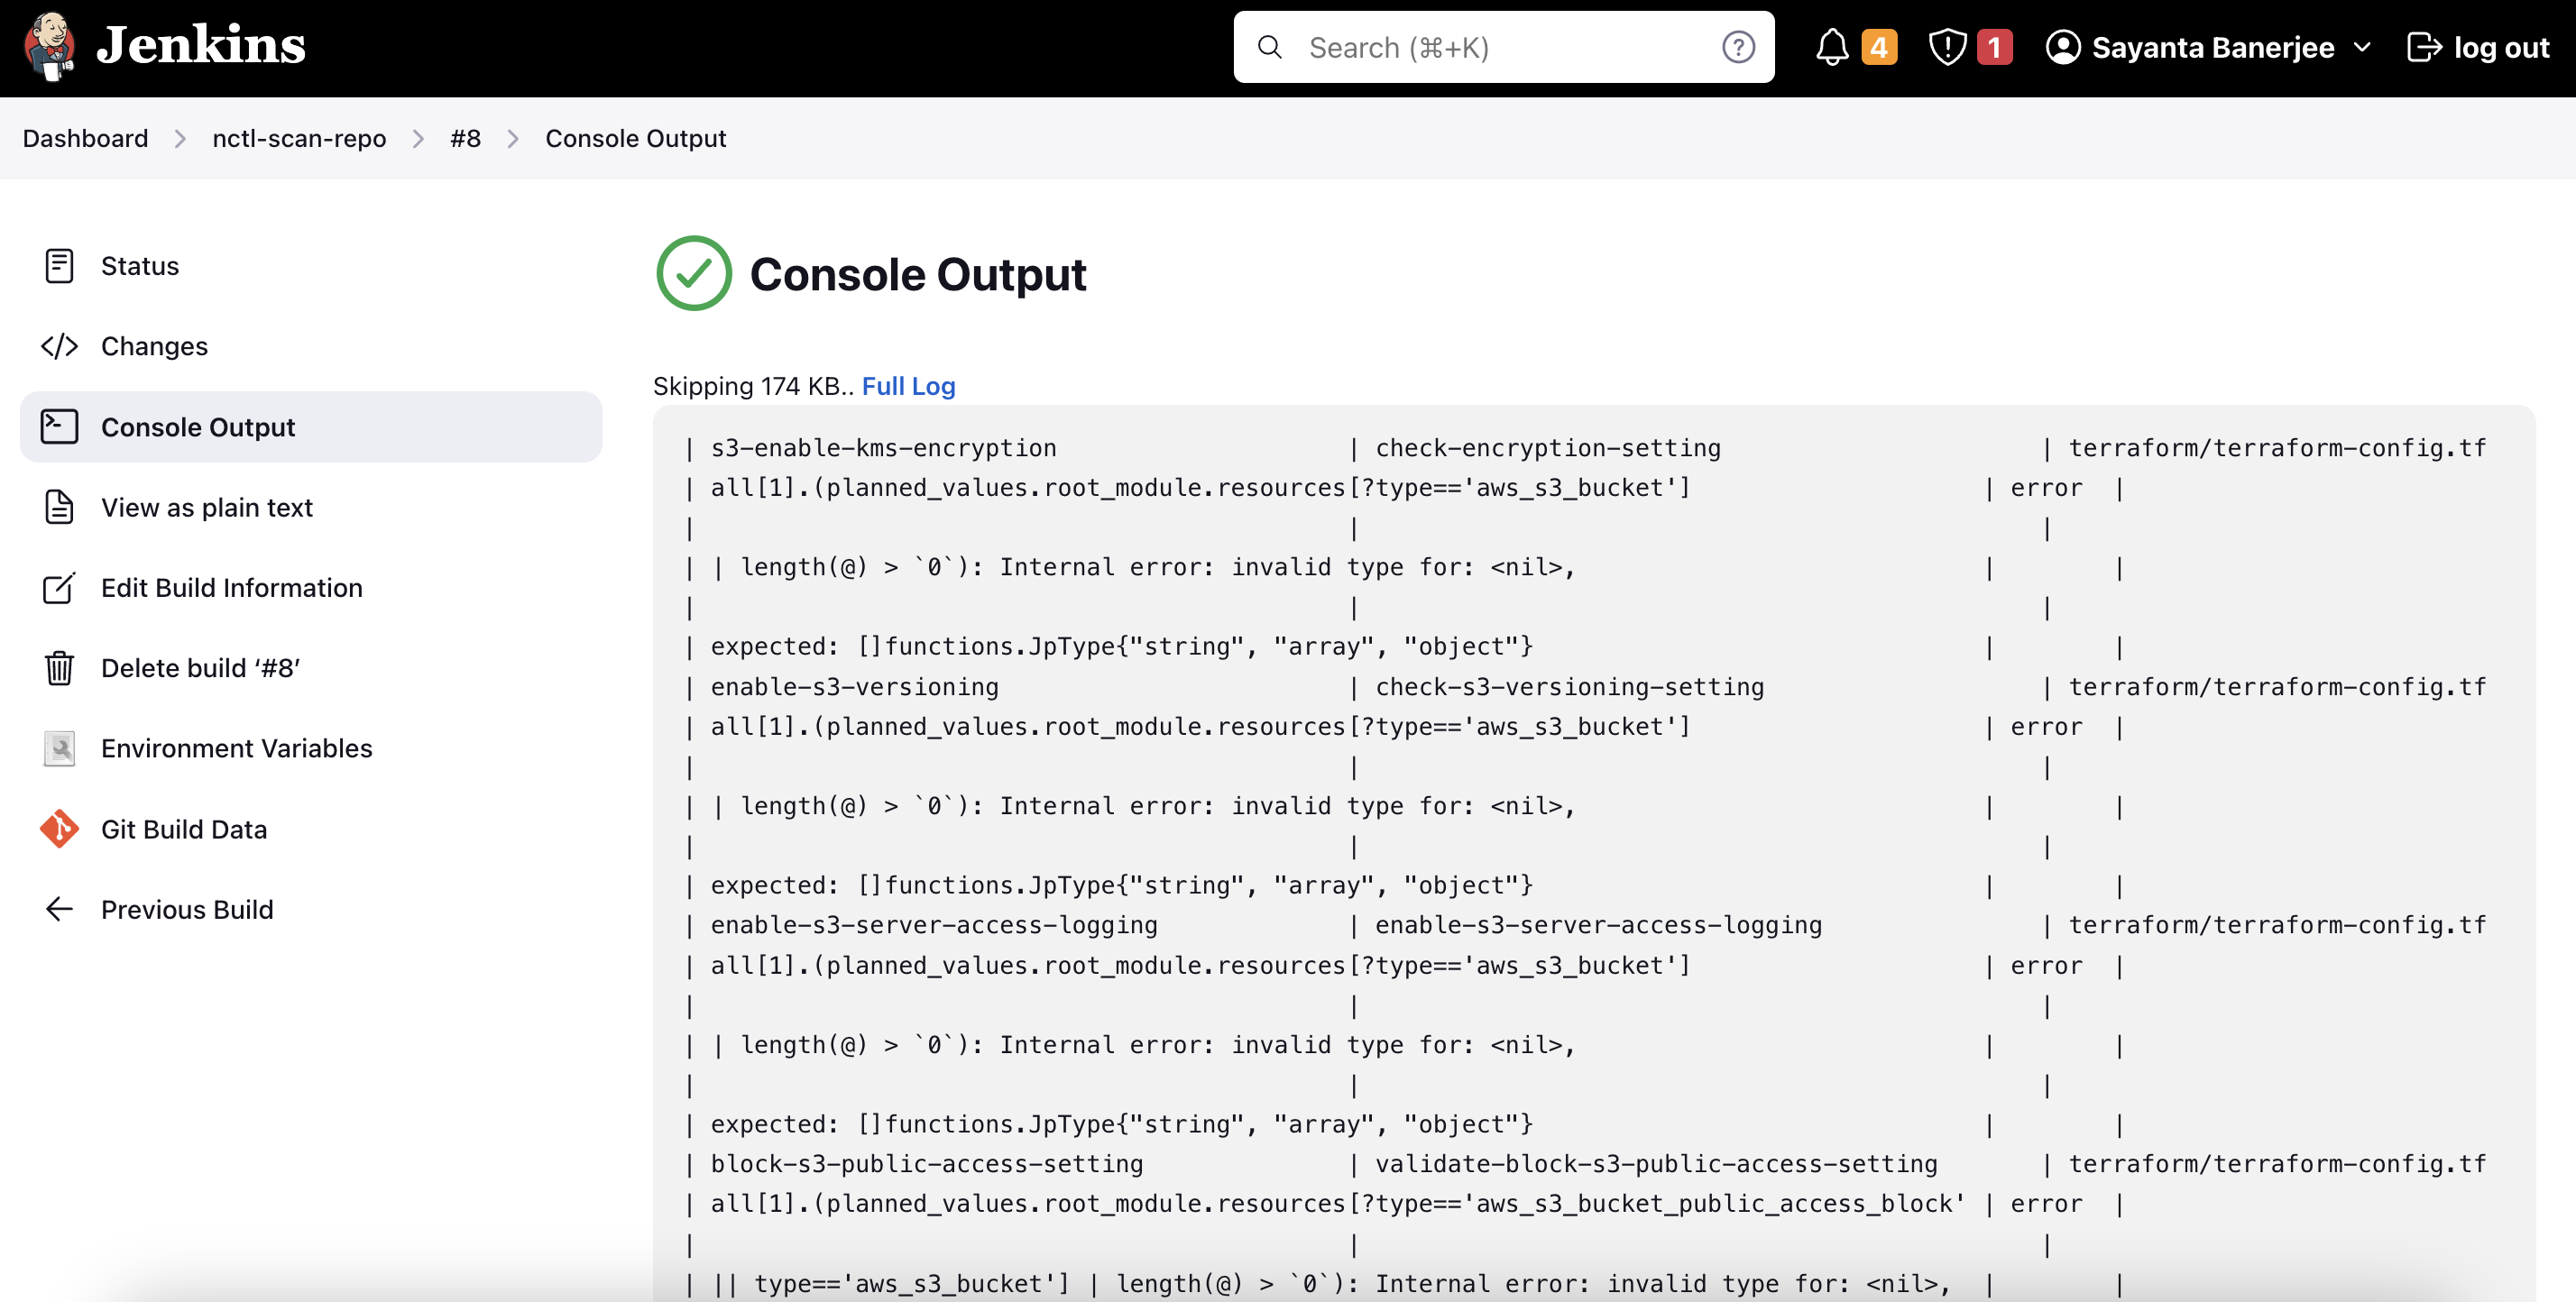
9. Scroll down to the end of the page to verify the publishing of the report to the Nirmata Control Hub tenant.
To have a look at the scan report in Nirmata Control Hub:
1. Log into Nirmata Control Hub and go to **Policies**>**Policy Reports**. The Policy Reports can be viewed based on Categories, Clusters, Namespaces, and Repositories.
2. Navigate to the Repositories tab to find the scanned repository under the list of repositories.

3. Click on the repository hyperlink to get a detailed view of the scanned report.
---
## Gitlab CI
`nctl` integrates with GitLab CI and allows scanning against security team-defined policies, which ensures addressing of misconfigurations in the pipeline alongside other tests and vulnerability scanning. The `nctl-scan` job triggers the scan. In case of a failure, the entire job can be configured to fail, meaning that the test pipeline will fail and users will get quick feedback on their changes. Upon successful completion of the job, the scan results are published to the Nirmata Control Hub for viewing. Nirmata Control Hub provides insights to platform administrators on the overall compliance of different code repositories in their organization. Learn more about GitLab CI pipelines and their configuration from this [official documentation](https://docs.gitlab.com/ee/ci/pipelines/).
### Understanding the GitLab CI Workflow
To see pipeline scanning with GitLab CI in action:
#### Install `nctl` in the GitLab pipeline
Add the `install nctl` job to the `gitlab-ci.yml` file in the repository. The job installs the nctl CLI and stores it as an artifact for future jobs. The following code does that:
````bash
install-nctl:
stage: install
script:
- echo "Downloading and Installing NCTL 4.2.0"
- curl -O -L -s https://nirmata-downloads.s3.us-east-2.amazonaws.com/nctl/nctl_4.0.2/nctl_4.2.0_linux_386.zip
- unzip *.zip
- echo "Verify Installation"
- chmod 755 ./nctl
- ./nctl version
artifacts:
paths:
- ./nctl
````
#### Scan Repository files for misconfigurations
The `nctl-scan-repo` job scans the configuration files in the repository for any misconfigurations. The `–policies` argument points to the directory containing security policies.
>Note: The policies can also be stored in a different GitLab repository. Refer to the sample list of policies [here](https://github.com/nirmata/kyverno-policies).
After the execution of this job, the pipeline will fail if there are misconfigurations which will force the developer to debug and fix the issue at the source.
````bash
nctl-scan-repo: # This job scans config files for misconfigurations.
stage: scan # It only starts when the job in the install stage completes successfully.
dependencies:
- install-nctl
script:
- echo "Running nctl scan"
- pwd
- git checkout main # Checkout the branch of choice or use pipeline variables to specify the branch.
- ./nctl scan repository --policies ./policy.yaml
````
>Note: Setting the branch variable through `git checkout main` is specific only for GitLab.
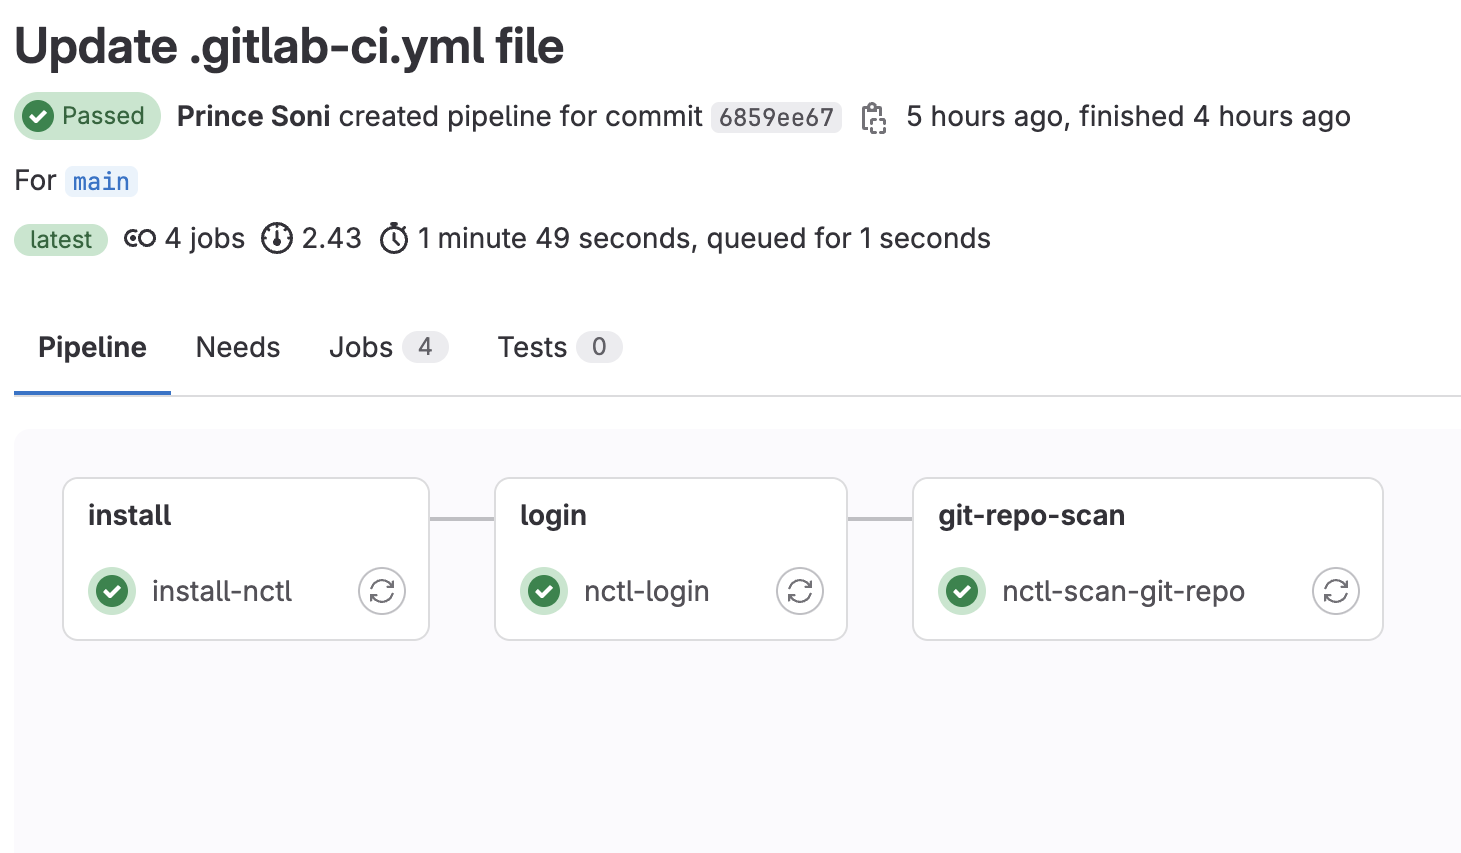
This pipeline runs in two stages: `install-nctl` and `scan`. Both can be visualized in the GitLab UI. The below image represents the same.
---
## BitBucket CI
`nctl` integrates with BitBucket CI and allows scanning against security team-defined policies, which ensures misconfigurations are addressed in the pipeline alongside other tests and vulnerability scanning. The `nctl scan` step triggers the scan. In case of a failure, the entire build can be configured to fail. This means that the test pipeline will fail, and users will get quick feedback on their changes. The results of the pipeline are published to Nirmata Control Hub for viewing.
Nirmata Control Hub provides insights to platform administrators on the overall compliance of different code repositories in their organization. Learn more about BitBucket CI pipelines and their configuration in this [official documentation](https://support.atlassian.com/bitbucket-cloud/docs/get-started-with-bitbucket-pipelines/).
### Understanding the BitBucket CI Workflow
To see pipeline scanning with BitBucket CI in action:
#### Install `nctl` in the BitBucket pipeline
Add the `install nctl` build to the `bitbucket-pipelines.yml` file in your repository. The build installs the nctl CLI and stores it as an artifact for future builds. The following code demonstrates this:
````bash
pipelines:
default:
- step:
name: 'install nctl'
script:
- echo "Installing nctl.."
- echo "Downloading and Installing NCTL 4.2.0"
- download_url="https://nirmata-downloads.s3.us-east-2.amazonaws.com/nctl/nctl_4.2.0/nctl_4.2.0_linux_amd64.zip"
- curl -L -o nctl.zip $download_url
- unzip -o nctl.zip
- echo "Verify Installation.."
- chmod 755 ./nctl
- ./nctl version
artifacts:
paths:
- nctl
````
#### Scan Repository files for misconfigurations
The `nctl-scan-repo` build scans the configuration files in the repository for any misconfigurations. The `--policies` argument points to the directory containing security policies.
>Note: The policies can also be stored in a different BitBucket repository. Refer to the sample list of policies [here](https://github.com/nirmata/kyverno-policies).
After this build executes, the pipeline will fail if there are misconfigurations, which will require the developer to debug and fix the issue at the source.
``