---
title: "Automatic User Role Mapping"
diataxis: how-to
applies_to:
product: "nirmata-control-hub"
audience: ["platform-engineer","cluster-admin"]
last_updated: 2026-03-25
url: https://docs.nirmata.io/docs/control-hub/how-to/auto_user_rolemapping/
---
Role mapping in Automatic User Provisioning refers to the assigning of roles to users that have been provisioned to a Team in the Nirmata Control Hub from Azure Active Directory. It is possible only when SAML Single Sign-On (SSO) is enabled in Nirmata Control Hub for the user and Azure Active Directory is set up as the SAML SSO provider. Refer to [this documentation](https://docs.nirmata.io/docs/control-hub/identityaccess/security-assertion-markup-language-saml/single-signon-with-saml-for-azuread/) for setting up Azure Active Directory to use it as the SAML SSO provider and enabling SAML SSO in Nirmata Control Hub for the user.
To map roles for provisioned users in a Team:
1. Log into the [Azure portal](https://portal.azure.com) with your account credentials. Then, go to **Home**>**Microsoft Entra ID**. Enterprise applications and groups can be created from here. Refer to [this documentation](https://docs.nirmata.io/docs/control-hub/how-to/auto_user_provisioning/#setting-up-npm-in-active-directory) for creating an enterprise application and a group and adding that group within that application.
2. After that, go to the **Default Directory** and click on **App registrations** under **Manage** to view your application among the list of registered applications. The `Owned applications` tab opens by default.
3. Next, click on the `All applications` tab and search the created application. Click on it to view the application details. The overview page opens by default.
4. Now, click on the **App roles** tab under **Manage** on the left to create the required app role and view the already created roles.
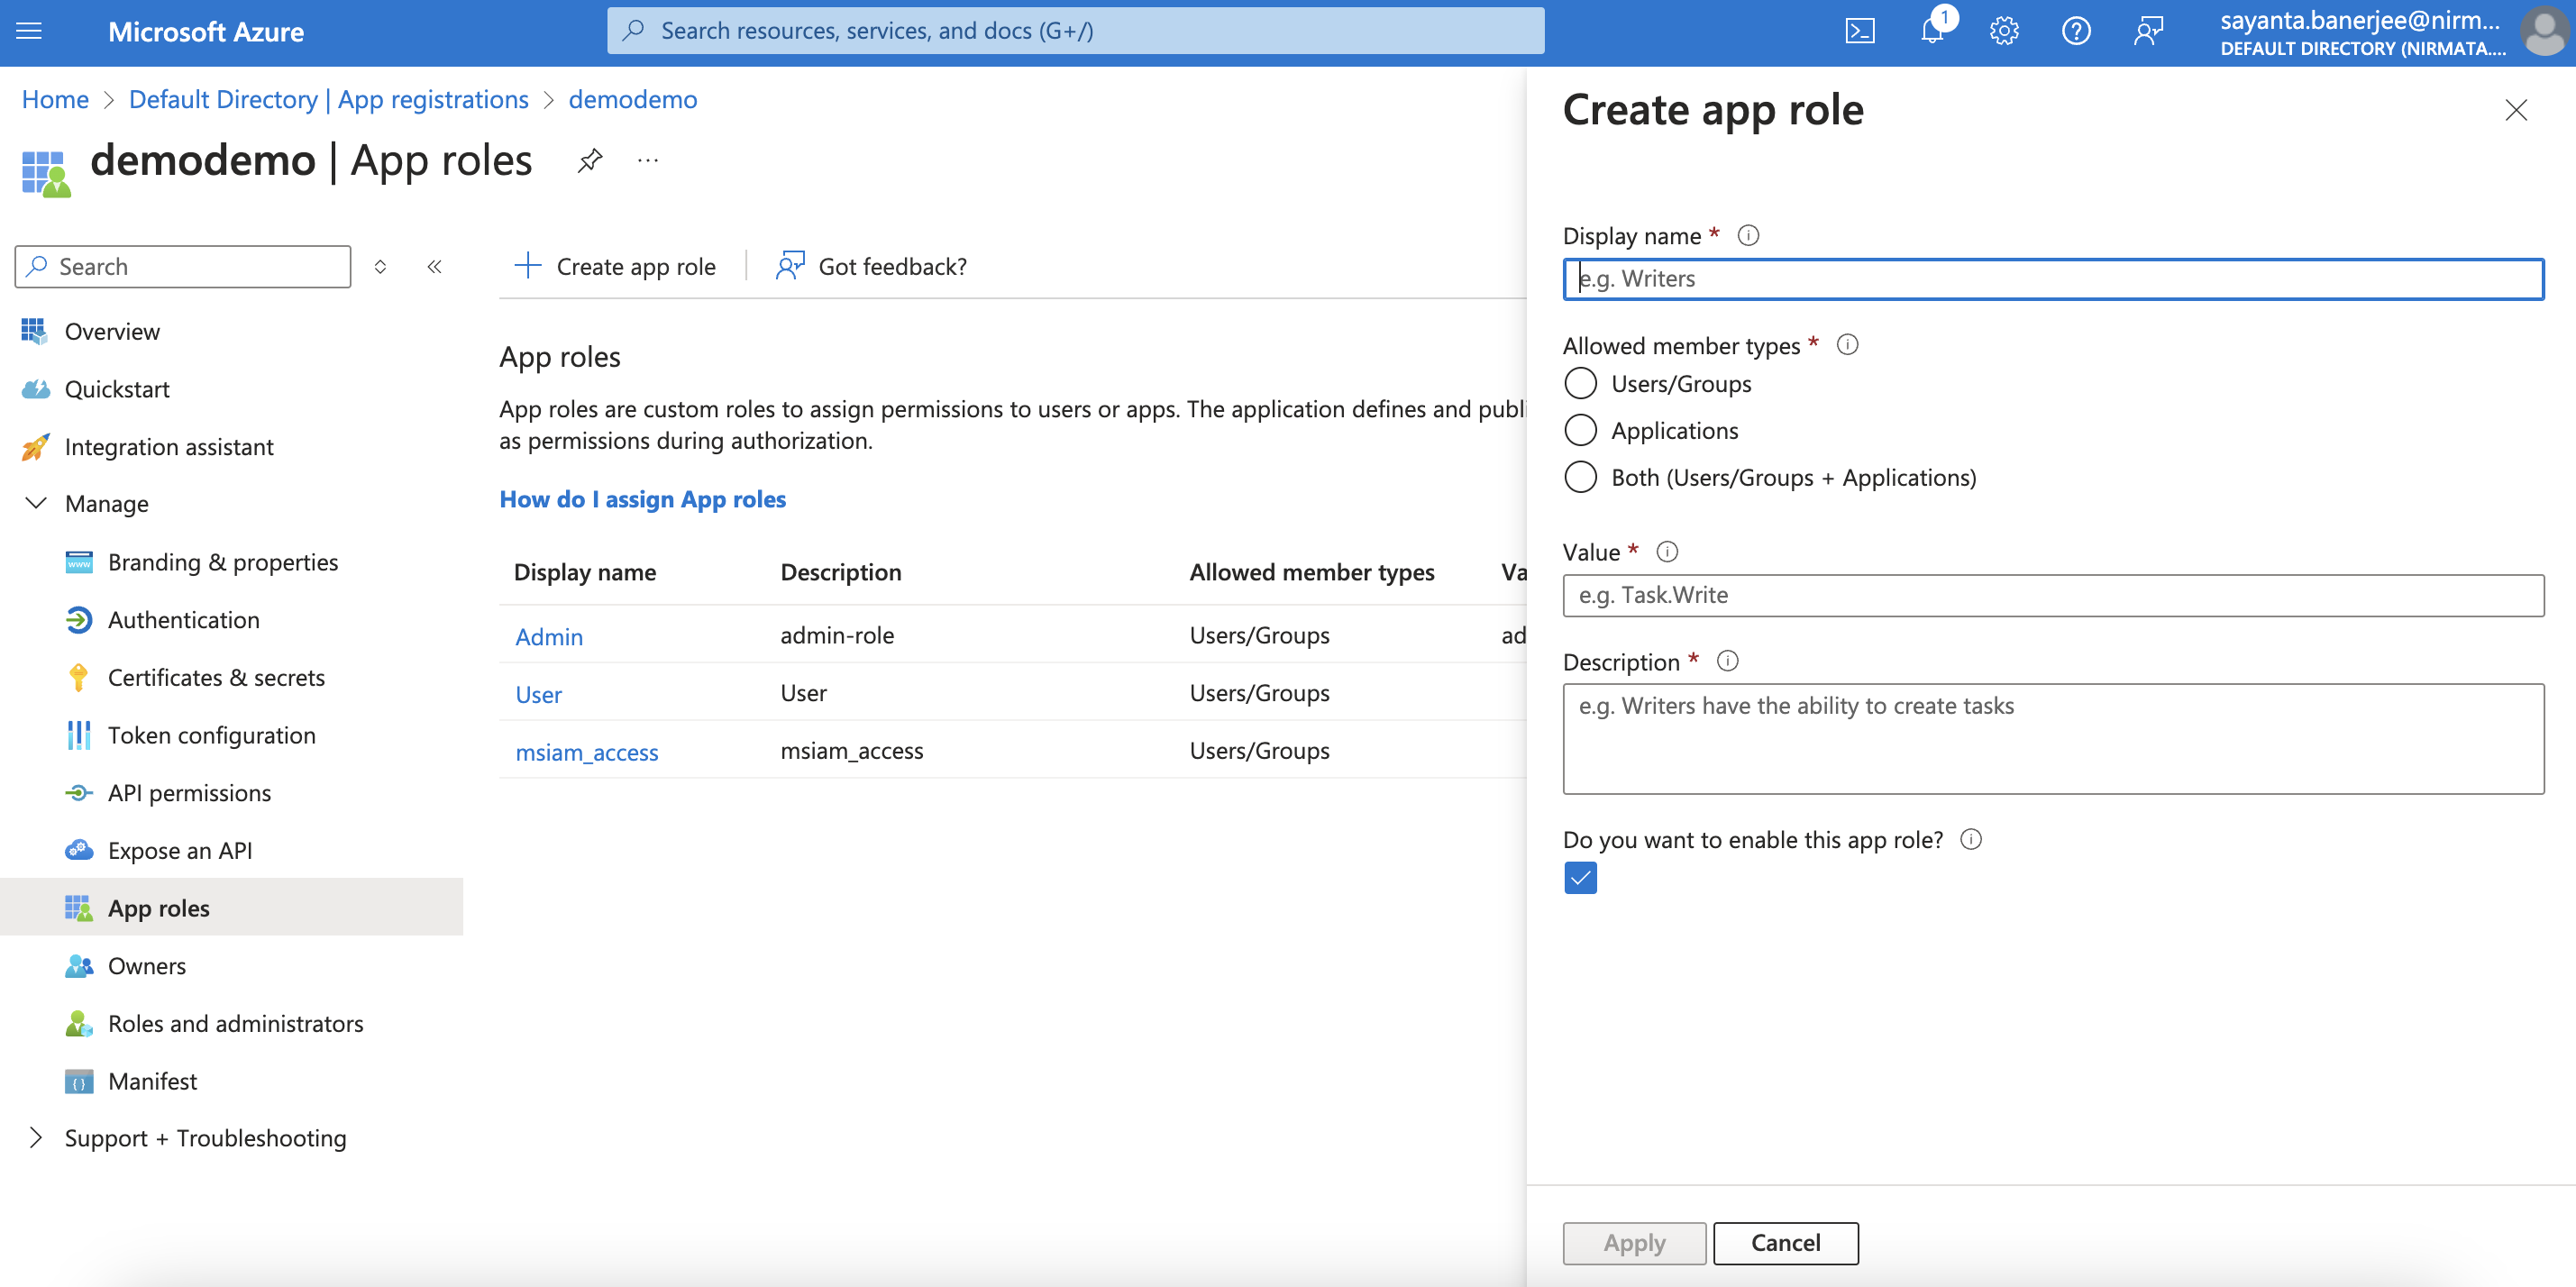
5. Then, click on the **Create app role** button on the top which will open the dialog box for creating the app role. The app roles can be created depending on the level of permissions. By default, without an app role, the `devops` role is assigned to a user. Hence, there is no need to create a particular `devops` role as an app role.
a. Enter the name of your role under `Display name`, e.g. admin, platform.
b. Click on `Users/Groups` as the `Allowed member types`.
c. Specify the `Value` as `admin` or `platform` depending on your preference.
d. Give a detailed description of the role under `Description` that will appear during app assignment and consent experiences.
e. The enablement of the role is checked by default.
e. Click **Apply**.
6. After creating the application role, go to the application created earlier and click on the **Assign users and groups** for assigning the created app-role to an user.
7. Click on the **Add user/group** button on the top. The `Add Assignment` page opens.
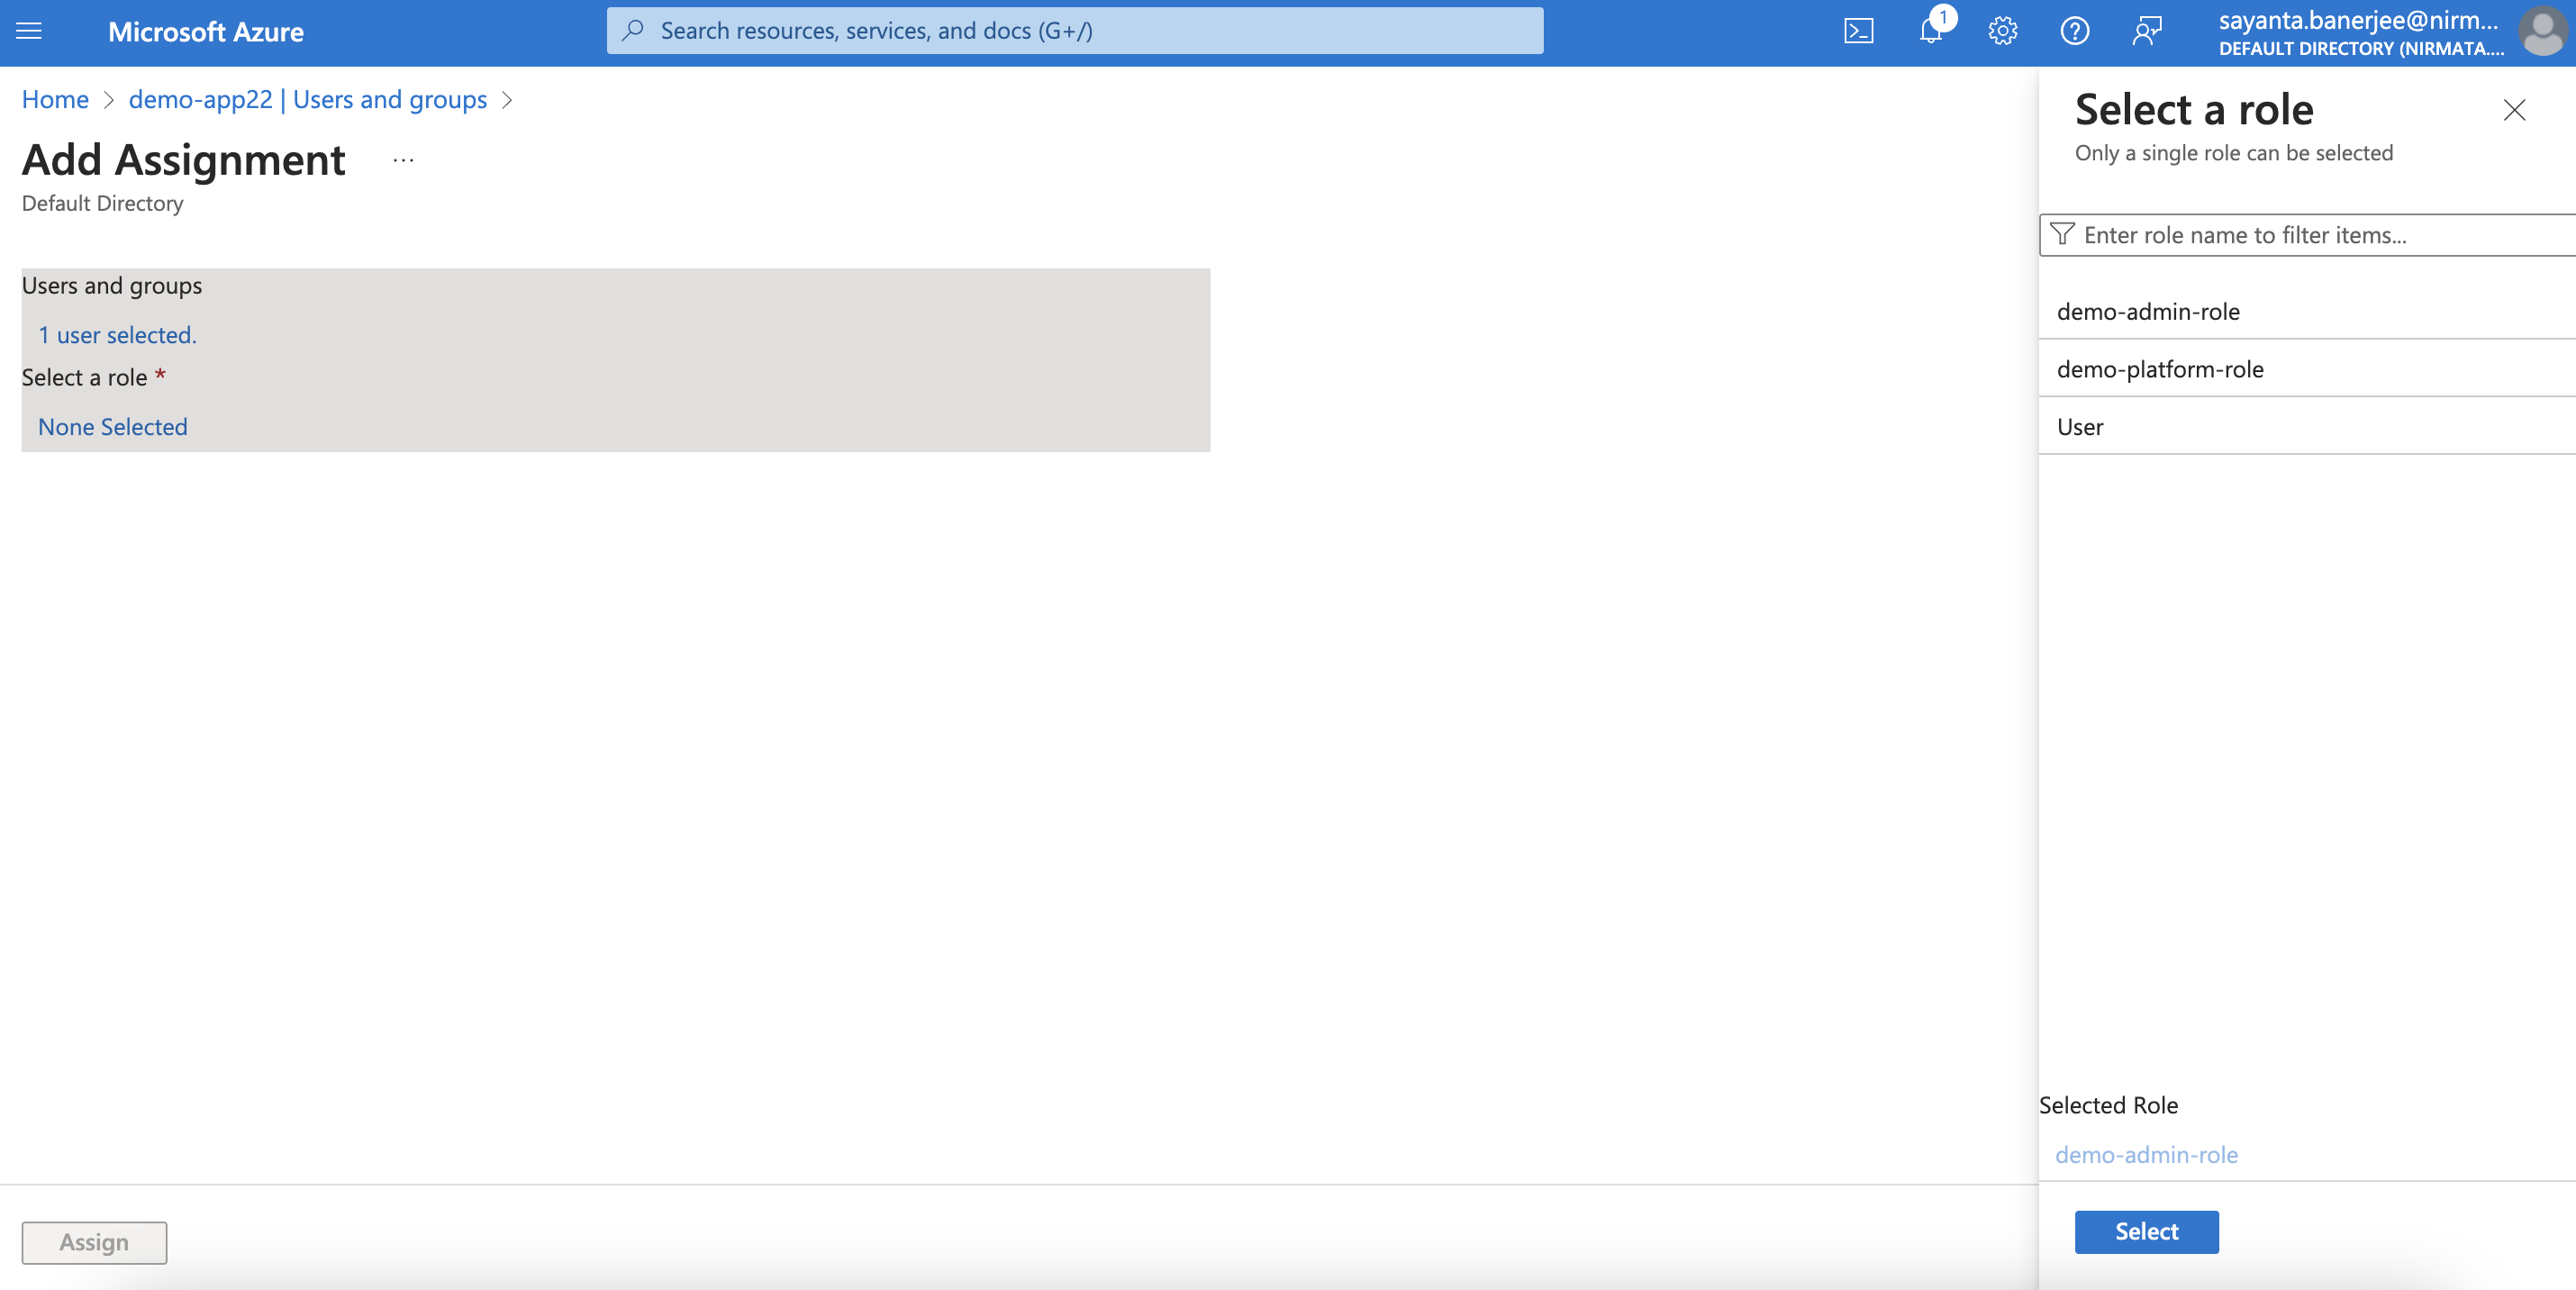
8. Select the user to whom the role will be assigned by clicking on `None Selected` under `Users and groups`.
a. Search the user from the search directory.
b. Next, click on the checkbox beside the user and click `Select`.
c. After that, click on `None Selected` under `Select a role` to assign the created app role.
d. Now, click on the created role from the list and click `Select`.
e. Finally, click on the **Assign** button to add the user to your application with the assigned role.
9. The user can log into the Nirmata Control Hub tenant with Azure Active Directory as the SAML SSO provider and will get the assigned role.